Finisher - Liftgate - Rear Window - Lower (Remove and Replace)

FRT No: 15111302

Removal

  1. Inspect the latch cover. If it is a separate trim part, remove it with a trim tool. If is not a separate part, proceed to step 2.
  2. Remove the liftgate upper trim finisher (refer to procedure).
  3. Remove the LH and RH liftgate side finishers (refer to procedure).
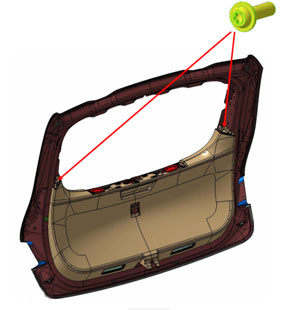
  4. Remove the screws (x2) that secure the lower trim panel (torque 3 Nm).
  5. Release the LH and RH pull cups by gently prying on all 4 sides with a trim tool.
  6. Disconnect the liftgate button connector.
  7. Remove the LH and RH pull cups.
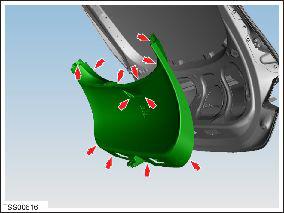
  8. Carefully release the clips (x10) that secure the liftgate lower finisher.
    Caution: Replace any broken clips.
    Caution: Take care not to damage component(s).
  9. Remove the liftgate lower trim.

Installation

Installation procedure is the reverse of removal, except for the following:
  • If the latch cover is a separate trim piece, replace the entire lower liftgate trim panel with revision E or higher, if possible. In these revisions, the latch cover is part of the main finisher panel.
  • Ensure that all clips are aligned before securing the liftgate trim panel.