Removal and Install
-
Use a trim stick to remove the rear dome light bezels. Discard the bezels.
Note: If the vehicle does not have a panoramic roof, skip to step 5.

-
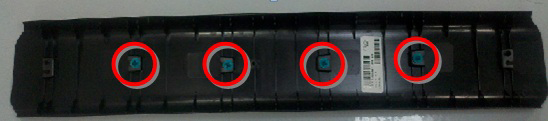
Remove the roof bow trim panel by releasing the 4 trim clips.
-
Remove the 3 screws and 2 trim buttons from the bottom side of the sunshade
carrier.

-
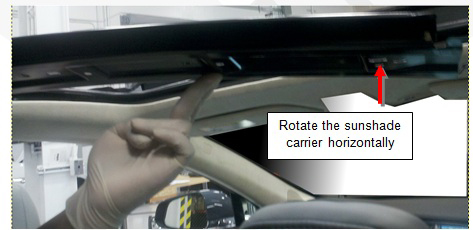
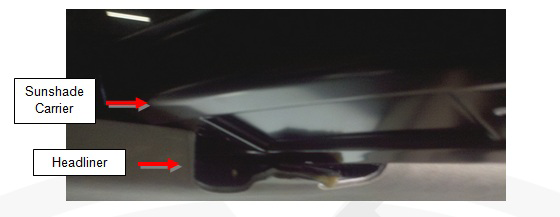
Lift both sides of the sunshade carrier. Remove the sunshade carrier by rotating
one side towards the front of the car and the other side towards the rear of the
car.

-
Lower the rear headliner to expose the rear dome light assembles. If the vehicle
has a panoramic roof, release the 2 dual locks on each side of the dome
light.
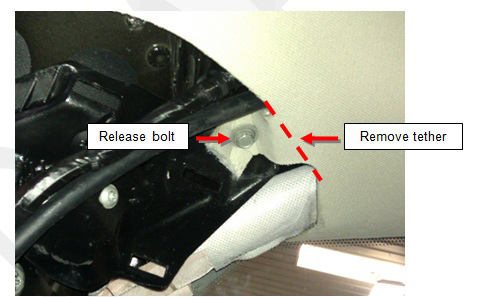
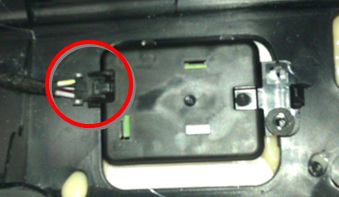
Caution: Do not damage the dome light harness connections.Note: Some early headliners are secured to the frame with tethers beneath the C-Pillar. Unbolt the tethers and use scissors to remove them.. Discard the bolts.


-
Disconnect the dome light harnesses.

-
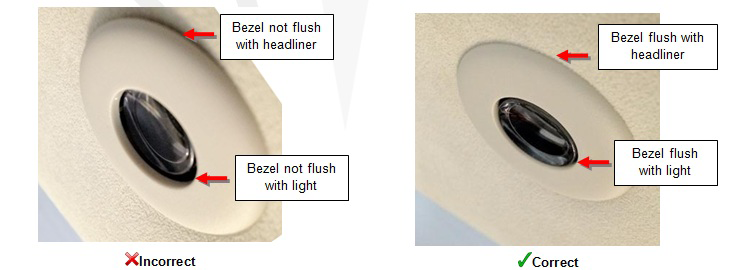
Attach the new dome light bezels by supporting the back of the dome light
assemblies and snapping the bezels firmly into place over the headliner. The
bezels fit flush with the headliner and light.
Caution: The bezels are one time use parts. Do not remove the bezel after attaching it to the assembly. This destroys the bezel.