Applique - Fascia - Front - 1st Generation (Remove and Replace)

FRT No: 10011402

Note: This procedure describes how to remove and replace the 1st generation front fascia applique. If the vehicle is equipped with a 2nd generation front fascia applique, refer to procedure 10011302 (refer to procedure).

Removal

  1. Remove the front fascia grill (refer to procedure).
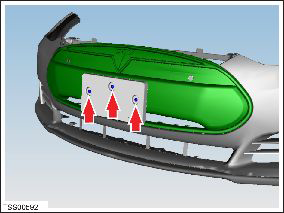
  2. If installed, remove the clips (x3) that secure the license plate mounting panel to the applique. Remove the license plate mounting panel.
  3. If installed, disconnect the parking sensor connectors (x2).
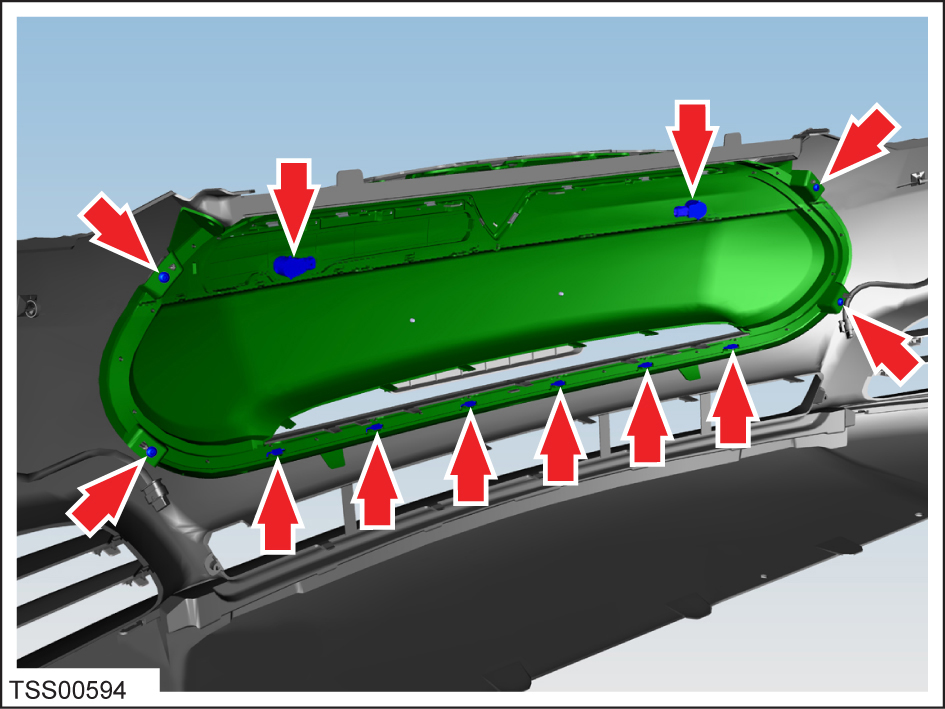
  4. Release the harness clips (x7) that secure the fascia harness to the applique.
  5. Carefully release the parking distance sensors (x2) from the applique retaining rings.
  6. Carefully release and remove the sensor retaining rings (x2) from the applique.
    Caution: Care must be taken to avoid damage to paintwork and exterior trim.
  7. Remove the screws (x4) that secure the applique to the fascia (torque 1 Nm).
  8. Release the clips (x6) that secure the applique to the fascia.

Installation

Installation procedure is the reverse of removal, except for the following:

If using this procedure to convert the old fascia assembly to the new fascia assembly, use Toolbox to update the PSRCM calibration. Refer to SB-13-17-002 for affected VINs and calibration instructions.