Procedure
-
Test fit the license plate bracket on the front fascia applique:
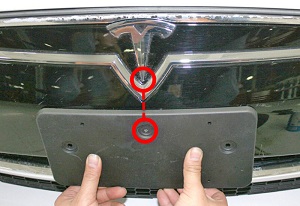
- The middle hole in the license plate bracket is centered below the
Tesla logo.Tip: Use tape or similar means of ensuring that the hole is completely centered.
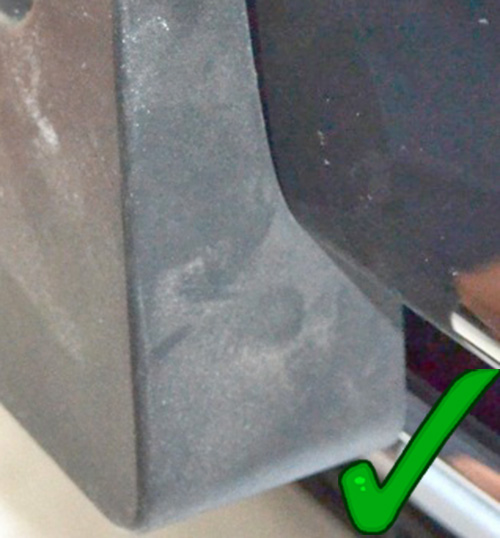
- There is no gap between the base of the front fascia applique and
the curved section at the base of the license plate bracket.
Bracket flush with applique Gap between bracket and applique 

- The middle hole in the license plate bracket is centered below the
Tesla logo.
-
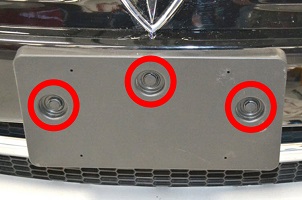
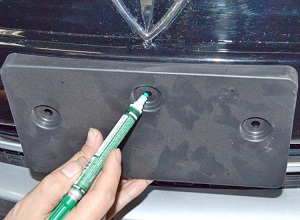
Use a paint pen to mark the front fascia applique at the center of the
holes (x3) in the license plate bracket. Remove the license plate
bracket.
-
Install the front license plate bracket:
- 1st generation front fascia applique: Secure the license plate bracket with push clips (x3).
- 2nd generation front fascia applique: Secure the license
plate bracket with the self-tapping screws (x3) (torque 0.5 Nm).Caution: Do not overtorque the screws.
1st generation applique: 2nd generation applique: