Sensor - Pedestrian Protection (Remove and Replace)

FRT No: 20202002

Warning: If the 12V power supply is disconnected, do not attempt to open any doors with door glass in closed position. Failure to follow this instruction could result in door glass shatter.
Note: Before disconnecting the 12V power supply, ensure that the driver’s door window is fully open. Failure to follow this instruction could result in vehicle lockout.
Note: This procedure does not currently apply to North American vehicles.

Removal

  1. Disconnect 12V power (refer to procedure).
  2. Remove the front fascia (refer to procedure).
  3. Remove the sensor shroud that covers the LH module.
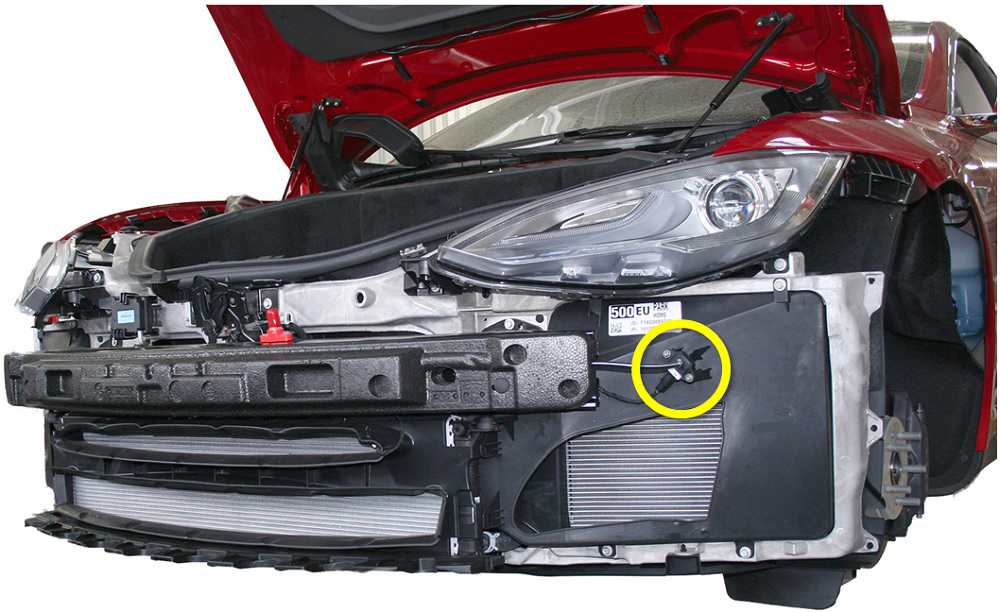
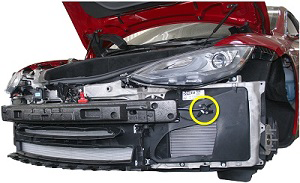
  4. Release the fasteners (x2) that secure the LH module to the vehicle (torque 2.5 Nm). Disconnect the harness connector.
  5. Repeat steps 3 and 4 on the RH side of the vehicle.
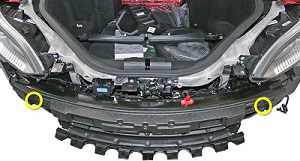
  6. Remove and discard the outboard clips (x2) that secure the foam assembly to the front bumper.
  7. Remove and discard the foam, pedestrian protection sensor assembly, and inboard fir tree clips (x3).
    Note: There are fir tree clips (x3) on the inboard side of the foam, so additional force might be required when removing the foam and pedestrian protection sensor assembly.

Installation

Installation procedure is the reverse of removal, except for the following:
  • When inserting the pedestrian protection sensor into the foam assembly, ensure that the center marking on the tube lines up with the center inboard fir tree clip and that the tube is not twisted.
  • Replace the inboard fir tree clips (x3) and outboard clips (x2) that secure the foam assembly to the bumper.
  • Ensure that the foam is evenly flush with the front bumper. If there are any inconsistent gaps, reinstall the pedestrian protection sensor.
  • Perform the following steps to clear DTCs:
    1. Open the "DTCs" panel in Toolbox.
    2. Read all SDM DTCs.
    3. Clear all SDM DTCs.
    4. Read all SDM DTCs again.