Installation procedure is the reverse of removal, except
for the following:
-
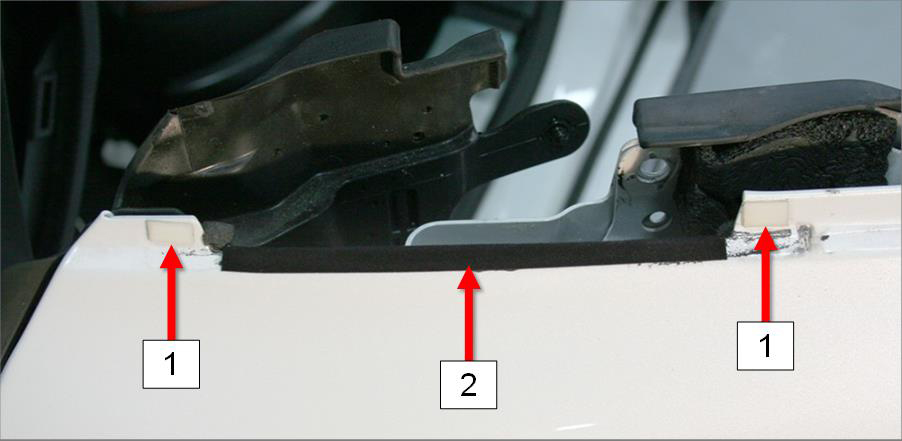
Inspect the mirror area of the door panel. Install 2 nylon shims (1026519-00-A)
and a strip of black felt tape if they are not present in the area.
-
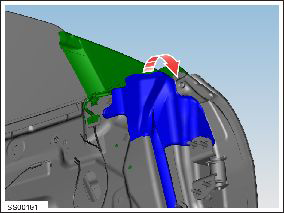
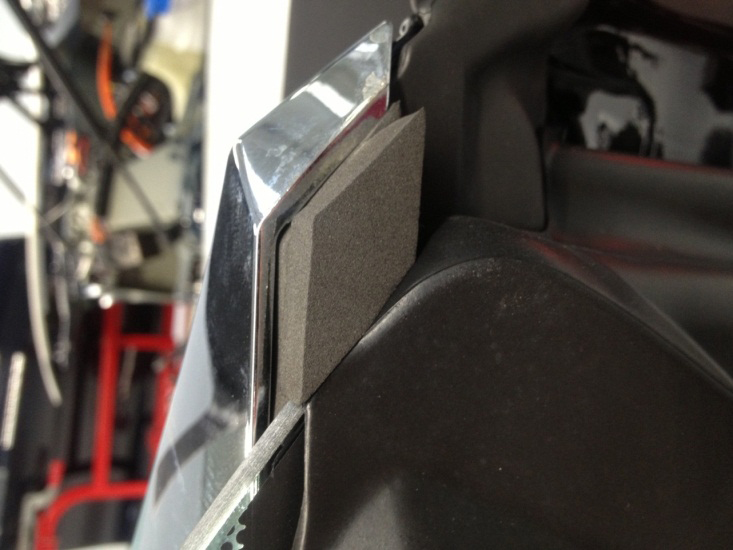
From the inside of the vehicle, inspect the diamond-shaped area immediately in
front of the fixed glass. Install the exterior mirror NVH foam (1022112-00-A) if
it is not present in the area.
-
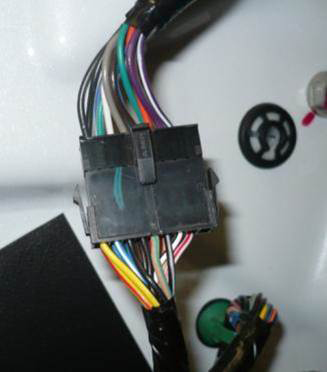
Check the color of the door harness electrical connector near the mirror. If the
connector is black (on vehicles built before late May 2013), install the mirror
harness adaptor (1025215-00-A).
-
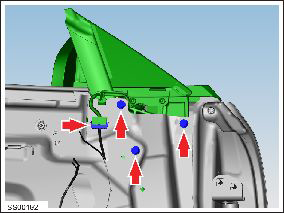
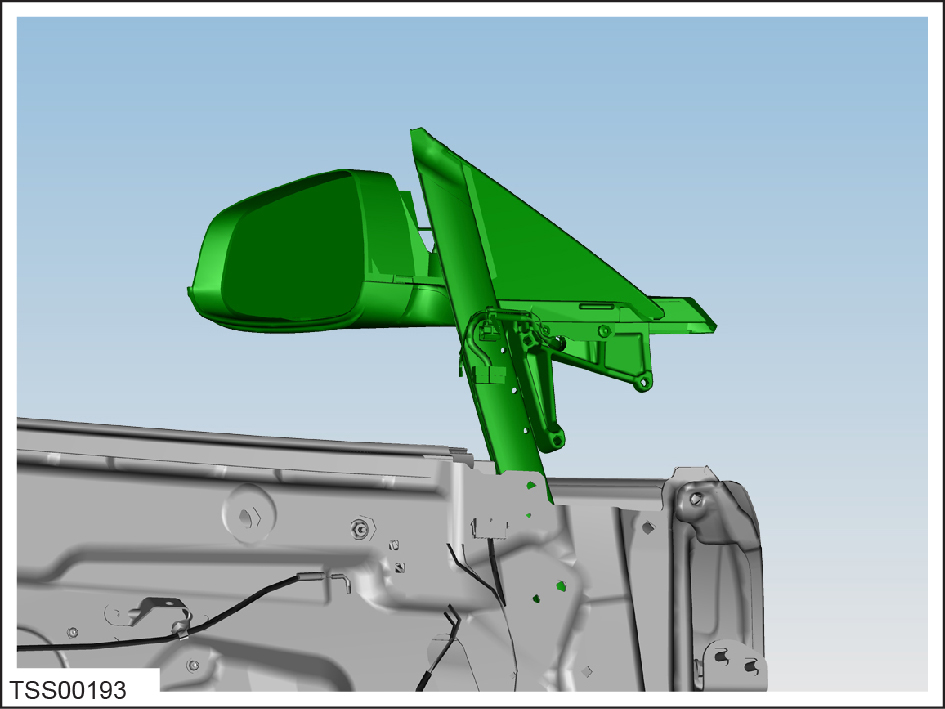
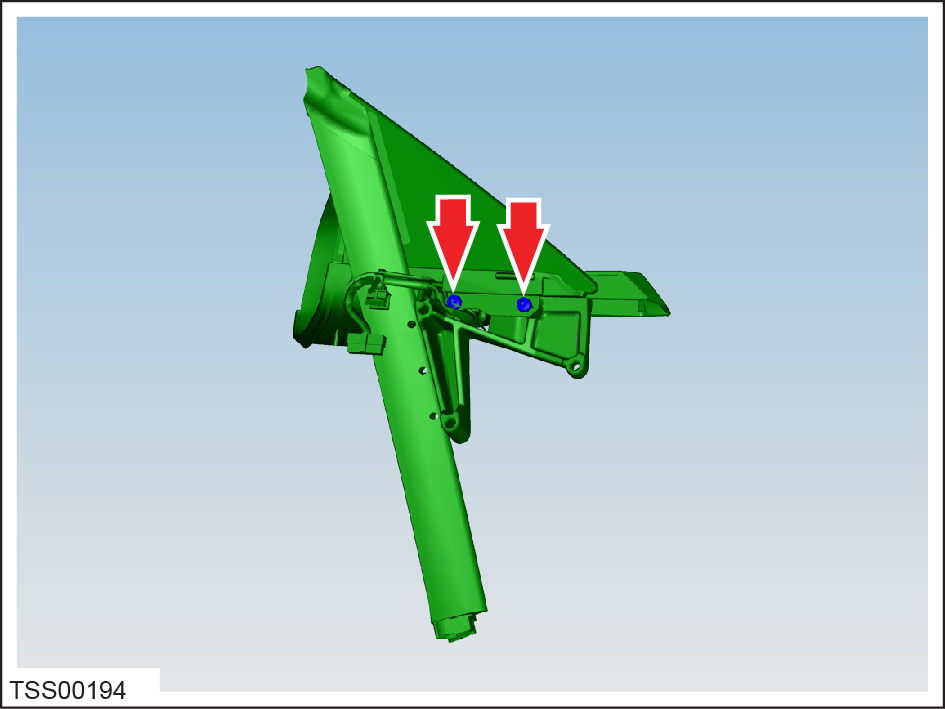
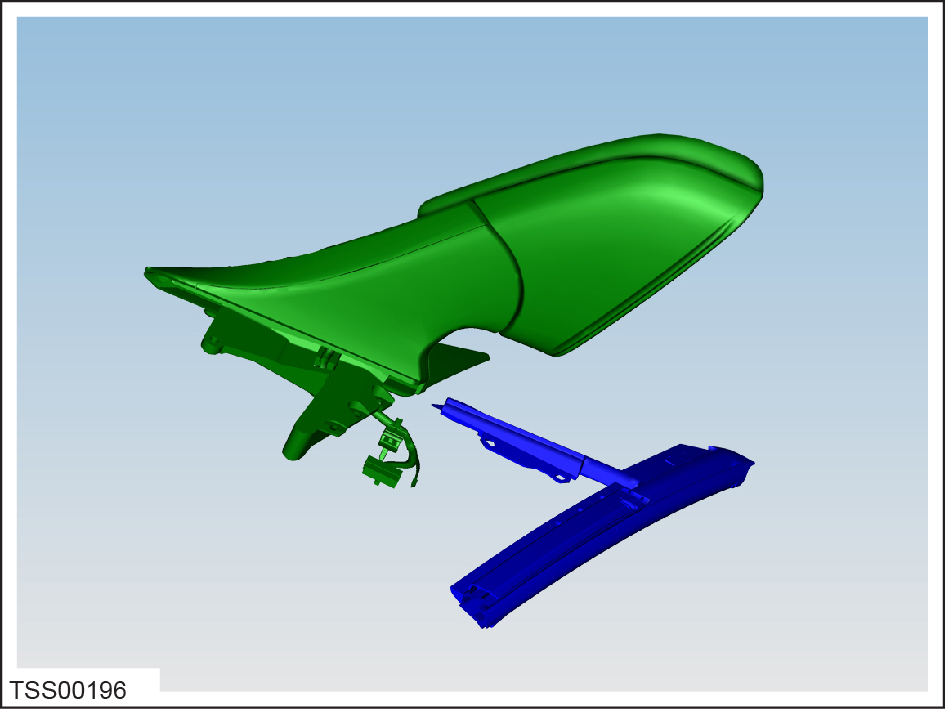
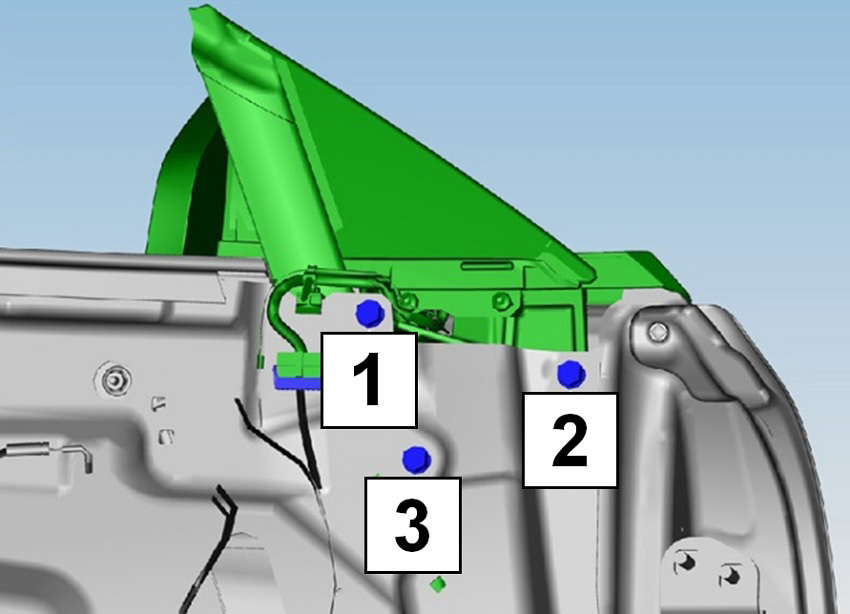
Install the door mirror assembly:
Caution: Ensure that the wiring harness connector is inboard of the
door.
Caution: Failure to install the fasteners using the following sequence
can result in NVH issues.

|
1
|
Upper bolt |
|
2
|
Forward bolt |
|
3
|
Lower bolt |
-
Hand tighten the upper bolt.
-
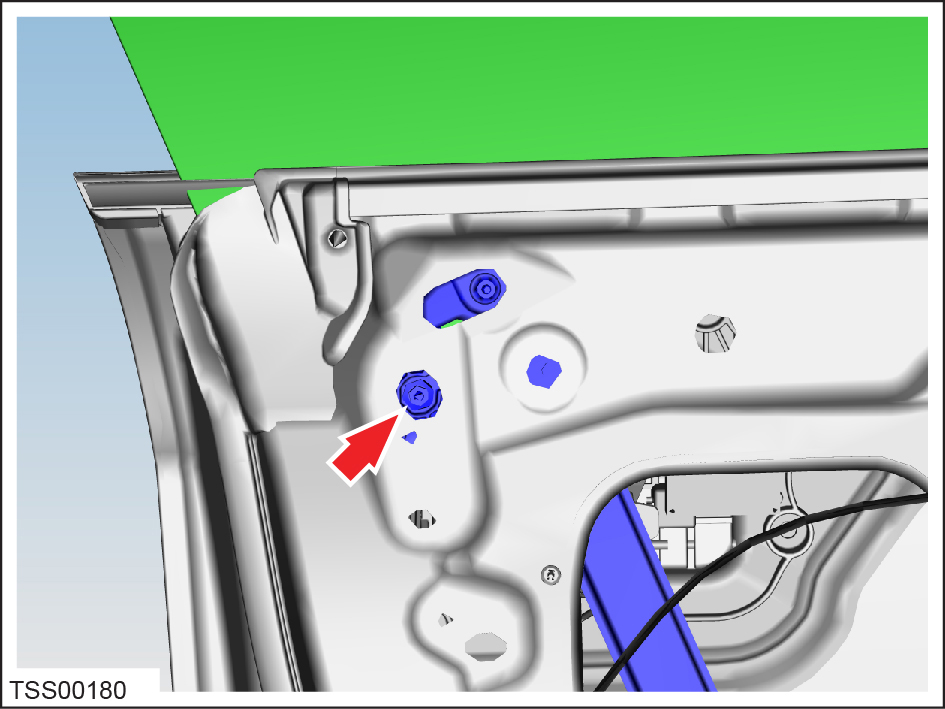
While applying downward pressure on the door mirror assembly, torque the
forward bolt (18 Nm).
-
While applying downward pressure on the door mirror assembly, torque the
upper bolt (18 Nm).
-
Torque the lower bolt (18 Nm).
-
Carefully align the door glass to the guide rail during final assembly.
-
Check for smooth operation of the window glass. Adjust the alignment of the
glass if the glass does not operate smoothly.
-
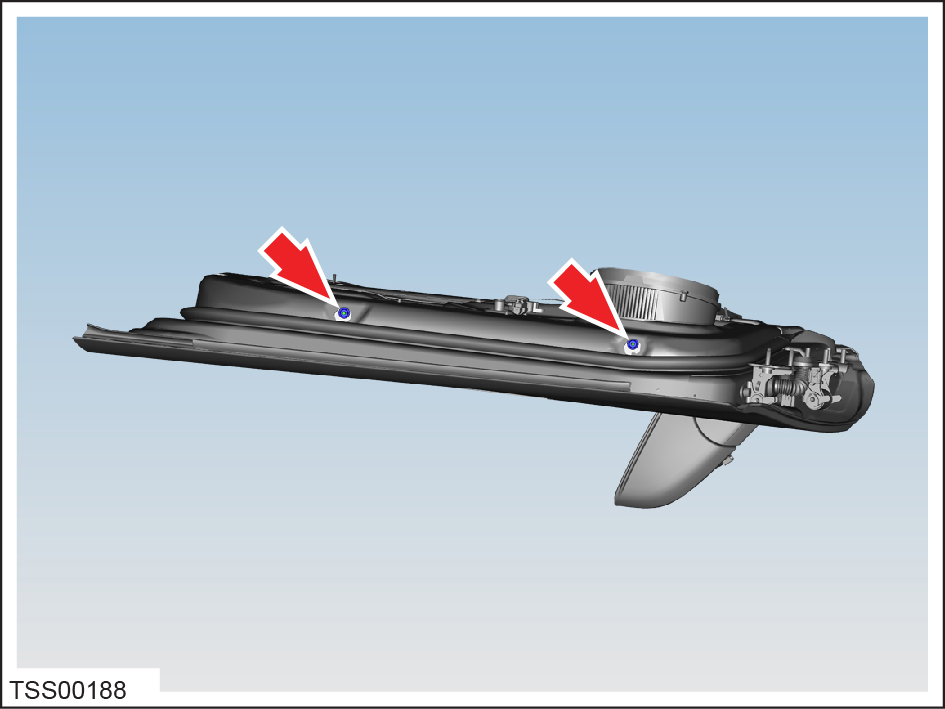
Remove the plugs and loosen the nuts (x2) that control the inboard and outboard
adjustment of the glazing, located beneath the door (torque 10 Nm).
-
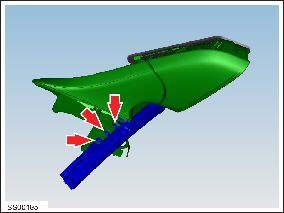
Loosen the nut the secures the glass clamp; adjust the glass fore and aft to
achieve the correct alignment (torque 7.5 Nm).
-
Conduct a final operations check, torque the adjustment nuts, and install the
plugs to the underside of the door.