Cover - Back Rest - Driver's Seat (Remove and Install)

FRT No: 13031402

Removal

  1. Prepare a padded work area
  2. Remove the driver's seat assembly (refer to procedure). With an assistant, place the seat onto a padded work area so that the plastic seat back faces down.
    Caution: To avoid damage when moving or rotating the seat, hold the base with one hand and the back with the other. Have an assistant hold the other side in the same manner.
  3. At the base of the seat, release the clips (2x) that secure the seat back carpeting to the flex mat.
    Note: In some vehicles, the clips might secure to a different location. Ensure that the clips are installed in the same location during reinstallation.
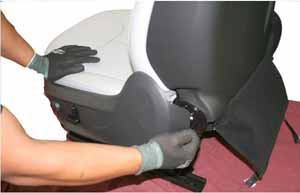
  4. On each side of the interior seat base, release the screw that secure the seat side covers.
  5. Rotate the seat to its normal upright position.
    Caution: To avoid damage when moving or rotating the seat, hold the base with one hand and the back with the other. Have an assistant hold the other side in the same manner.
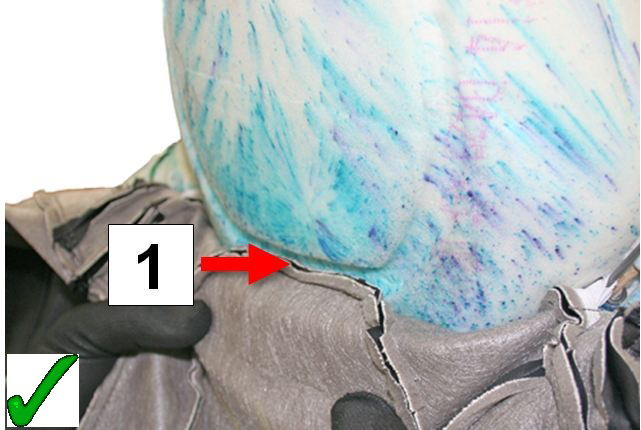
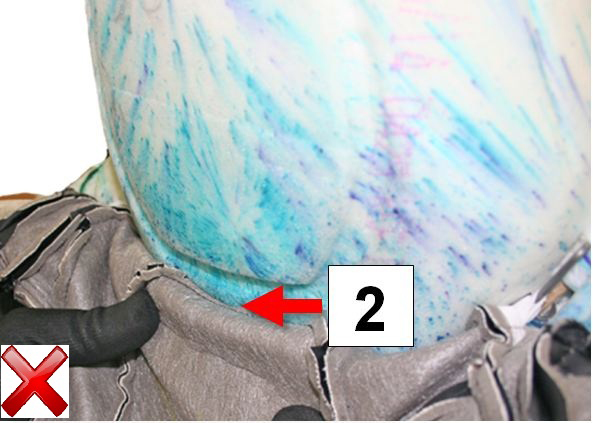
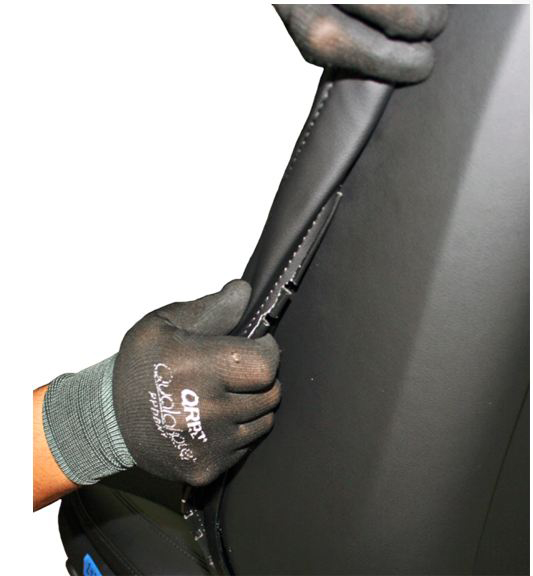
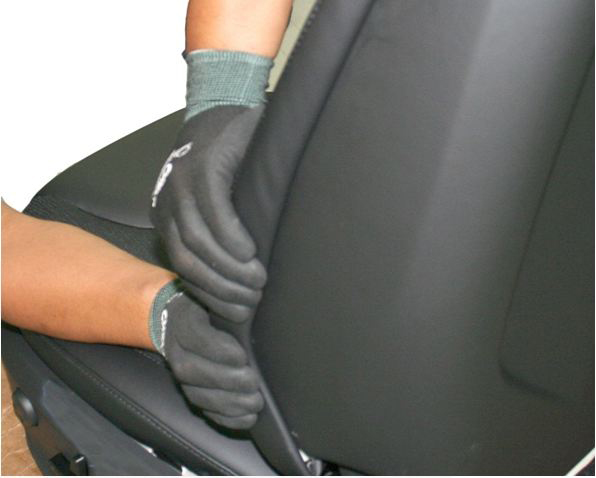
  6. While pushing down on the base of the seat to keep it steady, pull upward and then outward on the rear of the seat cover. This releases the rear of the seat cover while the front remains attached to the seat.
    Caution: Do not remove the entire seat side cover.
    Caution: Do not damage the seat motor harness inside the seat cover.
  7. Rotate the seat so that so that the plastic seat back faces up.
    Caution: To avoid damage when moving or rotating the seat, hold the base with one hand and the back with the other. Have an assistant hold the other side in the same manner.

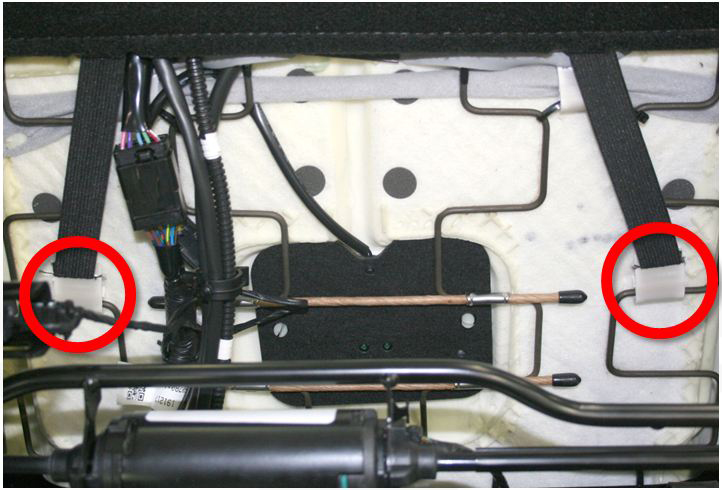
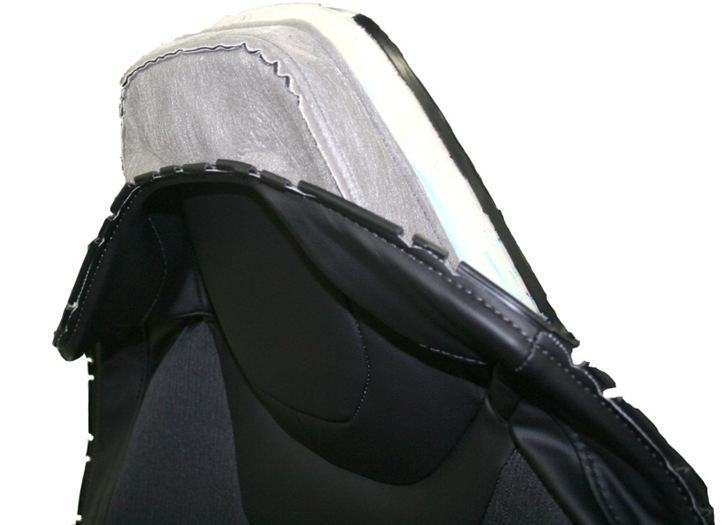
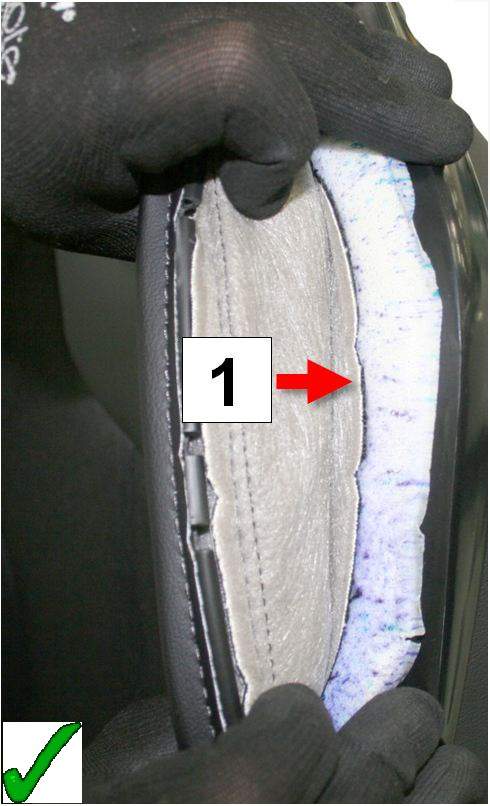
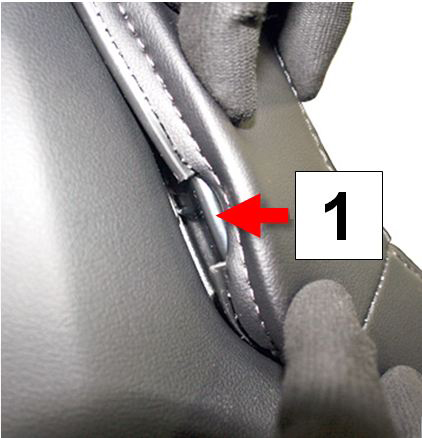
Note: The upholstery is secured by clips that attach to grooves in the plastic seat back.
1 Seat foam
2 Groove in seat back (highlighted in green)
3 Clip on upholstery

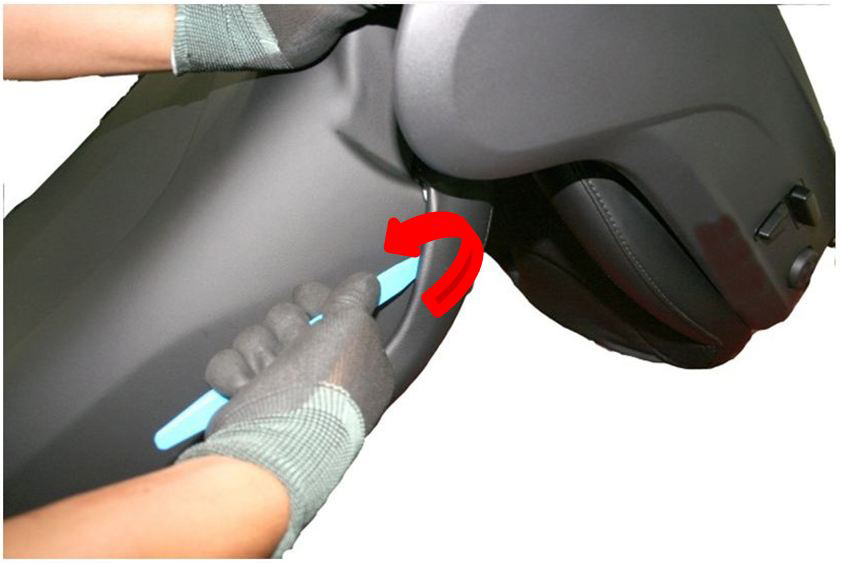
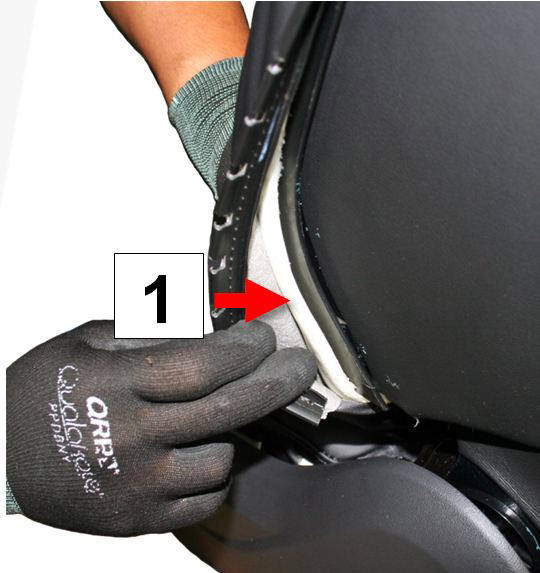
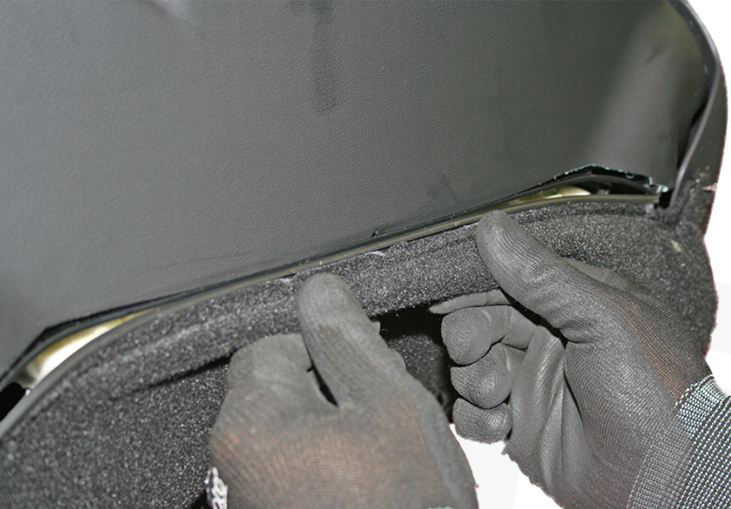
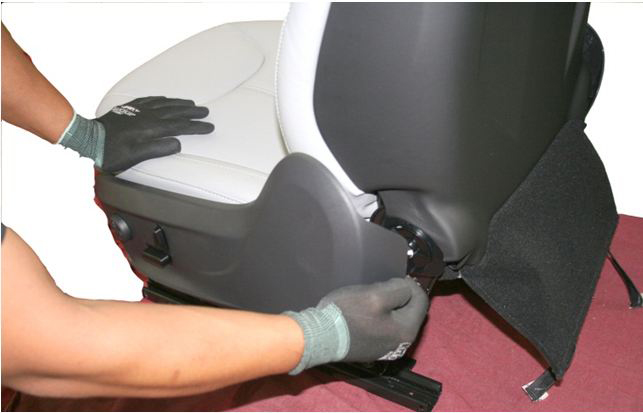
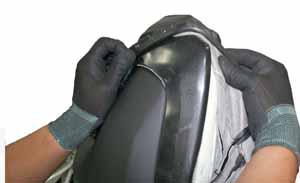
  1. At the LH base of the seat, position a trim stick between the upholstery and the plastic seat back. Pull outward on the upholstery and twist the trim stick to release the clips that secure the upholstery.
    Caution: Do not damage the clips that secure the upholstery.
  2. Working towards the top of the headrest, repeat the previous step to release all the upholstery clips.
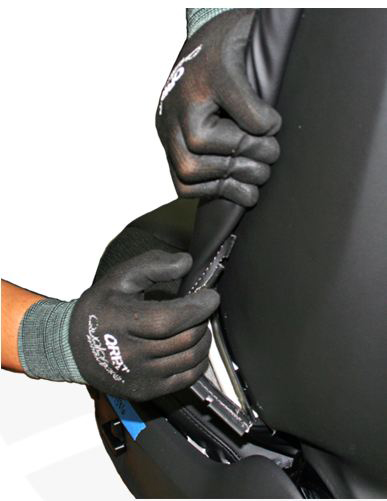
  3. Repeat the 2 previous steps on the RH side of the seat. Ensure that all clips are released before proceeding.
  4. Rotate the seat to its upright position.
    Caution: To avoid damage when moving or rotating the seat, hold the base with one hand and the back with the other. Have an assistant hold the other side in the same manner.
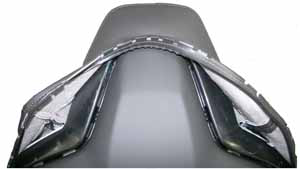
  5. Have an assistant hold the seat steady. Pull the RH side of the upholstery up and over the top of the headrest. Working from right to left, lift the upholstery up and over the top of the headrest
  6. Have an assistant hold the base of the seat to keep it steady. On the RH side of the seat, grip the base and shoulder of the plastic seat back and pull outward.
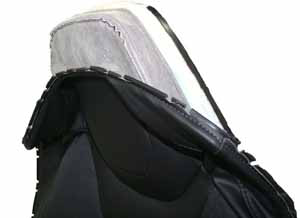
  7. Repeat the previous step on the LH side to release the plastic seat back. Discard the old part.
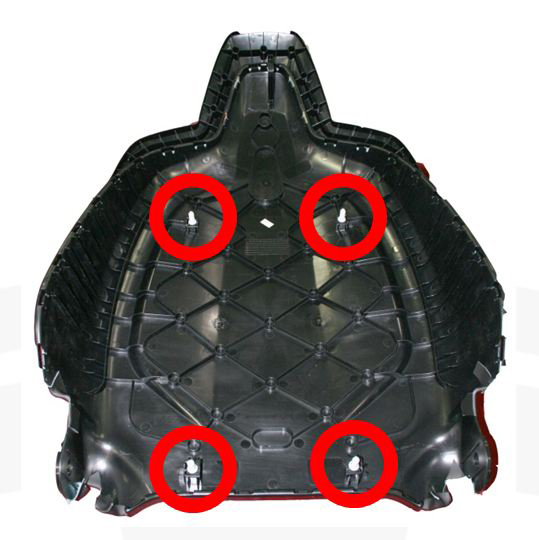
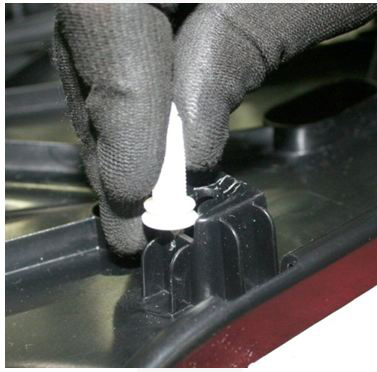
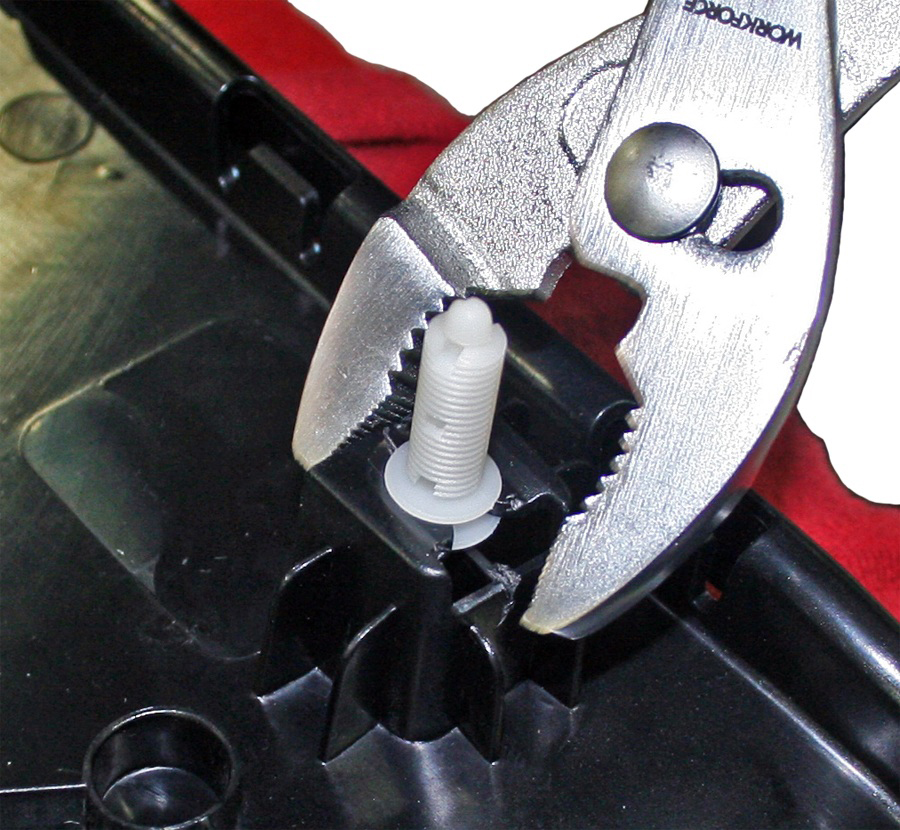
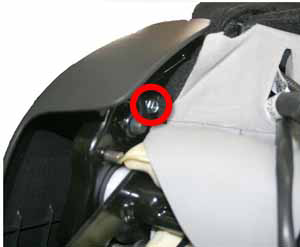
    Note: If any pieces of fir trege clip remain in the seat frame, remove and discard them.
    Caution: The fir tree clips are one time use components.

Installation

  1. Install new fir tree clips (x4) into the new seat back:
    1. Position the fir tree clip into the bracket.
    2. Use a pair of pliers to push the clips into the center of the bracket. This locks the clips in place.
  2. Install a new foam pad over the fir tree clips in the plastic seat back.
    Caution: Ensure that the new foam pad is installed correctly: The holes at the base of the seat back are closer together than the holes at the top of the seat back.
  3. Ensure that the interior foam is installed correctly:
    1. Ensure that the headrest section of the seat frame fits entirely in the groove in the head rest foam.
      1 Correct: Head rest frame seated in groove
      2 Incorrect: Head rest frame not seated in groove
    2. Ensure that both sides of the seat back foam overlap the metal seat frame.
      1 Foam wraps around side of metal seat frame
  4. Insert the hook on the seat back into the indentation on the back of the headrest foam.
    1 1: Hook fits into indentation
  5. Have an assistant support the seat by pushing on the seat back. Align the 2 bottom fir tree clips on the interior of the seat back with the holes in the bottom of the metal frame. Gently push on the bottom of the seat frame to engage the fir tree clips.
  6. Push firmly on the top and bottom of the RH side of the new seat back to secure the fir tree clips.
  7. Repeat the previous step on the LH side.
  8. Gently pull around all edges of the seat back to ensure that it is securely installed.
  9. Insert the lip on the inside of the headrest upholstery into the base of the groove on the front of the foam headrest. Ensure that the lip does not fold inward during the next step.
    1 Correct: Lip on inside of headrest upholstery seated in groove
    2 Incorrect: Lip on inside of headrest upholstery folded inward
  10. While holding the seam on the outside of the headrest upholstery in place, pull one side the headrest upholstery up and over the top of the headrest. Working towards the other side, continue pulling the upholstery up and over the top of the headrest.
  11. Gently massage the upholstery on the front of the headrest upwards so that it forms a lip on the top of the headrest.
  12. On both sides of the seat, set the lip of the inner padding into the groove on the foam. Ensure that the lip does not fold inward during the next step.
    1 Correct: Lip on inner padding seated in groove
    2 Incorrect: Lip on inner padding folded inward
  13. Bend the upholstery around both sides of the seat at the shoulder. Push the upholstery into the seat back to engage the clips.
  14. Pull downwards on the upholstery. Ensure that the foam at the base of the seat overlaps the side of the seat back.
    1 Foam overlaps side of seat back
  15. Working downwards towards the base of the seat, massage the upholstery to remove any wrinkles, then press firmly to attach all clips on the side of the upholstery.
  16. Pull outward on both sides of the headrest upholstery, then push inward to secure the clips to the plastic seat back. Do not secure the clips on the top of the headrest upholstery yet.
    1 Push in this area only
  17. At the top of the headrest upholstery, push the ribbing upward, then secure the clips.
    1 Push plastic ribbing upward before securing clips
    Caution: Before proceeding, ensure that there are no unattached clips.
    1 Upholstery clip not attached to seat frame
  18. Workings upwards, massage the sides of the headrest to work out any wrinkles.

Note: Before proceeding, ensure that there are no wrinkles in the upholstery.

  1. Position the clips on the side shields between the tabs at the base of the seat upholstery. Press firmly on the outside of the side shields to secure them in place.
  2. Align the lip on the rear carpet to the base of the upholstery on the back of the seat.
    Note: The lip is not at the edge of the carpet; ensure that the lip is positioned correctly before proceeding.
  3. While holding the lip in place, pull upwards on the carpet and tuck it underneath the plastic seat back. Ensure that the carpet is secure.
  4. Rotate the seat so that the seat back faces upward.
    Caution: To avoid damage when moving or rotating the seat, hold the base with one hand and the back with the other. Have an assistant hold the other side in the same manner.
  5. Reinstall the screws (x2) that secure the side shields.
  6. Secure the clips to the flex mat.
  7. Reinstall the seat.
  8. Ensure that the driver’s seat can move in all directions.
  9. Ensure that the driver’s seat heater functions properly.