Front Applique - 1st Generation (Remove and Replace)

FRT No: 24102402

Warning: To avoid personal injury, wear cut-resistant gloves when performing this operation.

Special tools required for this procedure:

Supplier Part Number Description
Tesla 1078739-00-A Equalizer Hydroblade Tool
Tesla 223-28550-TSL Torque Screwdriver, 1-6 Nm

Removal

  1. Open the panoramic roof glass.
  2. Move both front seats forward as far as possible.
  3. Apply painter's tape to protect the external bodywork and internal trim adjacent to the front windshield.
  4. Place suitable covers over the remaining paint and bodywork.
  5. Remove and discard the front screws (x2) from the sliding glass.
  6. Slide the LH and RH front links forward as far as they can go to keep the wind deflector out of the way during applique removal and installation.
    Caution: Place a clean towel under the sliding glass to protect the fixed glass.
  7. Apply painter's tape to the painted surfaces of the vehicle next to the front applique.
  8. Use a hydroblade tool to carefully cut the adhesive on the sides and front of the applique.
    Warning: To avoid personal injury, eye protection must be worn when performing this operation.
    Warning: Only use cleaning agents and solvents in a well-ventilated area.
    Caution: Take care not to damage component(s).
    Tip: Insert a wedge between the applique and the roof frame and lift the applique up slightly to make cutting through the adhesive easier.
  9. Remove the front applique and place it on a suitable stand.

Installation

  1. Use a scraping tool to remove the majority of the adhesive from the body, leaving a smooth layer of the original adhesive approximately 1 mm thick or less to aid assembly.
  2. Remove all existing butyl patches and replace them with new ones.
  3. Vacuum any debris from the body.
  4. Wipe all of the sealing surfaces with isopropyl alcohol (IPA) or with alcohol wipes.
  5. Apply primer to all adhesive paths on the body and the applique, and on any bare metal on the body opening.
    Caution: Check the expiration date of the primer and adhesive before use.
    Caution: Check the primer and adhesive packaging for the appropriate working times for each product. Prepare the necessary tools and work environment so that the the frame can be installed within the specified working times.
    Note: The procedure requires approximately 1 tube of adhesive.
  6. Assemble the adhesive applicator.
  7. Cut the tip of the adhesive applicator so that it will produce a bead 8 mm (5/16 in) wide and 14 mm (9/16 in) high.
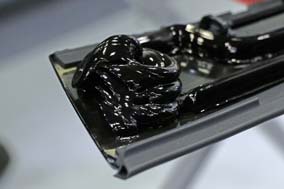
  8. Apply adhesive to the vehicle body in the path shown.
    Note: At the 6 spots indicated below, apply the adhesive in a circular motion with a decreasing diameter to form a spiral approximately 2-3/8 in (60 mm) wide and 3-1/8 in (80 mm) high.
  9. With assistance, position and align the applique to the body. Evenly and progressively press the applique onto the body.
  10. Reattach the LH and RH front links to the sliding glass using new screws (torque 5 Nm).
  11. Close the panoramic roof.
  12. Use a suitable tape to secure the corners of the applique to the vehicle while the adhesive cures.
    Note: Make sure that the corners of the applique are flush with the body.
  13. Move the front seats back to their original positions.
  14. Clean off any excess adhesive that was extruded from the joint.
  15. Close the panoramic roof.