Tail Light Assembly - RH (Remove and Replace)

FRT No: 17402202

Removal

  1. Remove the subwoofer (refer to procedure).
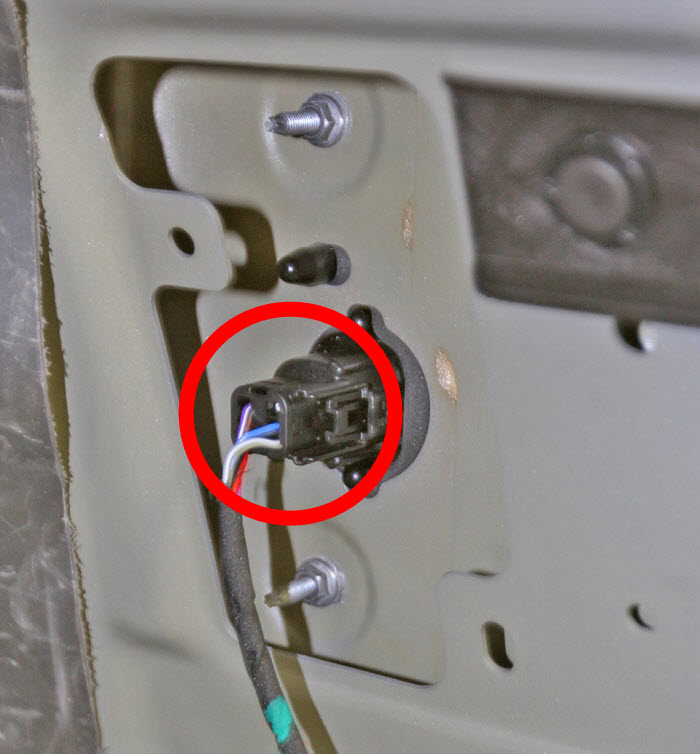
  2. Disconnect the electrical connector from the tail light.
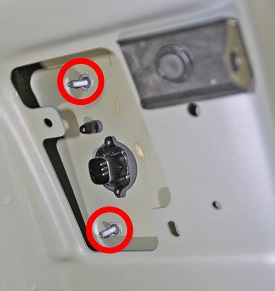
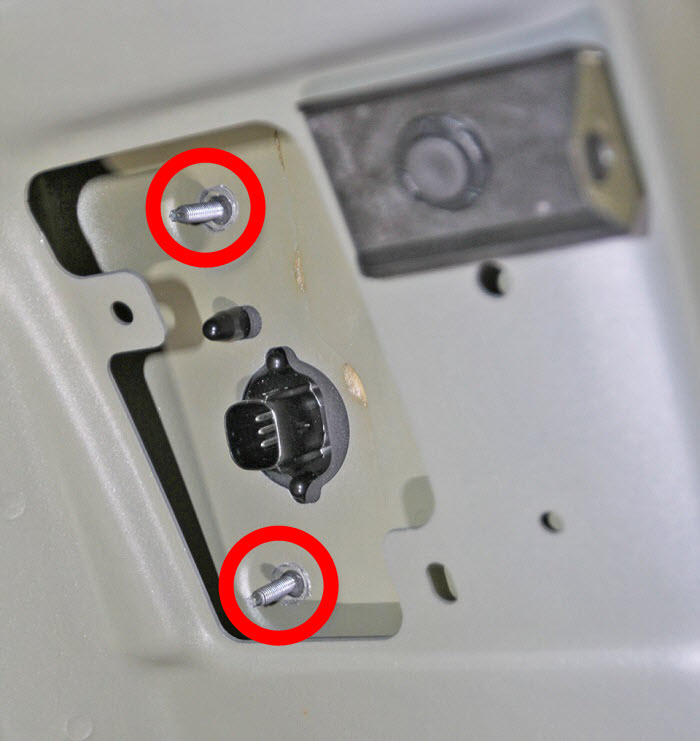
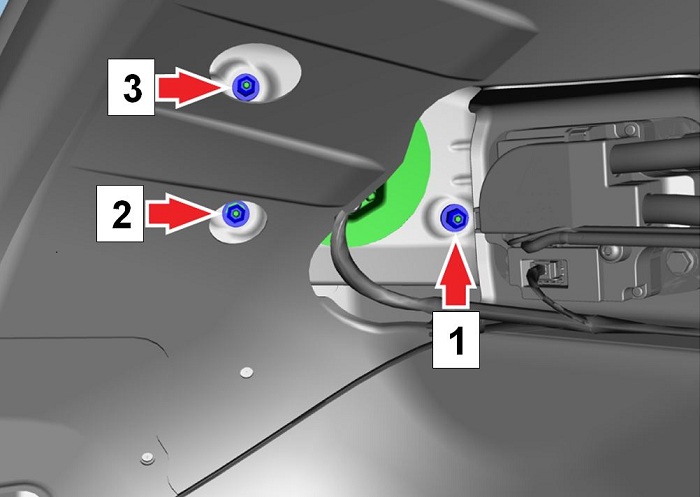
  3. Remove the fasteners (x2) that secure the tail light to the body (torque 2.5 Nm).
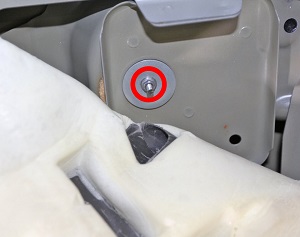
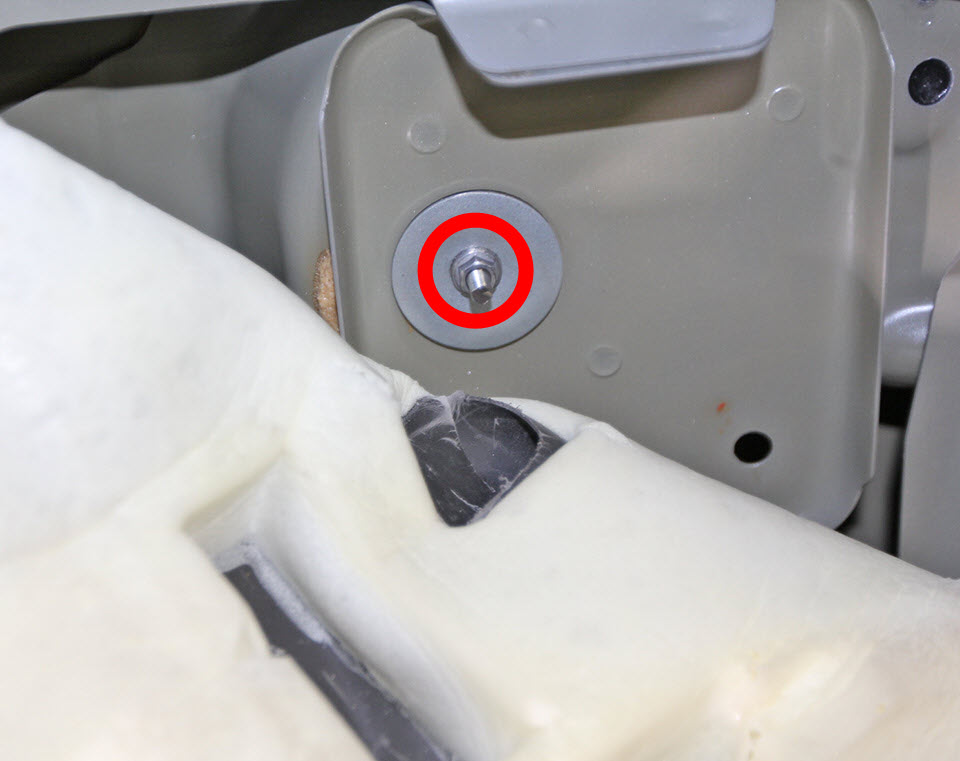
  4. Release the acoustic padding and remove the fastener that secures the tail light to the body (torque 2.5 Nm).
  5. Remove the tail light assembly from the vehicle.
  6. Place the tail light on a soft, clean surface.
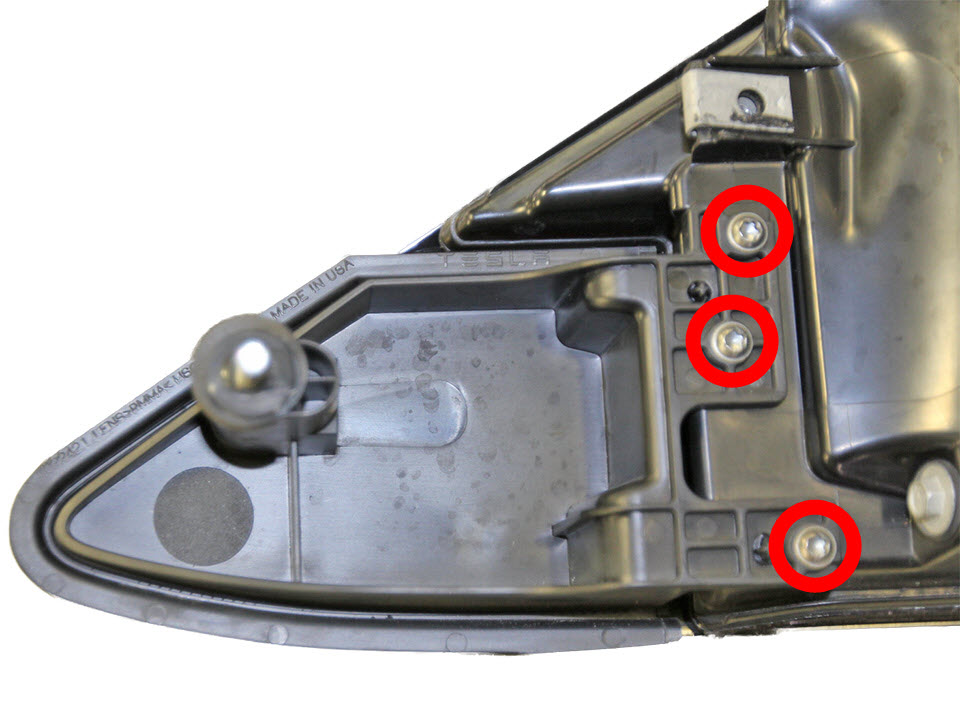
  7. Remove the screws (x3) that secure the dummy charge port door to the tail light (torque 1.25 Nm).
  8. Remove and retain the dummy charge port door.

Installation

Installation procedure is the reverse of removal, except for the following:

  1. Prior to installing the components that were removed for access, insert a 1 mm feeler gauge between the body and the base of the tail light. While holding the feeler gauge in place, tighten the nuts in the order shown (torque 2.5 Nm).
    Note: The following images show the LH tail light. The RH tail light is mirrored.
    Feeler gauge inserted Torque order

    View large image.

    View large image.

  2. Ensure proper operation of the tail light.