-
Open both front doors and windows.
-
Move the steering wheel fully downwards and away from the instrument panel.
-
Open the glove box.
-
Disconnect 12V power (refer to procedure).
-
Remove the RH instrument panel finisher (refer to
procedure).
-
Remove the driver's inner face vent (refer to
procedure).
-
Remove the ground strap from the top of the MCU/touch screen.
-
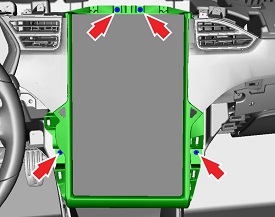
Remove the screws (x4) that secure the touch screen to the IP carrier (torque 7 Nm).
Caution: To avoid damage to the circuit board, fully depress the connector release
tab before pulling on a connector. Check all connectors on the MCU/touch screen to make sure
they are still securely attached to board. If the connector bodies can be twisted, the
MCU/touch screen must be replaced.
-
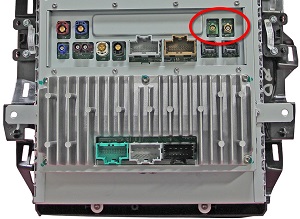
Gently tilt the top of the MCU/touch screen, then disconnect the Bluetooth and
Wi-Fi harness connectors.
Caution: To prevent damage, ensure there is sufficient slack in the USB1 and USB2
wires. Excessive tension on these wires could damage the connector bodies on the MCU/touch
screen.
-
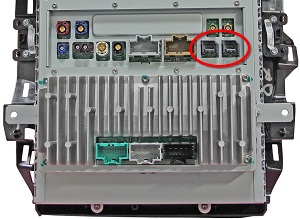
Disconnect the USB1 and USB2 harness connectors.
-
Disconnect the remaining harness connectors.
Caution: To prevent damage, make sure that the cables are aligned correctly with
no excessive twists or bends.
-
Remove the MCU/touch screen from the vehicle. Gently place the MCU/touch screen on the
foam ESD container with the touchscreen facing down.
Caution: Take care not to damage
component(s).


