Removal
-
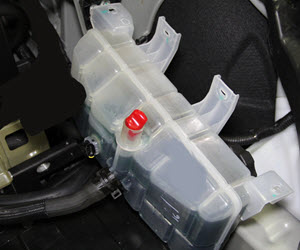
Move the coolant reservoir out of the working area:
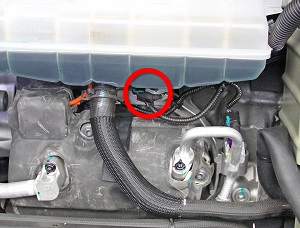
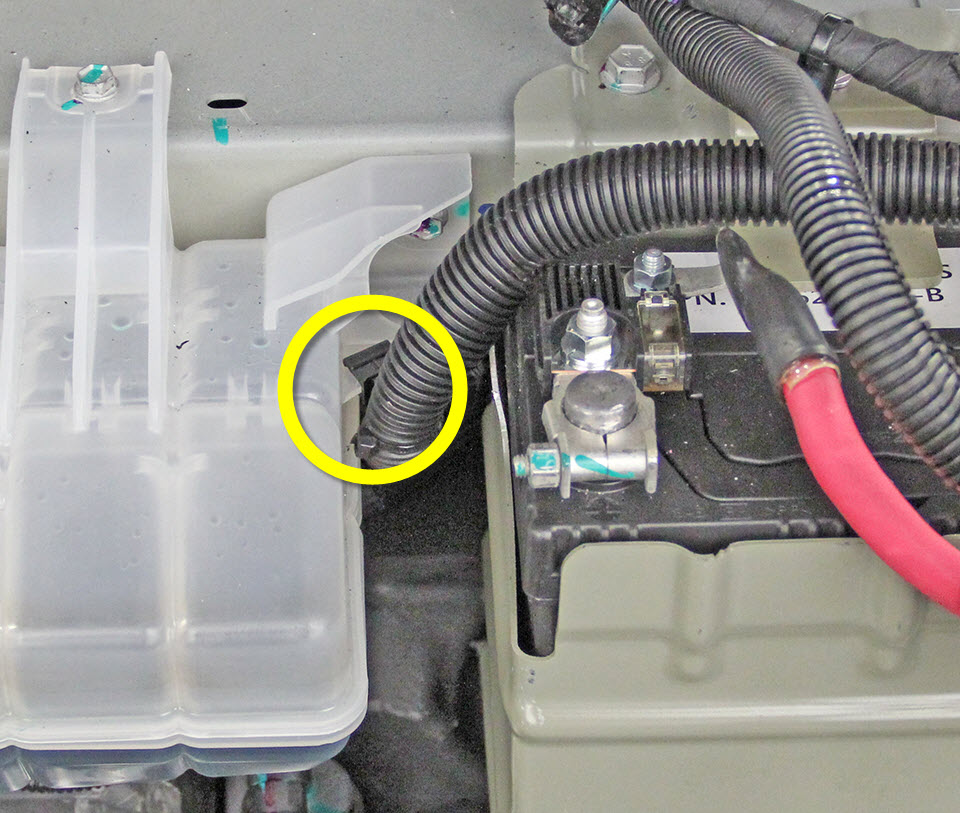
- Release the 12V harness clip from the coolant reservoir.
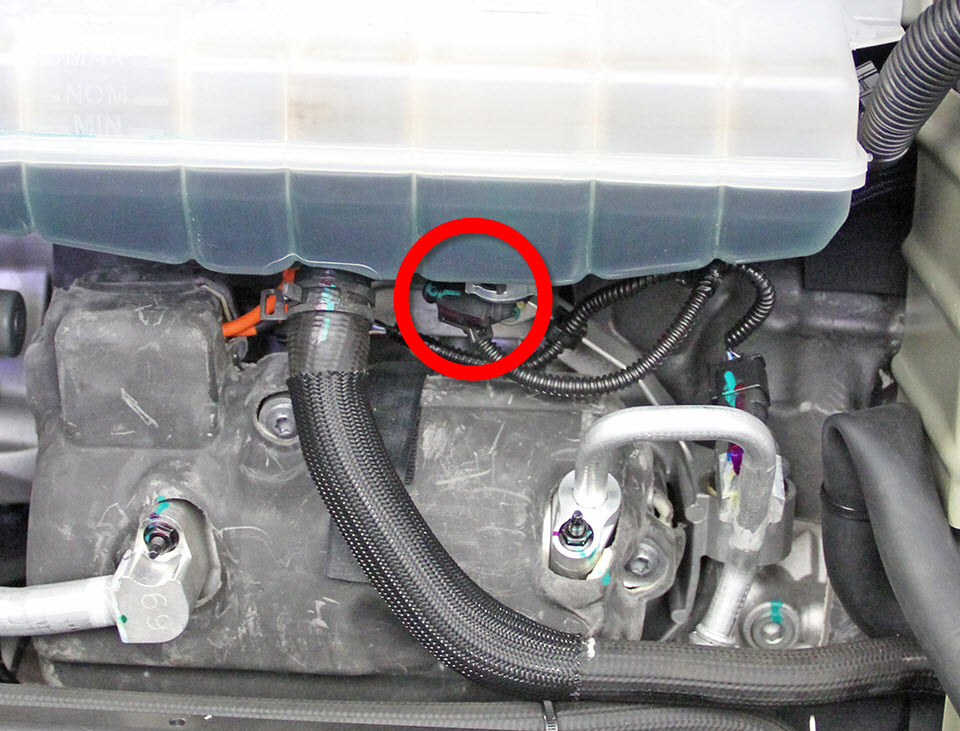
- Disconnect the coolant fluid level sensor electrical connector.
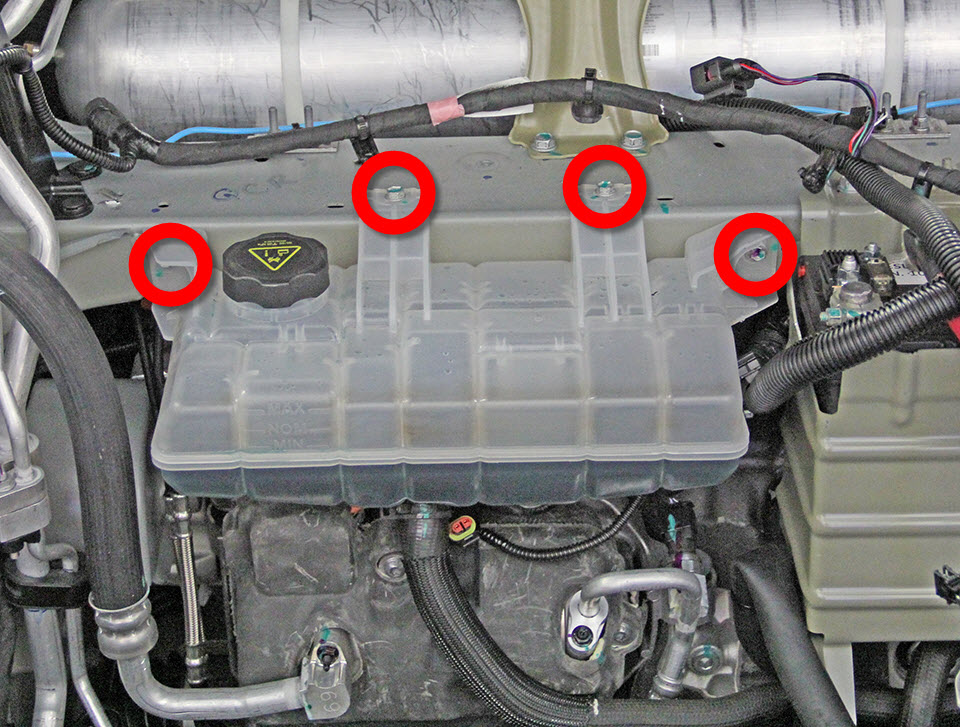
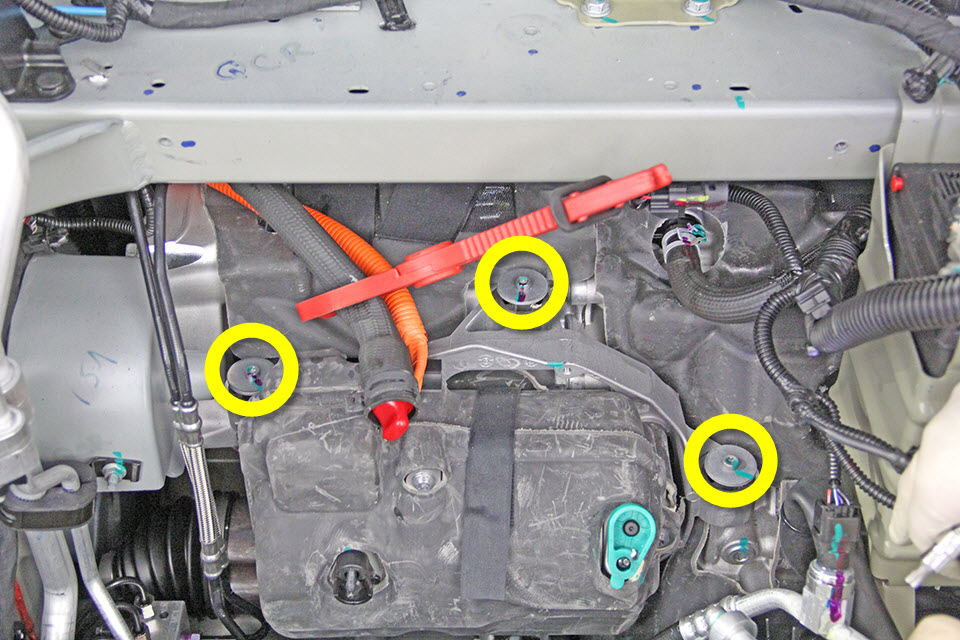
- Remove the bolts (x4) that secure the coolant reservoir to the front crossmember (torque 6 Nm).
- Clamp the coolant hose at the rear of the coolant reservoir.
- Plug the coolant hole then carefully move the reservoir to the LH side of the frunk.
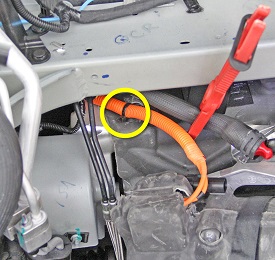
- Disconnect the electrical connector from the A/C compressor and the electrical connector from the high pressure pipe.
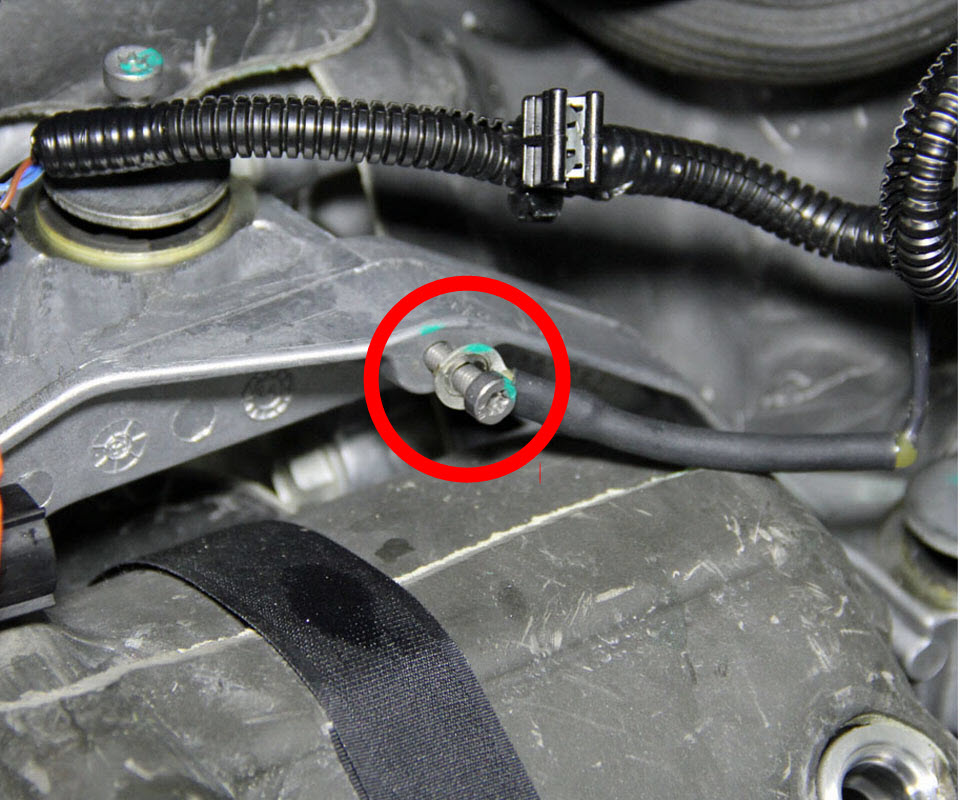
- Remove the screw that secures the ground strap to the compressor bracket (torque 8 Nm).
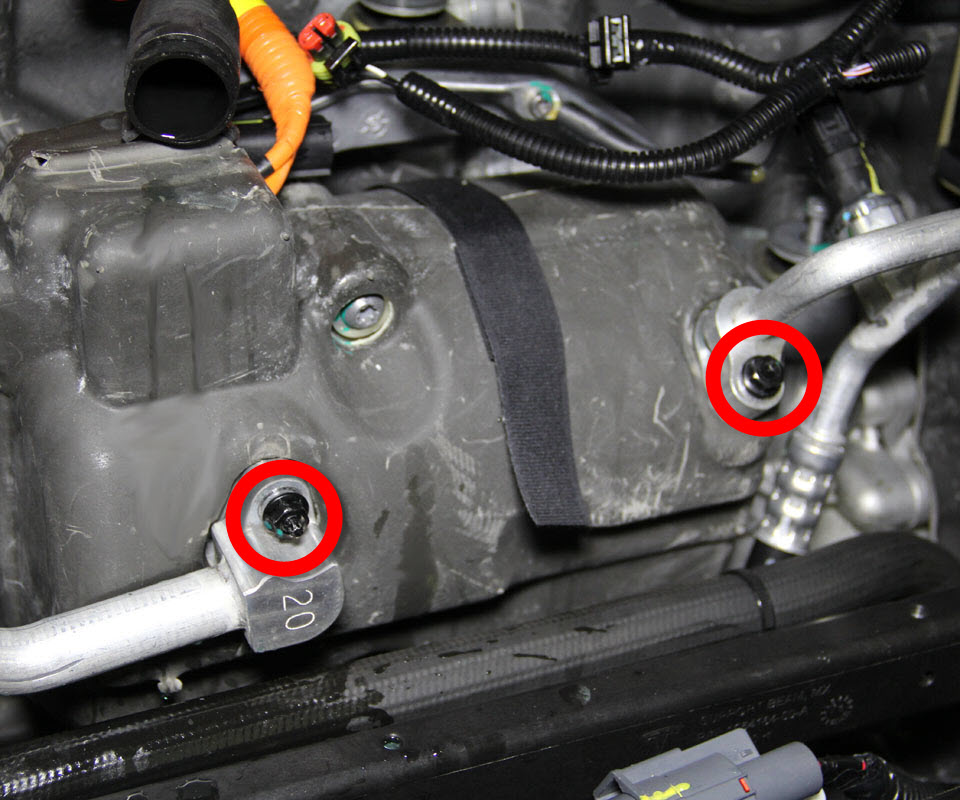
- Release the nuts (x2) that secure the A/C lines to the compressor (torque 10 Nm).
- Have an assistant support the compressor. Release the bolts (x3) that secure the A/C compressor bracket to the front drive unit (torque 10 Nm).
- Release the push clip that secures the A/C compressor HV cable to the body of the vehicle.
-
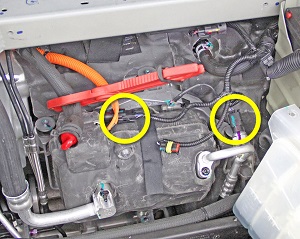
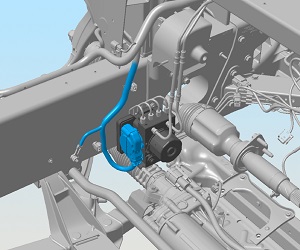
Disconnect the ABS modulator electrical connector.
Note: Components have been removed in this graphic to aid clarity.
-
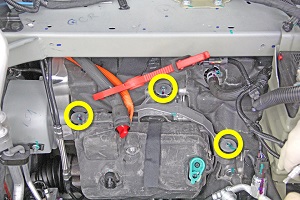
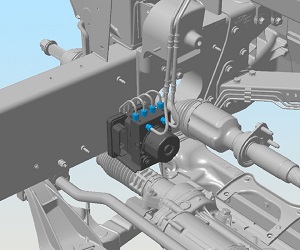
Use a flare wrench to release the brake pipes (x6) from the ABS modulator
(torque 23 Nm).
Caution: Plug pipe connections to prevent ingress of moisture or dirt.Note: Place suitable absorbent material around the affected area to absorb any possible fluid spillage.Note: Components have been removed in this graphic to aid clarity.
-
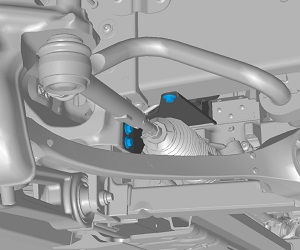
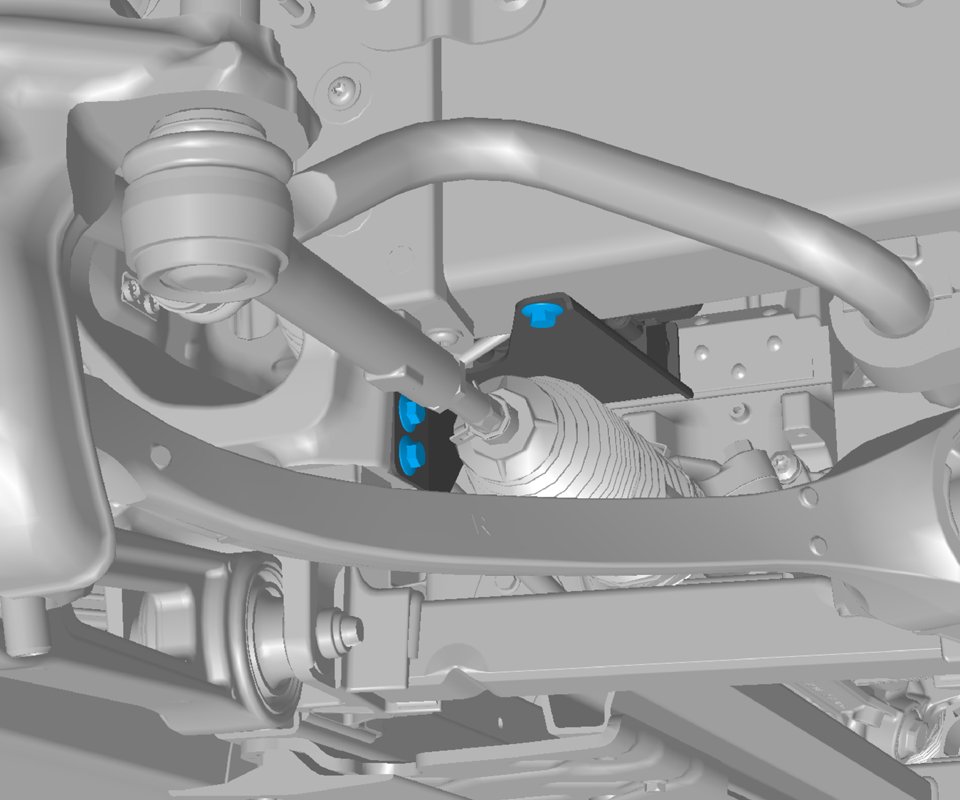
Remove the bolts (x3) that secure the ABS modulator bracket to the body of the
vehicle (torque 5 Nm).
Note: Components have been removed in this graphic to aid clarity.
-
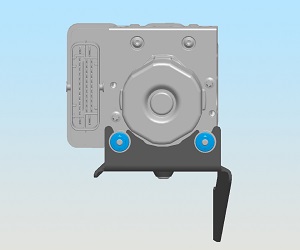
Remove the nuts that secure the ABS modulator to the bracket (torque 8 Nm).
Release the ABS modulator from the bracket.
Note: Components have been removed in this graphic to aid clarity.


