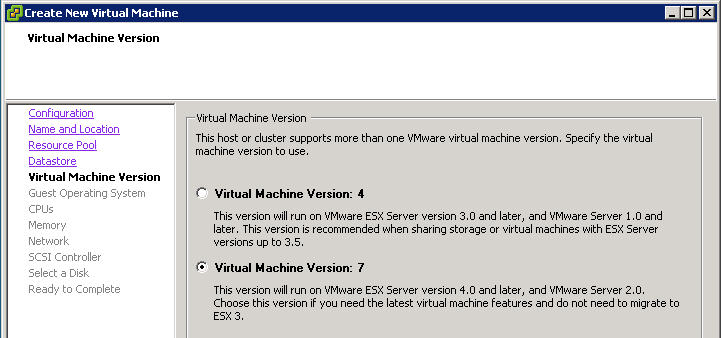
If you’ve upgraded to or installed ESX(i) 4.0 you’ll see that you have an advanced option to pick which virtual machine hardware version to use for your new VMs. As noted in the image below, the virtual hardware version will determine which other VMware products the VM can be run on. Virtual machine version 7 is also required for new ESXi 4.0 features like virtual IDE hard drives, VMXNET generation 3 virtual NICs, the LSI Logic SAS virtual controller and VMDirectPath. If you’ve upgrade from ESXi 3.5, you can use the process below to upgrade the virtual hardware version from 4 to 7.
Click on the images to get full-size previews.
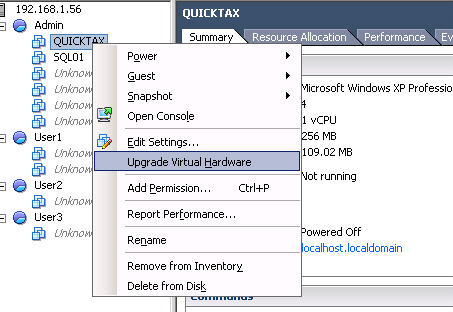
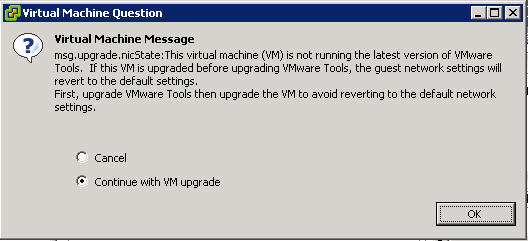
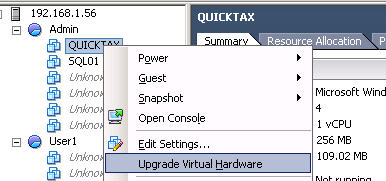
1) While the VM is powered down, right click on the VM and select Upgrade Virtual Hardware. If the VM is already at version 7 then the option will not be available. The option will also not be available if the VM is running. As shown in the 2nd image, the option is upgrade the virtual hardware is not reversible. This includes a VM with a snapshot on it. If you’re using vCenter Server, you can use Update Manager to upgrade the VM which will automatically backup the VM before the upgrade. As shown in the 3rd image below, it is best to upgrade VMware Tools in the VM prior to upgrading the virtual hardware. This will help preserve network settings especially on Microsoft Windows VMs.
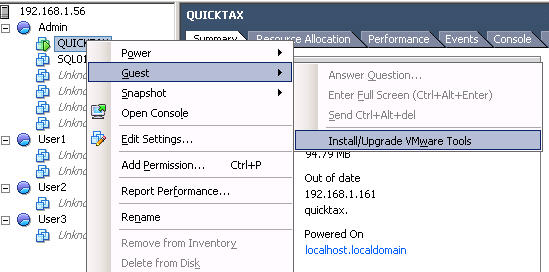
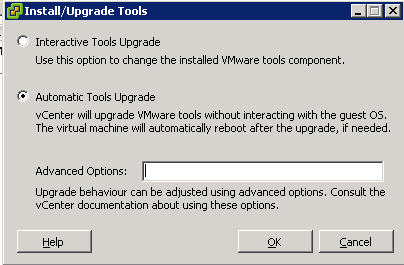
2) If you’ve opted to upgrade VMware Tools prior to the virtual hardware upgrade, selec the Cancel option shown on the image above and click OK. Then power on the VM and once it has booted up, you can right click and select Guest \ Install/Upgrade VMware Tools. With ESXi 4.0 you can select to manually upgrade VMware Tools or to have VMware Tools automatically upgraded.
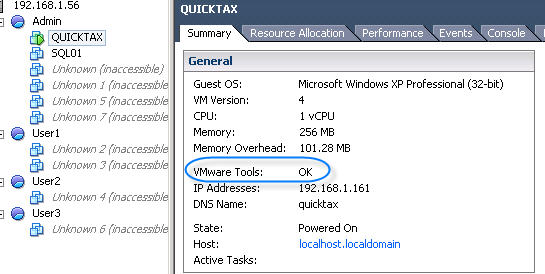
3) After VMware Tools has been upgraded, the status should show as OK on the summary page for the VM. Select the Upgrade Virtual Hardware option again. After a few minutes the process should complete as shown in the 3rd image below.
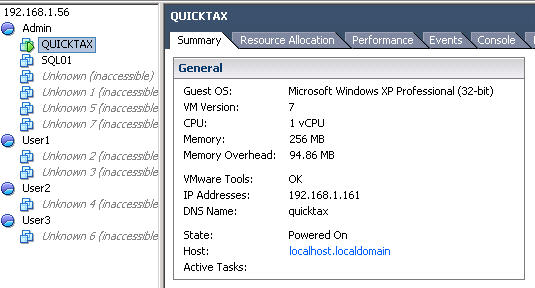
4) Once the process has completed, the VM Version should show 7 on the VM’s summary page. You will also want to check the console of the VM as the change in virtual hardware may require a further reboot of the VM.
5) And there you go, hope this works out for you! Thanks to VM-Help for the info.
