Removal
-
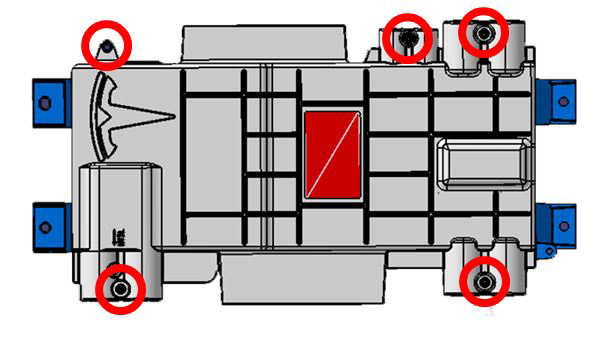
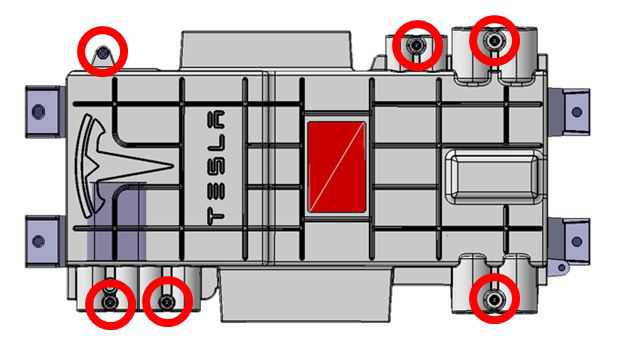
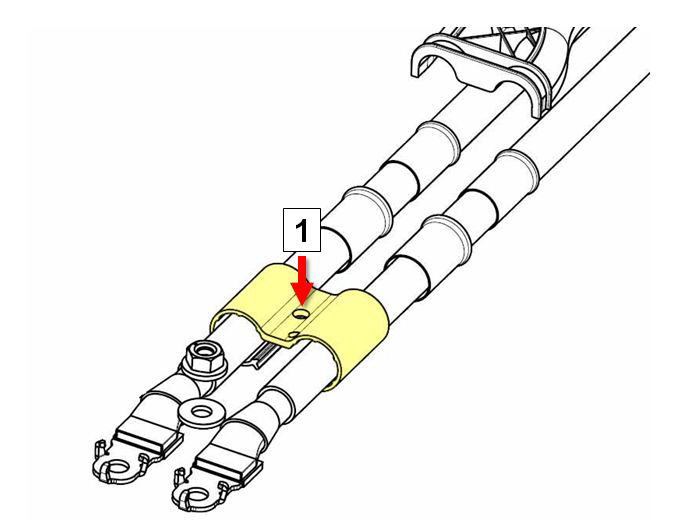
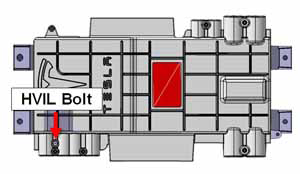
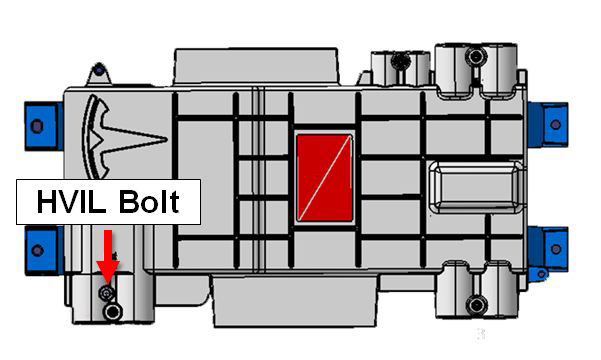
Remove the HVIL bolt from the HVJB cover. Do not remove the remaining fasteners at
this time.
-
North America, Japan (torque 4 Nm)Note: In North American and Japanese vehicles, the HVIL bolt is one-time use only. Install a new bolt during reinstallation.

-
Europe, APAC (torque 5 Nm)Note: In European and APAC vehicles, the HVIL bolt can be reused during reinstallation.
-
North America, Japan (torque 4 Nm)

Warning: Proper personal protective equipment (PPE) and insulating HV
gloves with a minimum rating of class 00 (500V) must be worn while performing the
remainder of this procedure.
Warning: Ensure that the multimeter and leads are capable of handling at
least 500V.
-
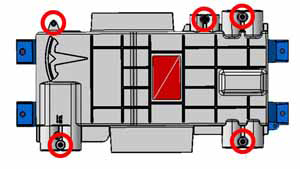
Remove the remaining fasteners that secure the HVJB cover.
-
North America, Japan (torque 8 Nm)Note: In North American and Japanese vehicles, there are 5 additional fasteners.
-
Europe, APAC (torque 8 Nm)Note: In European and APAC vehicles, there are 6 additional fasteners.

-
North America, Japan (torque 8 Nm)
-
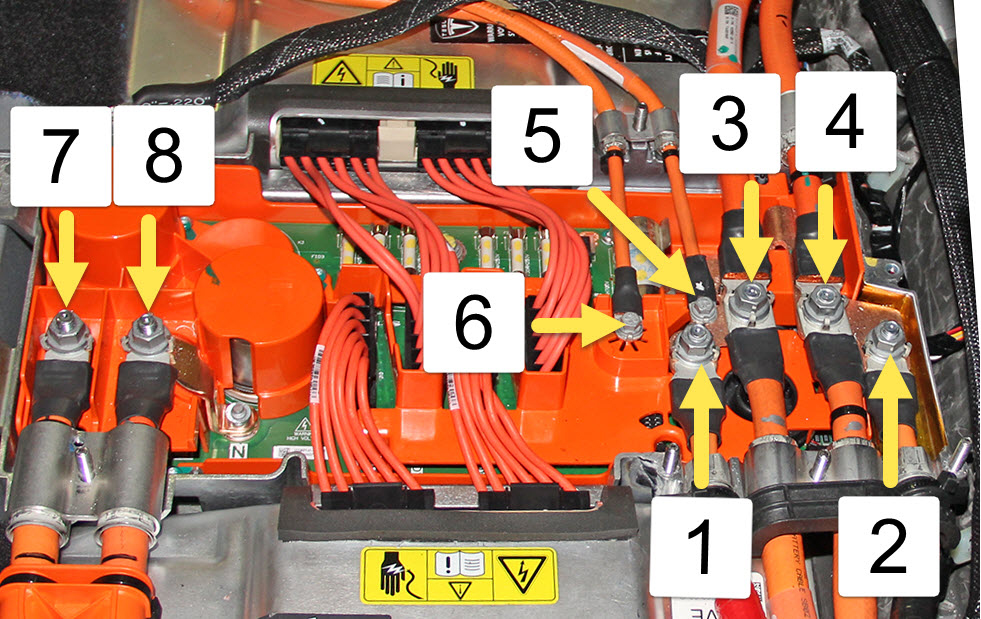
Use a multimeter to check voltages across the HV cables and to ground:
Warning: If any voltage reading is more than 10V, the high voltage contactors are not fully opened. Due to the risk of electrocution, contact Service Engineering before performing any further work.Warning: Never use a fastener or an e-coated surface as a path to ground. In this procedure, ensure that the ground strap from the HVJB is secure to the body and use the lug as a path to ground.
- The 4 HV cables to the HV battery and rear drive unit
- The 2 HV cables to the forward junction box
- The 2 HV cables to the charge port
- Dual Motor vehicles only: The 2 HV cables to the front drive unit

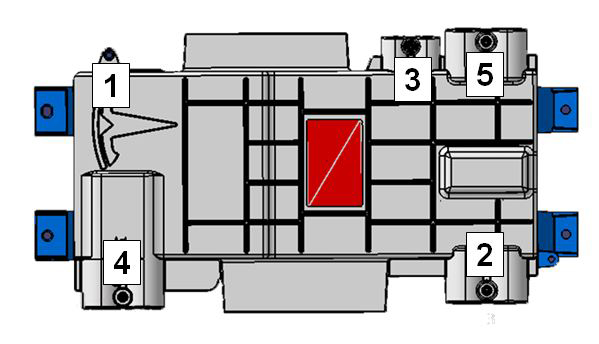
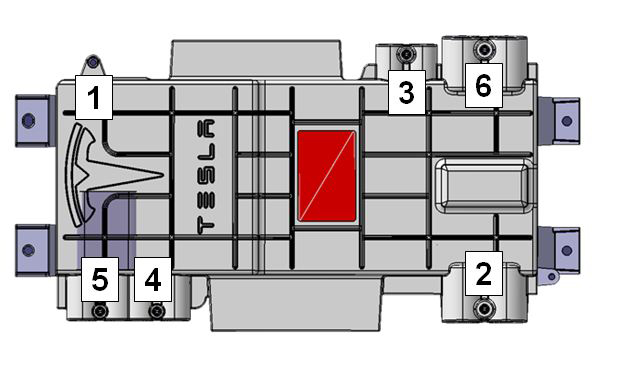
1 B+ Front Drive Unit (if equipped) 2 B- Front Drive Unit (if equipped) 3 B+ battery/drive inverter 4 B- battery/drive inverter 5 B+ DCDC converter 6 B- DCDC converter 7 B- charge port 8 B+ charge port Note: Vehicles with 3-phase charging have 4 harnesses to the charge port:
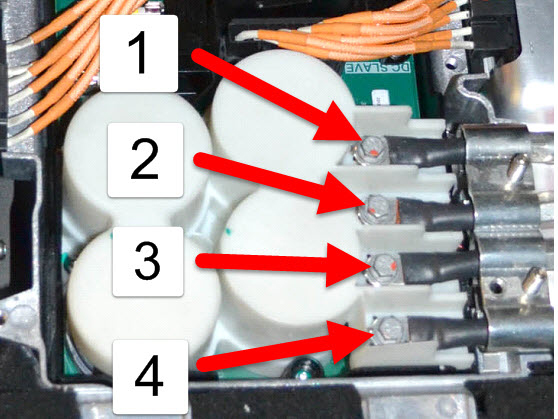
1 B+ N charge port 2 B- L1 charge port 3 B+ L3 charge port 4 B- L2 charge port