Position Switch Harness - Door Handle (Remove and Replace)

FRT No: 11457502

Note: This procedure is valid for all 2nd generation door handles.

Special tools required for this procedure:

Supplier Part Number Description
Bosch 223-28550-TSL Wiha (Torque Screwdriver .1 - .6Nm)

Removal

  1. Remove the exterior door handle.
  2. Remove and discard the door handle cover.
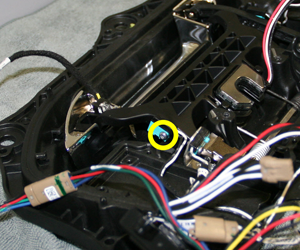
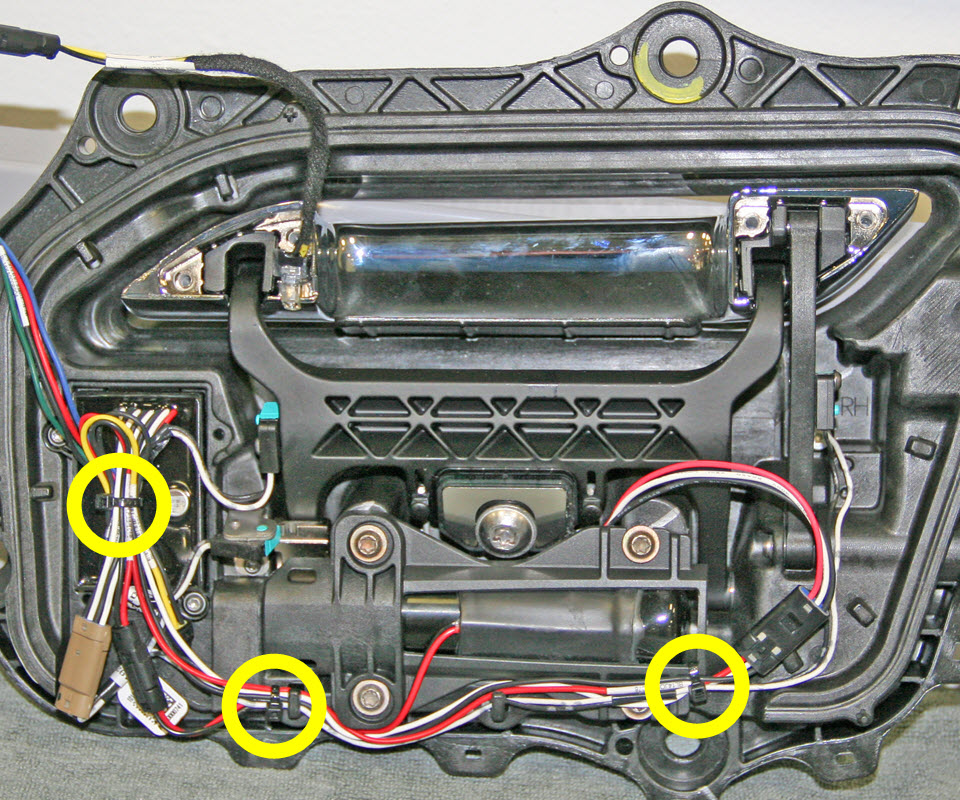
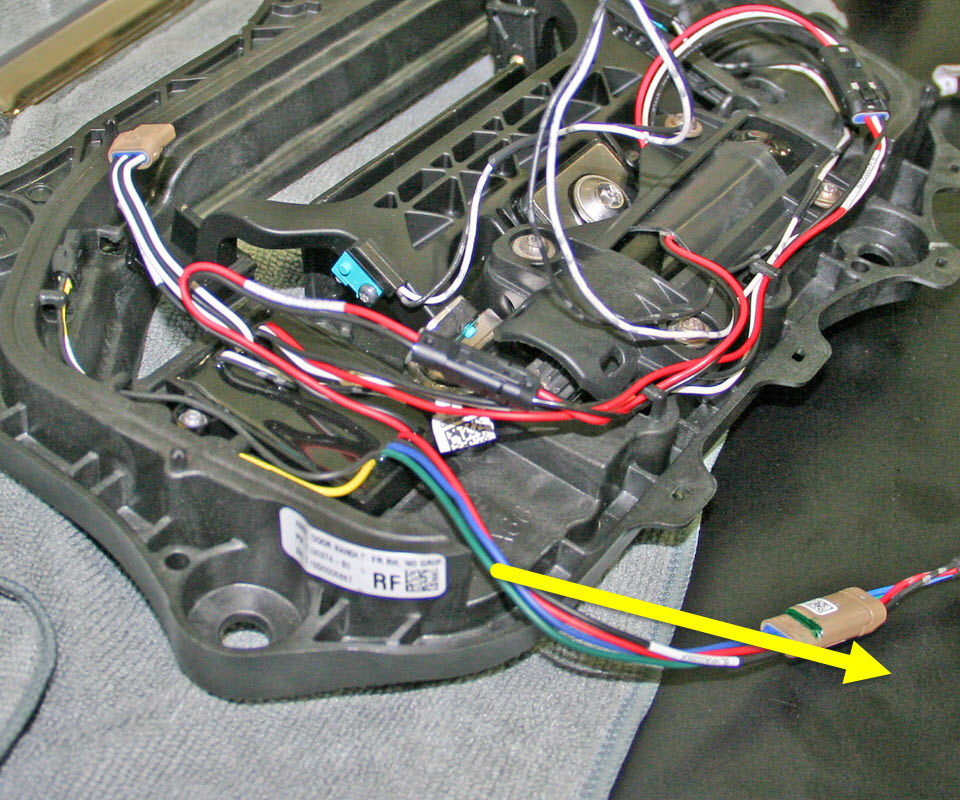
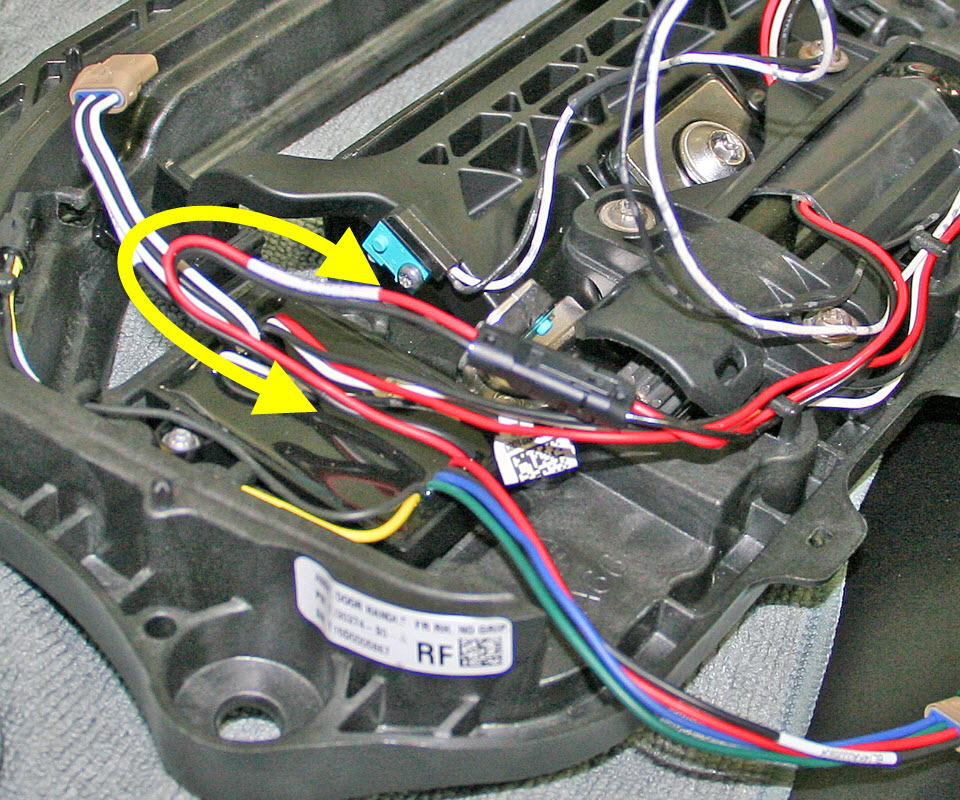
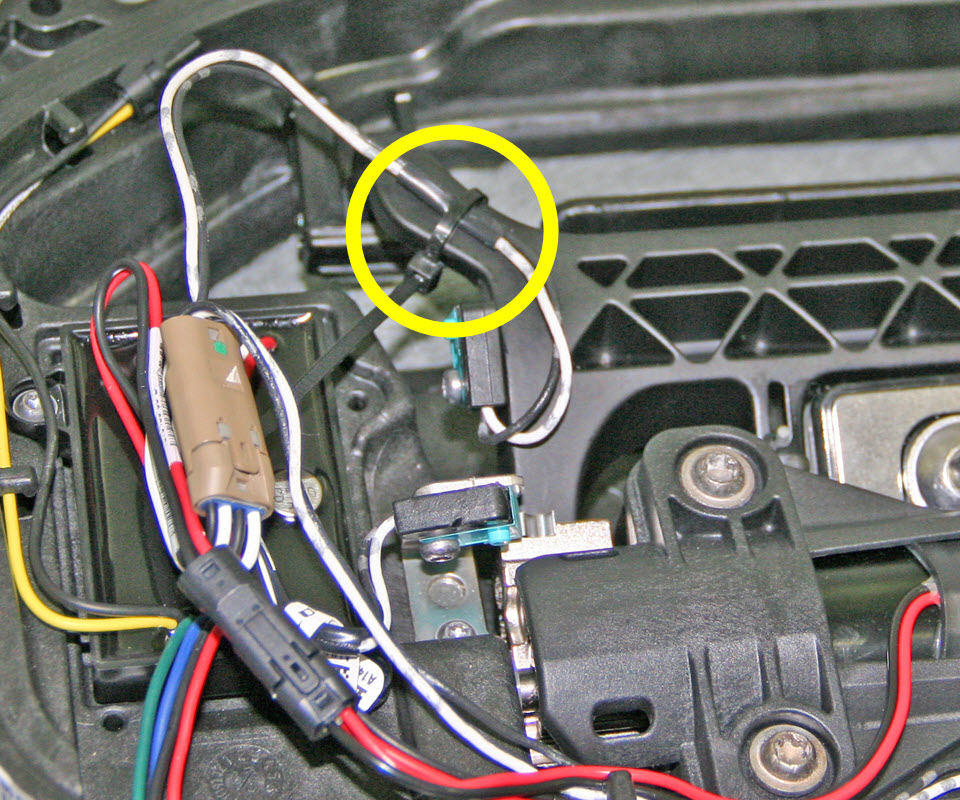
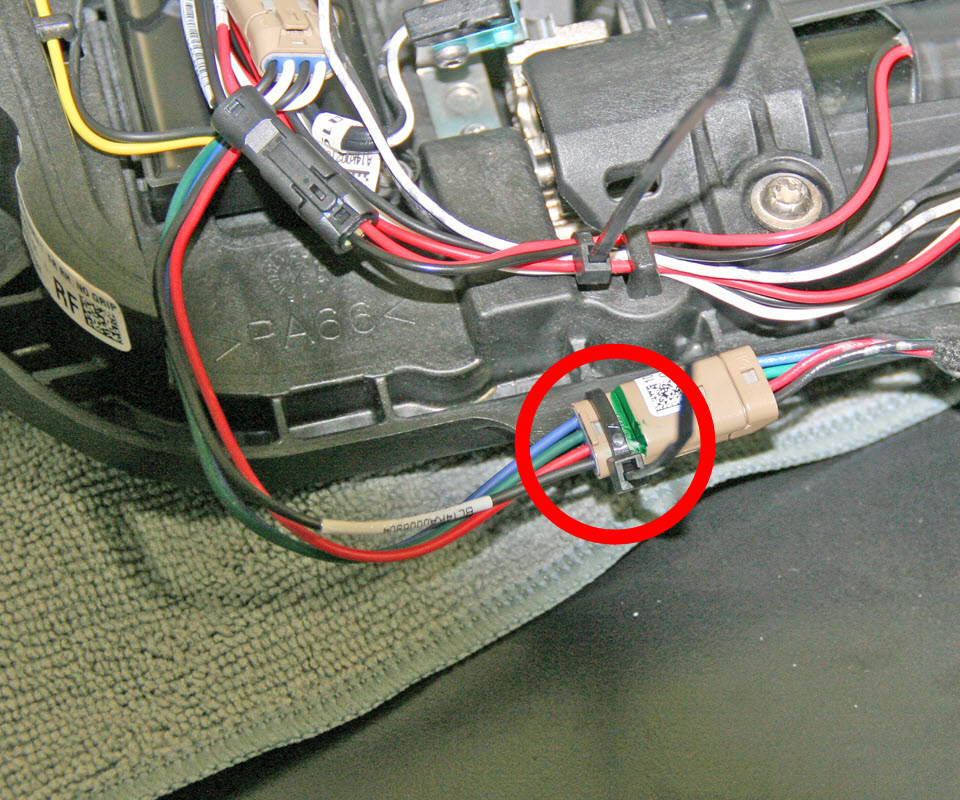
  3. Cut the cable ties that secure the wires to the door handle.
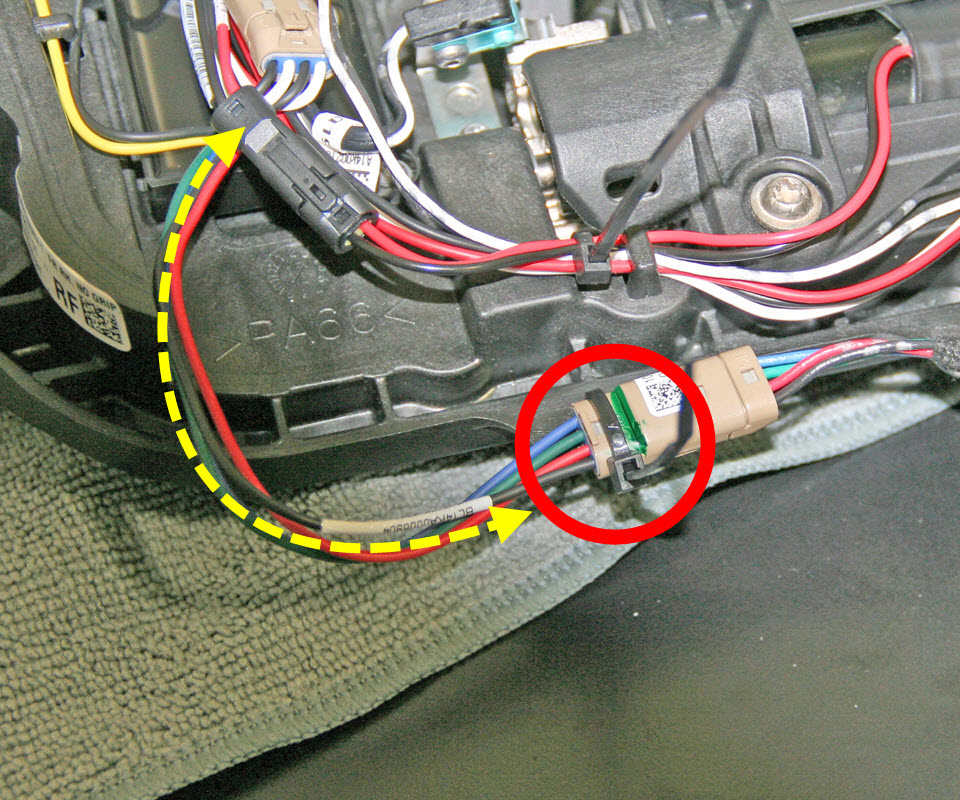
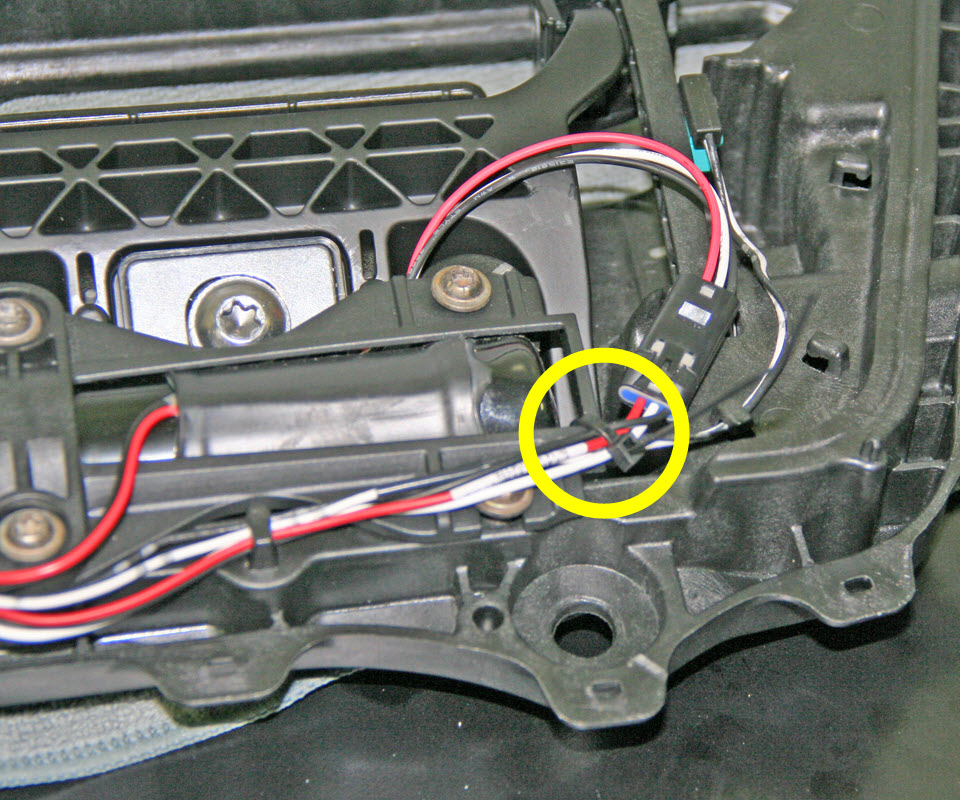
  4. Disconnect the electrical connectors (x2):
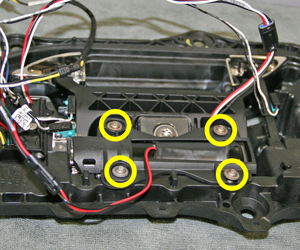
  5. Remove and discard the screws (x4) that secure the motor (torque 0.3 Nm). Remove the motor from the handle.
    Note: Rear door handles only have 3 screws.
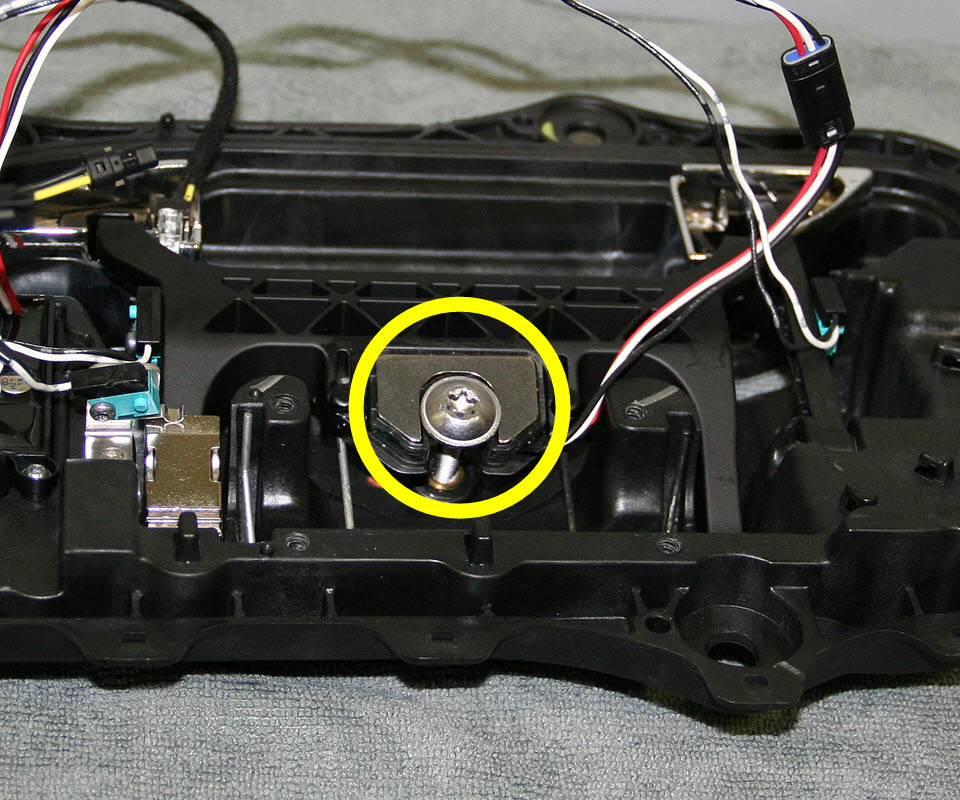
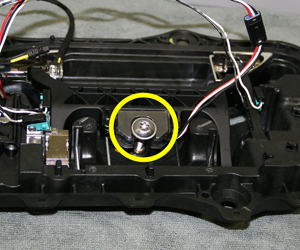
  6. Remove the adjustment screw from the door handle.
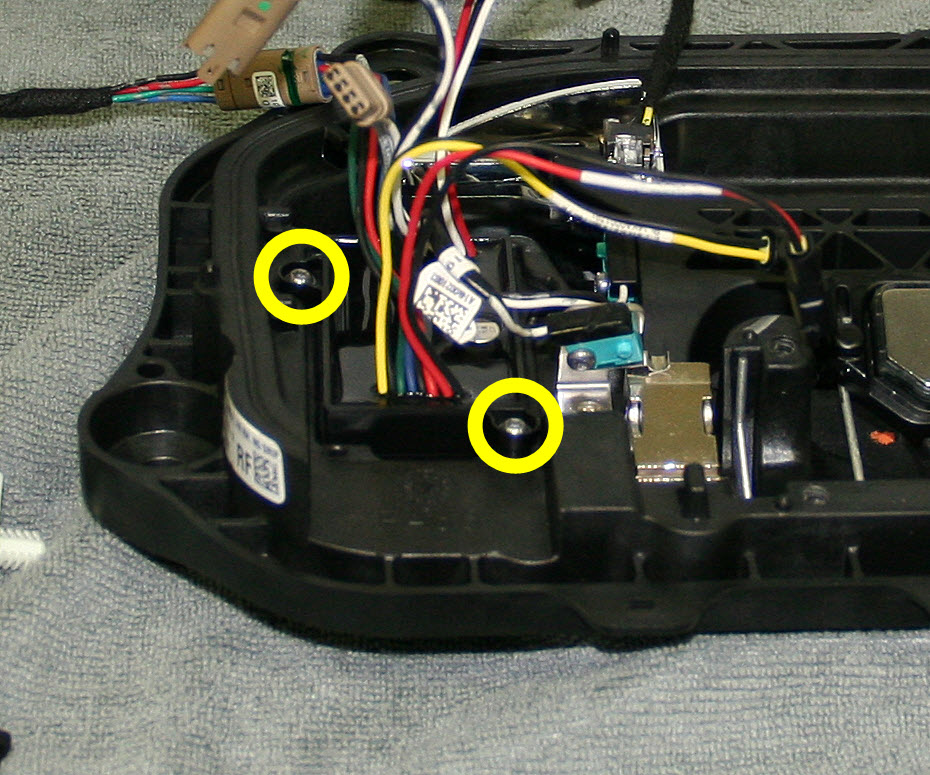
  7. Remove and discard the screws (x2) that secure the door handle module (torque 0.3 Nm).
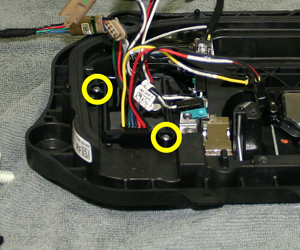
  8. Move the module out of the way, then release the screw that secures the rear microswitch (torque 0.3 Nm).
  9. Release the screw that secures the front microswitch (0.3 Nm).
  10. Remove the microswitch harness from the door handle.

Installation

  1. Install the microswitch harness.
  2. Reinstall all components other than the door backing. Leave the harnesses loose.
    Note: If performing this procedure on a rear door handle, do not install the lower rear screw for the motor bracket.
  3. Route the harnesses under the tabs as shown:
    1 Microswitch harness
    2 Microswitch and motor harnesses
    3 Microswitch, motor, and pressure harnesses
  4. Route the LED harness along the front of the handle and secure the connector.
  5. Move the primary door harness towards the bottom of the handle and out of the working area.
  6. Route the motor harness:
    • Front door handle: Route the harness so that it forms a loop above the door module.
    • Rear door handle: Route the motor harness so that it forms 2 loops below the door module.
  7. Connect the microswitch harness to the connector on the primary harness.
  8. Push the harnesses onto the module and hold them in place. Loop the microswitch harness so that the taped section is routed over the plastic extrusion.
  9. Use a cable tie to secure the taped section of harness to the plastic extrusion. Discard any excess tie.
  10. Use a cable tie to secure the microswitch, motor, and pressure harnesses together as shown. Discard any excess tie.
  11. Use a cable tie to secure the microswitch, motor, and pressure harnesses together as shown. Discard any excess cable tie.
  12. Form a drip loop in the primary door harness, then use a cable tie to secure the primary door harness connector to the door handle as shown. Discard any excess tie.
  13. Use a cable tie to secure the pressure switch to the door handle as shown. Discard any excess cable tie.
  14. Install a new door handle cover.
  15. Reinstall the door handle.