Disconnect the low pressure temperature transducer connector.
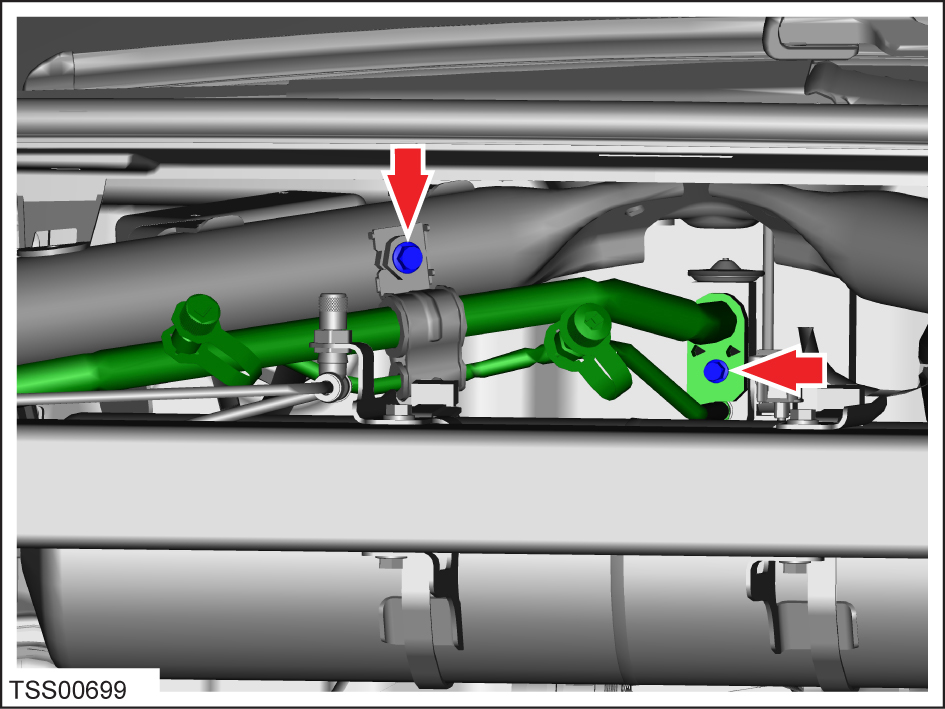
Remove the bolt that secures the low pressure pipe to the compressor (torque 15
Nm).
Remove the nut that secures the pipe retaining plate to the evaporator TXV
(torque 6 Nm).
Remove the bolt that secures the A/C pipe bracket to the cross-brace (torque 6
Nm).
Release the low pressure charge port pipe from the bracket.
Remove the bolt that secures the low pressure charge port pipe at the union to
the low pressure chiller pipe (torque 8 Nm).
Caution: Plug pipe connections to
prevent ingress of moisture or dirt.
Caution: Remove and discard O-rings.
Remove the bolts (x2) that secure the A/C pipe brackets to the crossmember and
the RH shock tower (torque 6 Nm).
Release the low pressure charge port pipe from the brackets (x2).
Maneuver and remove the pipe.
Installation
Installation procedure is the reverse of removal, except
for the following:
Replace the A/C pipe O-rings.
Caution: Lubricate new O-rings with clean
refrigerant oil.
If the new pipe does not have a low pressure temperature transducer, install a
refrigeration pressure sensor dummy plug on the vehicle-side electrical harness
connector.