Coolant Heater - Electric - Battery (Dual Motor) (Remove and Replace)

FRT No: 18307302

Warning: Only technicians who have been trained in High Voltage Awareness are permitted to perform this procedure. Proper personal protective equipment (PPE) and insulating HV gloves with a minimum rating of class 00 (500V) must be worn any time a high voltage cable is handled. Refer to Tech Note TN-15-92-003, "High Voltage Awareness Care Points" for additional safety information.

Removal

  1. Disconnect 12V and HV power (refer to procedure).
  2. Remove the wiper motor (refer to procedure).
  3. Remove the LH and RH shock tower to bulkhead struts (refer to procedure).
  4. Release the 2 bolts that secure each fuse box to the front crossmember (torque 5 Nm).
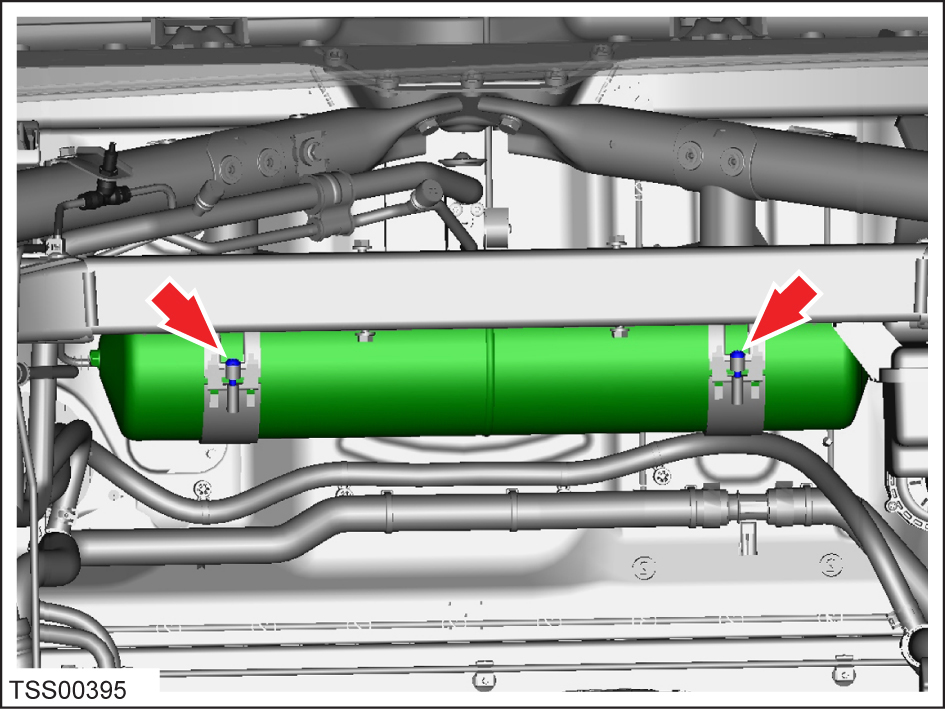
  5. If the vehicle is equipped with air suspension, release the bolts (x2) that secure the air reservoir (torque 2.5 Nm). Carefully set the reservoir in the RH side of the underhood area.
    Note: It is not necessary to disconnect the air lines.
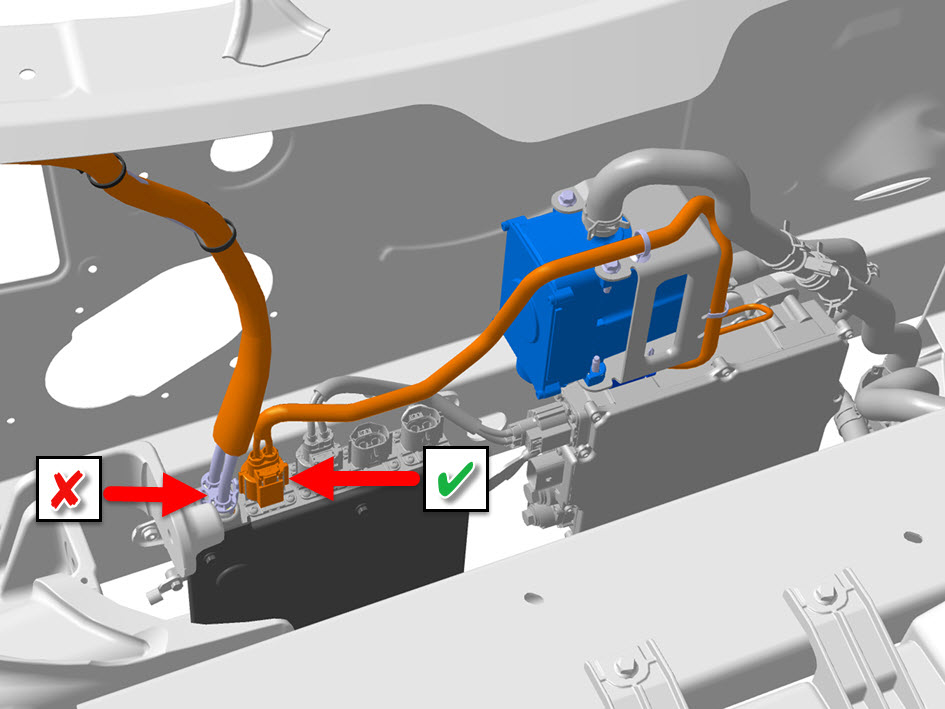
  6. On top of the forward junction box, release the harness that leads to the battery coolant heater.
    Caution: Do not disconnect the RH most harness from the forward junction box.

Warning: Before continuing, put on high voltage gloves.

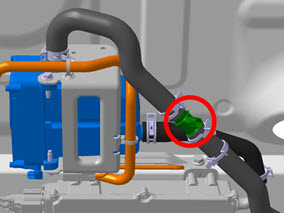
  1. Disconnect the temperature sensor connector from the coolant hose.
    Note: Disconnecting this connector allows the coolant hose to move out of the way more freely when the heater is removed.

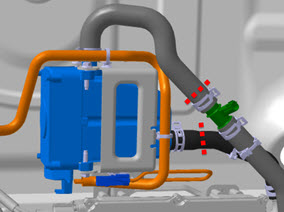
Note: Before continuing, place a coolant catcher underneath the vehicle and place suitable absorbent material around the affected area.

  1. Clamp and disconnect the 2 coolant hoses.
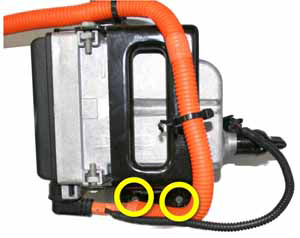
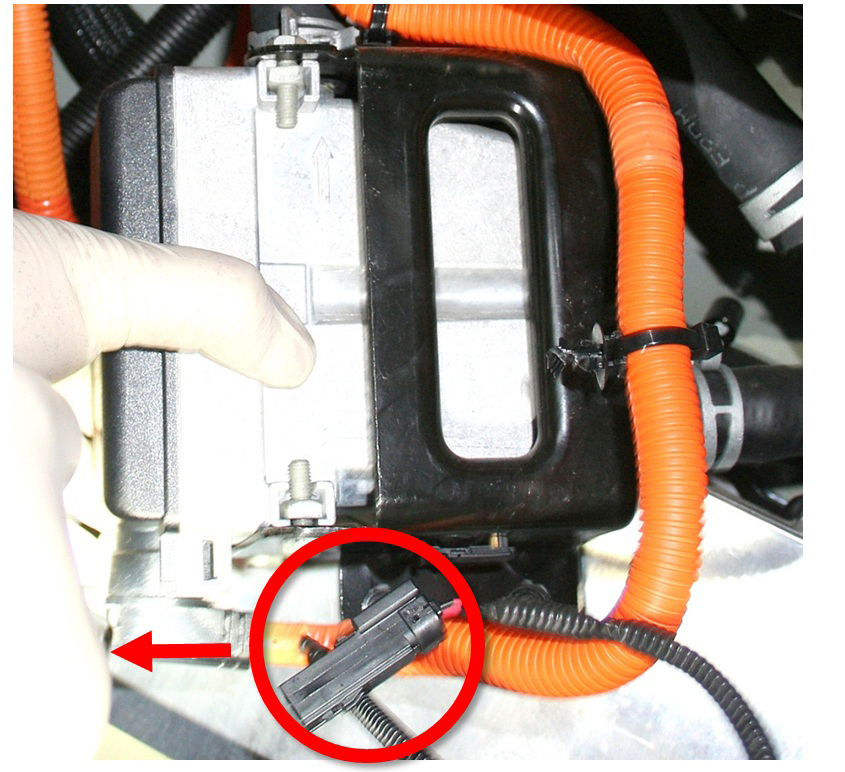
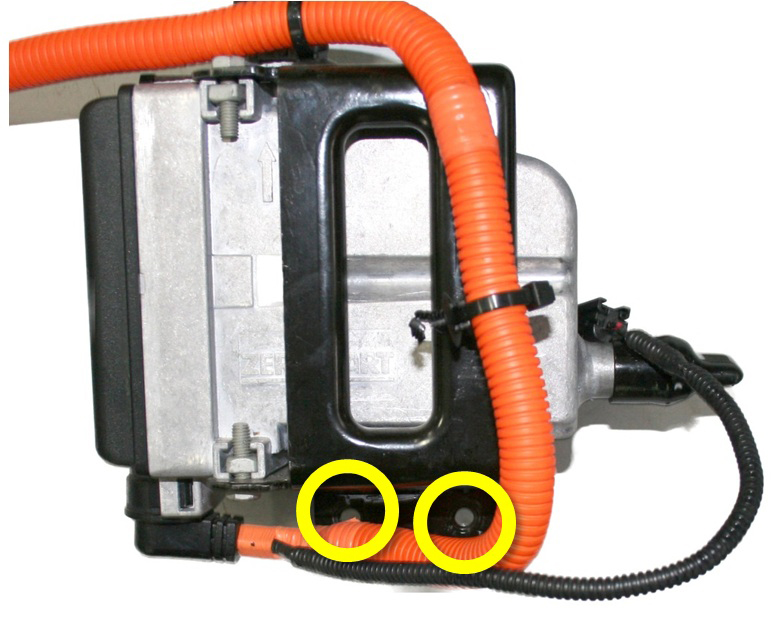
  2. At the base of the coolant heater bracket, disconnect the harness that leads to the DCDC converter.
  3. Slide the harness connector off of the base of the coolant heater assembly.
  4. Release the 2 bolts that secure the coolant heater assembly to the crossmember (torque 8 Nm).

Installation

Installation procedure is the reverse of removal, except for the following:
  • Transfer the coolant hose and bracket to the new part.
  • Ensure that all areas are clean and dry before installing the coolant heater.

  • When all components have been reinstalled, refill and bleed the cooling system (refer to procedure).

  • If necessary, adjust the wipers (refer to procedure).