Bushing - Drive Unit - Rear (Remove and Replace)

FRT No: 40111502

Warning: To avoid personal injury, eye protection must be worn when performing this operation.
Warning: To avoid personal injury, safety-toe shoes and cut-resistant gloves are recommended when performing this operation.
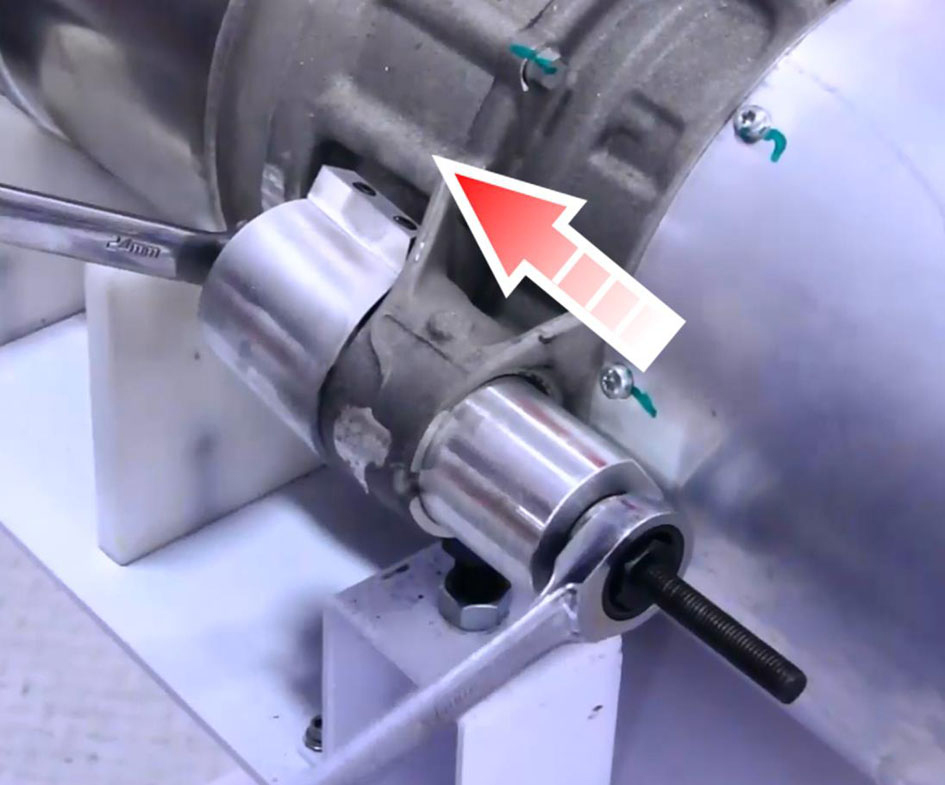
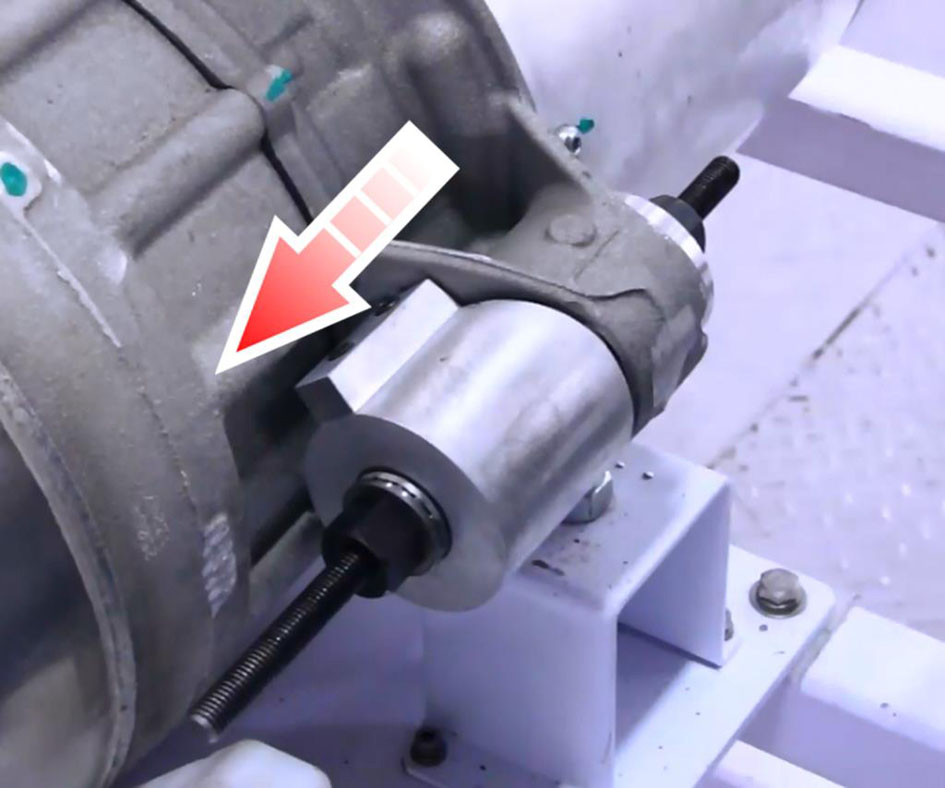
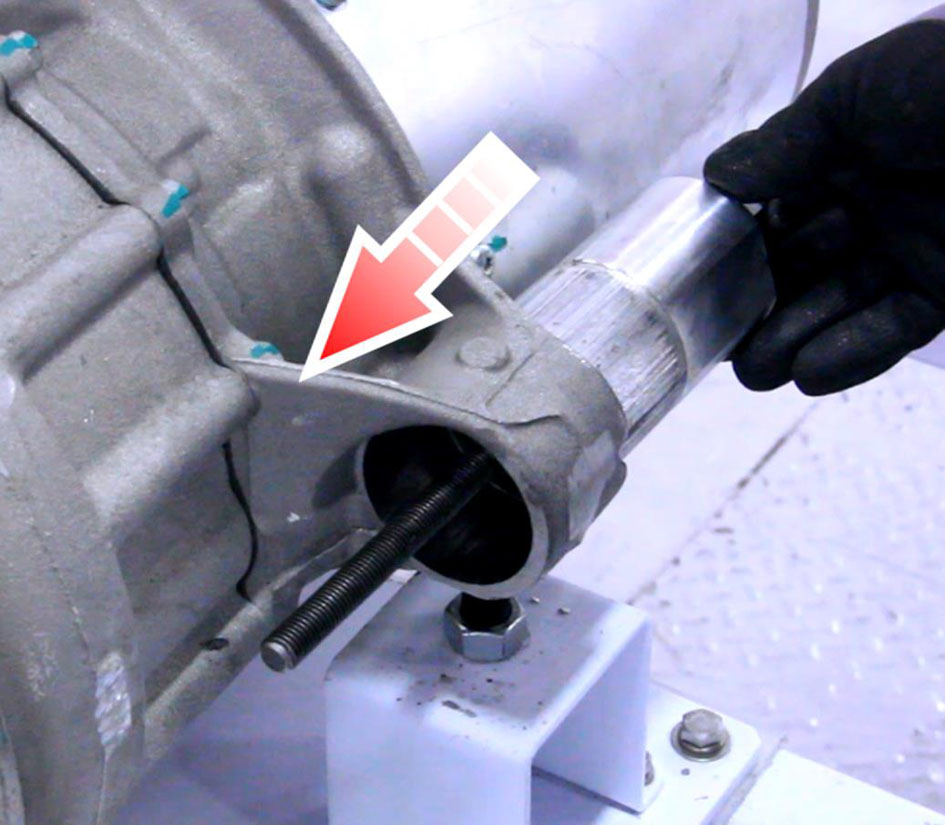
Note: A demonstration video for removing and replacing the drive unit bushing can be found on the Tesla Academy training site. It is listed as TAS-DU-BUSHING-OLT-01_EN: Model S Drive Unit Bushing Removal Video.

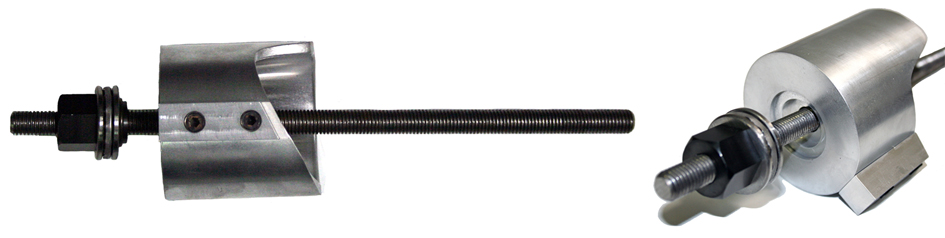
The drive unit bushing tool set includes the following parts:

1 Driver
2 Front bushing cup
3 Rear bushing cup
4 Nut bearing assemblies
5 Threaded rod

Bushing Removal, Rear Motor Mount

  1. Remove the drive unit (refer to procedure).
  2. Use brake cleaner to clean the threaded rod and the nut bearing assemblies.
  3. Use 3M Spray Lube 08878 or equivalent to lubricate the threaded rod and the nut bearing assemblies.
  4. Thread 1 nut bearing assembly onto 1 end of the threaded rod.
  5. Slide the closed end of the rear bushing cup onto the other end of the threaded rod.
  6. Slide the other end of the threaded rod through the left side of the rear bushing.
  7. Slide the driver onto the other end of the threaded rod so that the side of the driver with the single tapered counterbore faces the bushing.
    1 Faces bushing
    2 Faces nut bearing assembly
  8. Thread the second nut bearing assembly onto the other end of the threaded rod until it lightly touches the driver.
  9. Adjust the assembly until the rear bushing cup is seated flush against the front motor mount.
  10. Place a 1 in (24 mm) ratchet wrench onto each nut bearing assembly.
  11. Alternate rotating the ratchet wrenches to push the driver towards the rear bushing cup until the bushing is removed into the bushing cup.
    Caution: If the effort required to rotate the ratchet wrenches is excessive, the tool is misaligned and continued ratcheting could cause damage. Loosen the nut bearing assemblies on the threaded rod, add lubrication to the threaded rod, realign the parts, and begin again.
  12. Remove the tool and the bushing from the rear motor mount.
  13. Disassemble the removed tool. Discard the bushing.

Bushing Installation, Rear Motor Mount

  1. Use brake cleaner to clean the threaded rod and the nut bearing assemblies.
  2. Use 3M Spray Lube 08878 or equivalent to lubricate the threaded rod and the nut bearing assemblies.
  3. Slide the bushing into the right side of the rear motor mount so that the longer cavities are horizontal on the bushing.
    Tip: Draw a reference line on the bushing prior to installation to aid with orientation.
  4. Thread 1 nut bearing assembly onto 1 end of the threaded rod.
  5. Slide the driver onto the other end of the threaded rod so that the side of the driver with the single tapered counterbore faces away from the nut bearing assembly.
  6. Slide the other end of the threaded rod through the right side of the rear bushing.
  7. Slide the rear bushing cup onto the other end of the threaded rod.
  8. Thread the second nut bearing assembly onto the other end of the threaded rod until it lightly touches the driver.
  9. Adjust the assembly until the rear bushing cup is seated flush against the rear motor mount.
  10. Place a 1 in (24 mm) ratchet wrench onto each nut bearing assembly.
  11. Alternate rotating the ratchet wrenches to push the driver towards the rear bushing cup until the bushing is aligned with the machined face of the motor mount (the bushing is slightly visible from the right side of the front motor mount).
    Caution: If the effort required to rotate the ratchet wrenches is excessive, the tool is misaligned and continued ratcheting could cause damage. Loosen the nut bearing assemblies on the threaded rod, add lubrication to the threaded rod, realign the parts, and begin again.
  12. Disassemble and remove the tool from the bushing and the rear motor mount.