AC Refrigerant Leak Detection

FRT No: 18200200

  1. Recover refrigerant from the vehicle (refer to procedure), see section "Recover Refrigerant and Verify Charge").
  2. Remove the underhood storage unit(refer to procedure).
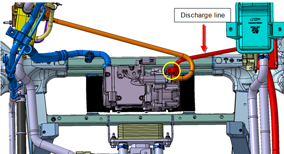
  3. Release the bolt that secures the HVAC compressor discharge line (torque 10 Nm).
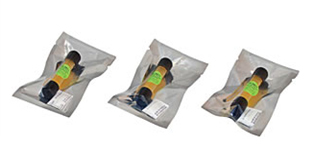
  4. Pour 1 container of Tracerline Tracer-Stick TP-3811 Hybrid / POE ultraviolet leak detection dye (Figure 7) into the A/C compressor discharge port and resecure the bolt (torque 10 Nm).
  5. Recharge the vehicle with refrigerant (refer to procedure, see section "Recharge Refrigerant").
  6. On the vehicle’s touchscreen, touch Climate. Set Temp to LO and Fan to HI on both the driver and passenger controls.
  7. Run the A/C system for 10 minutes to allow the dye to circulate.
  8. Using an ultraviolet (UV) or blue light lamp, examine all AC lines for leaks. Leaks glow a bright yellow-green.
  9. Once the leak is located, recover refrigerant from the vehicle (refer to procedure, see section "Recover Refrigerant and Verify Charge").
  10. Replace the defective component.
  11. Recharge the vehicle with refrigerant (refer to procedure, see section "Recharge Refrigerant").
    Note: If a component was replaced, additional oil must be added to the system. See the end of the "Recover Refrigerant and Verify Charge" section for more information.
  12. Use a general-purpose shop cleaner to clean off all dye residue. This prevents leftover residue from being mistake for a leak in future repairs. Confirm that all residue is removed by inspecting all AC lines with a UV or blue light lamp
  13. Run the A/C system with the temp on LO and the fan on HI. Inspect all AC lines with a UV lamp or blue light to verify repairs.
  14. Fill out the Tracerline dye label and place it next to the A/C refrigerant label on the right underhood apron to inform future technicians that dye has been added to the A/C system.