Hose - HVAC - Drain (Remove and Replace)

FRT No: 18103602

Removal

  1. Remove the LH closeout extension assembly (refer to procedure).
    Note: For vehicles built with the cold weather package between May 31, 2013 and July 11, 2014, a fuse box blocks access to the drain hose from the LH side. Remove the RH closeout extension assembly, then continue with the procedure by accessing the hose from the RH footwell.
  2. Remove the underhood storage carpet (refer to procedure).
  3. Remove the front underhood apron (refer to procedure).
  4. Remove the screws (x5) that secures the underhood storage extension box to the underhood storage unit.
  5. Remove the extension box.
  6. From the LH footwell, place a rag under the hose to catch any remaining fluid.
  7. Twist the hose to loosen and remove it from the nipple.
    A HVAC nipple
    B HVAC hose
  8. Spray silicone lubricant on the area where the hose runs through the firewall grommet.
  9. From the underhood area, spray silicone lubricant on the firewall grommet.
  10. Pull the hose out through the grommet.
  11. Discard the hose.

Installation

  1. Spray silicone lubricant onto the grommet and the tip on the straight end of the new hose.
  2. Fold the straight end of the new hose into a U-shape and slide it into the grommet from the underhood area.
  3. From the LH footwell, install the hose onto the HVAC nipple.
    A HVAC nipple
    B HVAC hose
  4. If the vehicle originally had the long drain hose that routed over the crossmember, continue to step 5. If the vehicle originally had the short drain hose that ended at the firewall, complete the steps in the Upgrade Drain Hose section before continuing to step 5.
  5. Push the hose into the cable clip on the crossmember until it sits snugly in the clip.
  6. Reinstall the components that were removed for access.

Upgrade Drain Hose

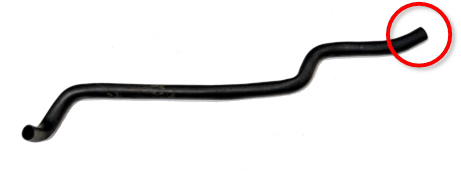
Note: Only complete the steps in this section if upgrading the drain hose. See step 4 of the Installation section.
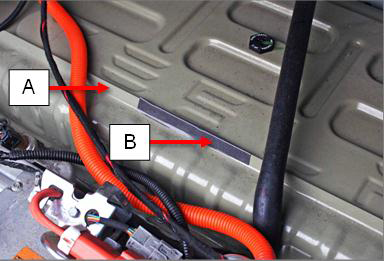
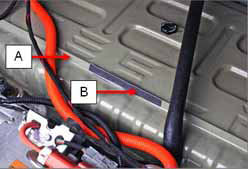
  1. Clean both sides of the cover lip on the front center of the HV battery with an alcohol wipe and allow to completely dry.
  2. Remove the backing from the sealing tape and fold it over the cover lip. Use a plastic tool to smooth down the tape.
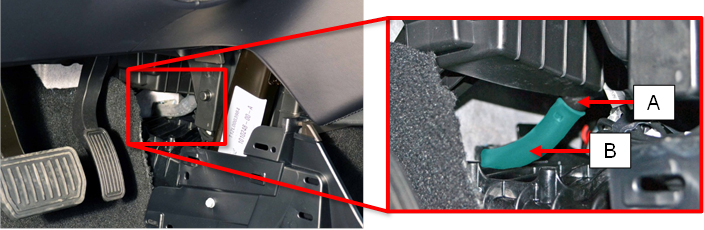
    A Cover lip
    B Sealing tape
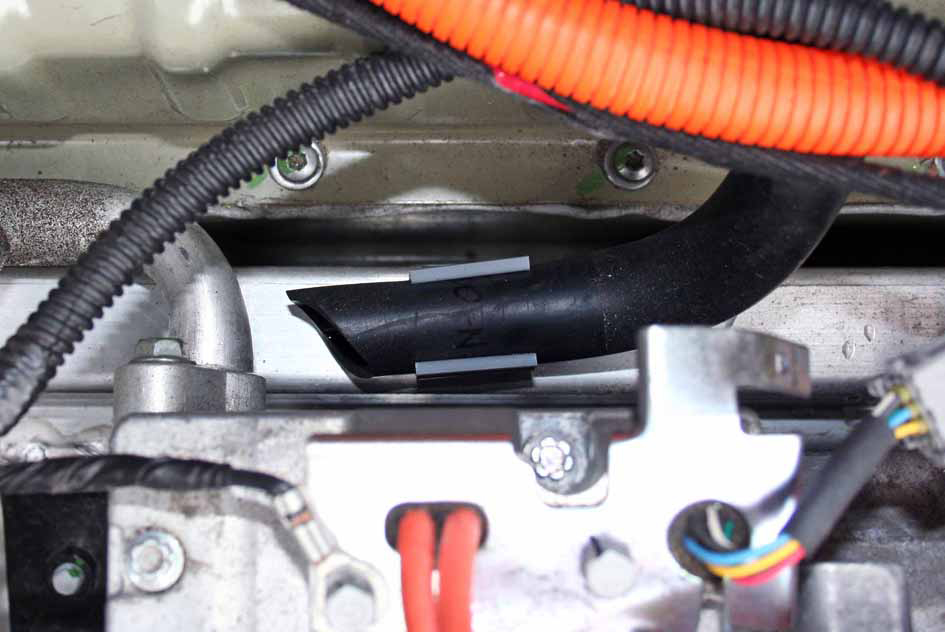
  3. Clean the crossmember near the back of the A/C compressor with an alcohol wipe and allow to completely dry.
  4. Apply adhesion promoter to the crossmember.
  5. Remove the backing from the hose clip and press it firmly onto the crossmember to secure.