Pipe - High Pressure - Charge Port (Dual Motor) (Remove and Replace)

FRT No: 18204702

Warning: If the 12V power supply is disconnected, do not attempt to open any doors with door glass in closed position. Failure to follow this instruction could result in door glass shatter.
Note: Before disconnecting the 12V power supply, ensure that the driver’s door window is fully open. Failure to follow this instruction could result in vehicle lockout.

Removal

  1. Remove the 12V battery bracket beam (refer to procedure).
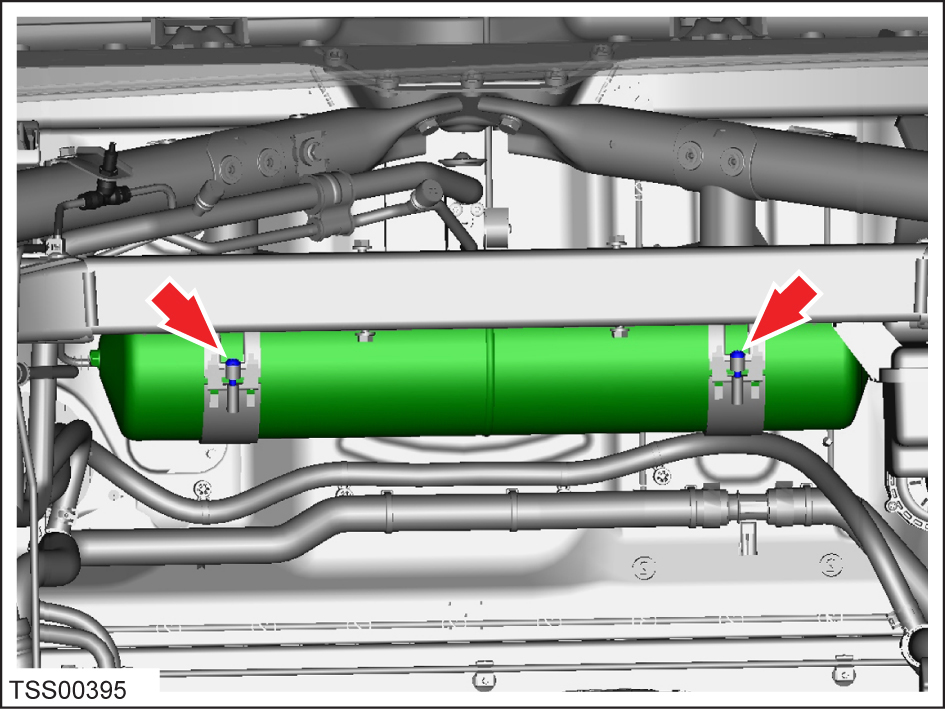
  2. If the vehicle is equipped with air suspension, release the bolts (x2) that secure the air reservoir (torque 2.5 Nm). Carefully set the reservoir in the RH side of the underhood area.
    Note: It is not necessary to disconnect the air lines.
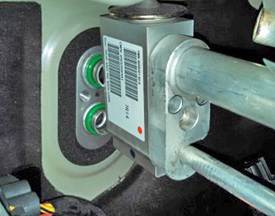
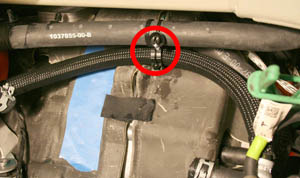
  3. Release the bolt that secures the high pressure and low pressure pipes to the TXV at the bulkhead (torque X Nm).
    Note: The TXV and pipes must be removed at the same time.
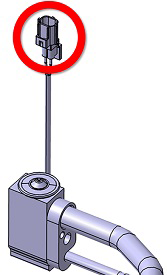
  4. Disconnect the TXV connector and release the clip that secures it.
  5. Remove the TXV from both pipe assemblies.
  6. Remove the nuts (x2) that secure the AC lines to the compressor (torque 10 Nm). Release the lines and remove the seals. Plug the holes.
    Note: The following figure shows the compressor from the rear of the vehicle.
    Caution: The holes must be plugged to prevent contamination.
    Caution: Remove and discard O-rings.
  7. Plug both holes and cap both lines.
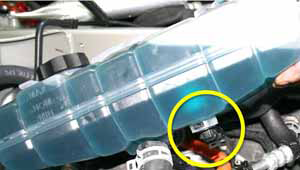
  8. Disconnect the coolant level sensor harness.
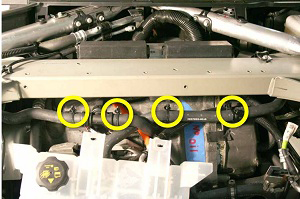
  9. Release the bolts (x4) that secure the coolant reservoir to the front crossmember (torque 6 Nm).
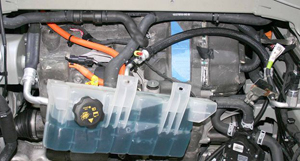
  10. Pull the reservoir forward into the underhood area.
    Note: The reservoir hose is routed behind the hose that connects to the gearbox. Note the routing of the hoses and ensure that they are routed correctly during reinstallation.
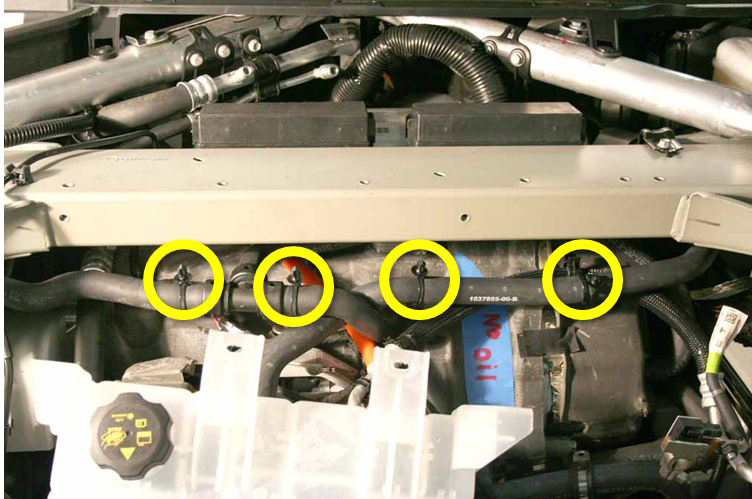
  11. Gently pull down on the 2 coolant hoses to release the clips (x4) that secure them to the front crossmember.
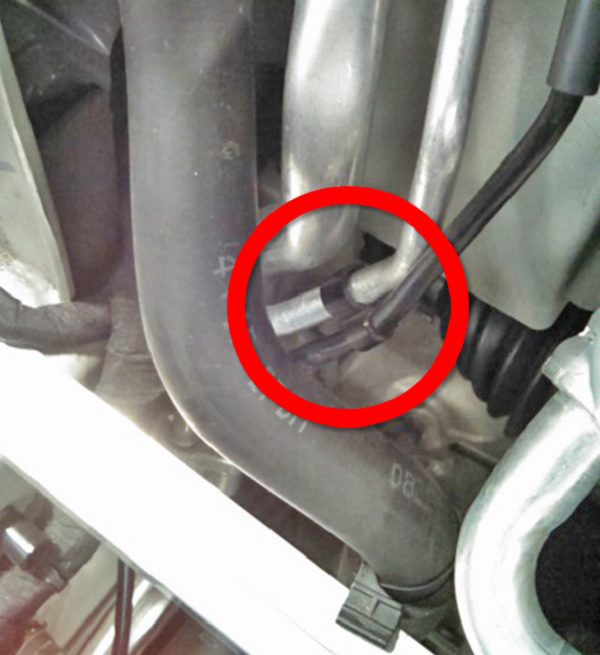
  12. Release the clip that secures the coolant reservoir hose to the A/C line.
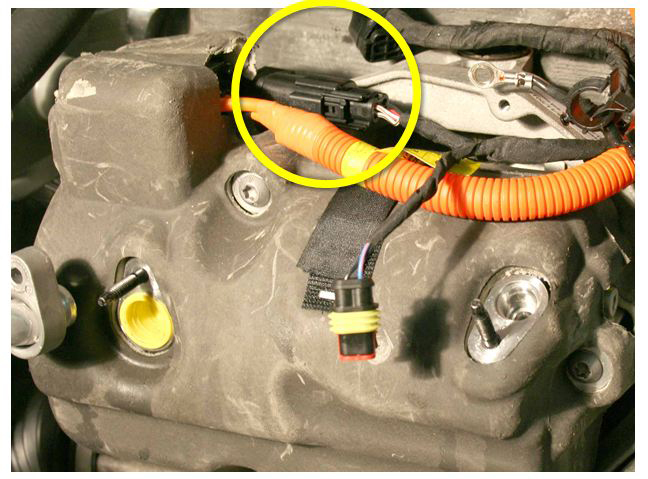
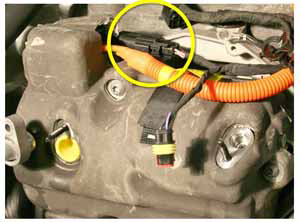
  13. Disconnect the compressor LV harness.
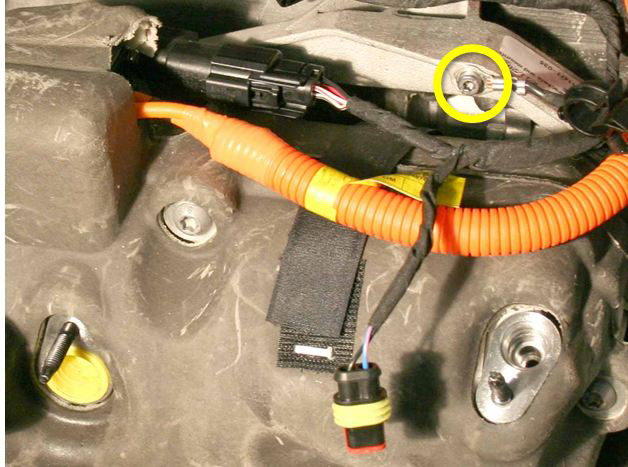
  14. Release the ground strap from the A/C compressor bracket (torque 7 Nm).
  15. Release the edge clip that secures the LV harnesses to the compressor bracket.
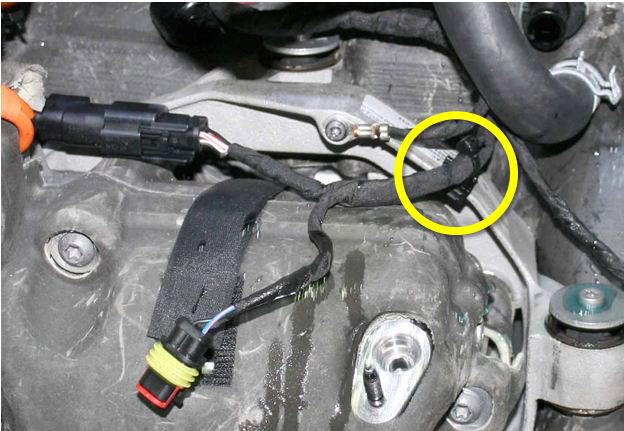
  16. Release the fir tree clip that secures the LV harnesses to the top of the front drive unit.
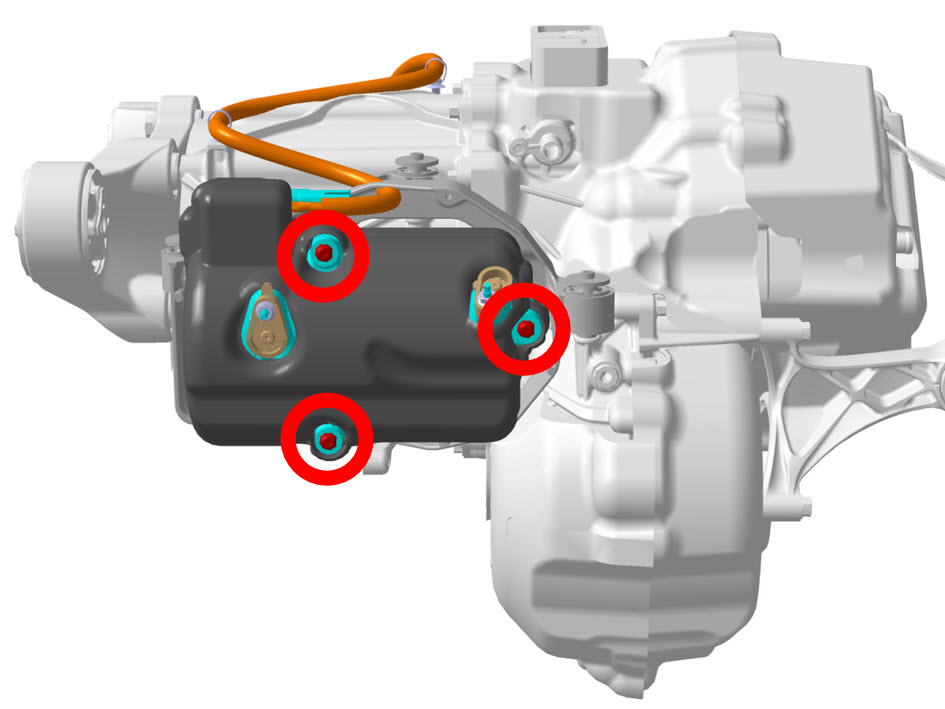
  17. Remove the bolts (x3) that secure the compressor bracket to the drive unit (torque 20 Nm). Move the compressor aside.
  18. Remove the RH fuse box from the crosscar beam and move it out of the working area.
  19. Remove the bolt that secures the upper high pressure pipe to the lower high pressure pipe (torque X Nm).
  20. Remove the bolt that secures the upper low pressure pipe to the lower low pressure pipe (torque X Nm).
  21. Remove the bolt that secures both pipes to the crosscar beam (torque X Nm).
  22. Release the clip that secures the air suspension line to the high pressure pipe.
  23. Remove both pipe assemblies from the vehicle by maneuvering them between the cross car beam and the bulkhead.
    Note: The pipes will need to be rotated towards the center of the vehicle in order to clear the cross car beam.

Installation

Installation procedure is the reverse of removal, except for the following:
Caution: Lubricate new O-rings with clean refrigerant oil.
Verify that the AC system works properly.