Note: After disconnecting 12V power,
the rear doors and liftgate are inoperable. Open any necessary closures before
proceeding.
-
Open the liftgate.
-
If equipped, fold down the 3rd row seats.
-
Disconnect 12V power (refer to
procedure).
Caution: Ensure that the first responder loop has been disconnected
for at least 2 minutes.
-
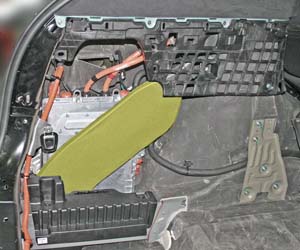
Remove the LH rear trunk carpet and trim assembly (refer to procedure).
-
Remove the foam HVAC ducting.
-
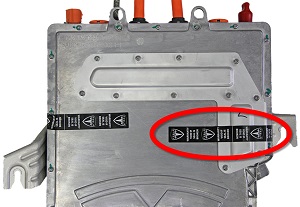
Remove and discard the warranty label from the charger access panel.
Note: Components have been removed
in this graphic to aid clarity.
-
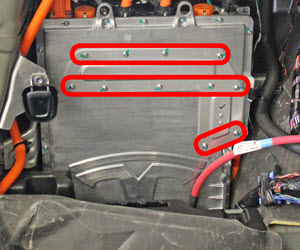
Remove the screws (x11) that secure the charger access panel (torque 2
Nm).
Warning: Only technicians who have been
trained in High Voltage Awareness are permitted to perform this procedure.
Proper personal protective equipment (PPE) and insulating HV gloves with a
minimum rating of class 00 (500V) must be worn any time a high voltage cable is
handled. Refer to Tech Note TN-15-92-003, "High Voltage Awareness Care Points"
for additional safety information.
-
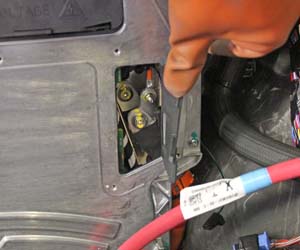
Gently peel back the rubber cover to expose the HV fasteners.
-
Use the charger casing as a chassis ground. Measure the following
voltages:
Warning: Ensure
that the multimeter and leads are capable of handling at least
500V.
Warning: Do not use a probe with an exposed tip length that is
greater than 3 mm.
- B+ to ground
- B- to ground
- B+ to B-
Warning: If any voltage reading is more
than 10V, the high voltage contactors are not fully opened. Due to the risk of
electrocution, contact Service Engineering before performing any further
work.
-
Replace components that were removed for access.
Note: Clean the adhesive
residue on the charger and charger access panel with an alcohol wipe
before installing a new warranty label.


