There are a few commercial services that provides logging for Tesla vehicles, TeslaFi, LinkMyTesla, Teslascope and a few others. These often cost money and all of them requires you to “give up” your Tesla account username and password for the service to function as intended.
TeslaMate on the other hand is a self-hosted data logger for Tesla vehicles. Which means you can install it locally and within your control, without giving away the Tesla account credentials to a third party.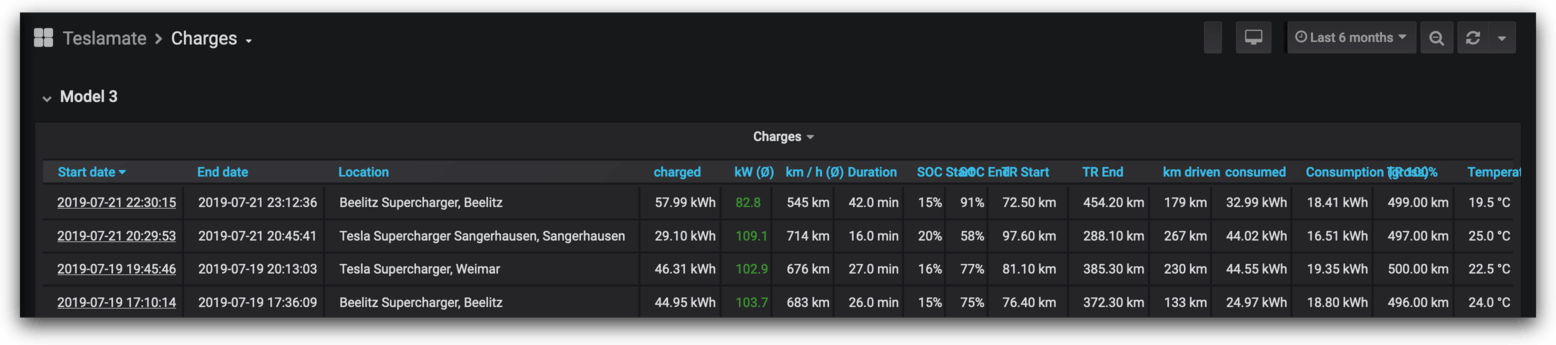
This particular guide is focused on installing and getting TeslaMate up and running using a virtual computer from DigitalOcean. It is not for free, but it can be a very cheap alternative if you for some reason don’t like using the commercial services available.
Simply put – the perfect setup if you want total control and privacy!
Disclaimer:
Please note that the use of the Tesla API and this software in particular is not endorsed by Tesla Inc, the developer or myself. Use at your own risk as I or anyone else cannot be held accountable for your actions!
[Last updated: 7th. October 2019]
– Added index
– Added Tasker App setup
Update changelog:
– Autostart services
– Misc typos
Prerequisites:
The guide itself is a bit technical and you should have basic skills when it comes to editing files, transferring and running commands. Also, there is a more advanced step if you want more than the basic setup. The advanced setup guide features HTTPS, Let’s Encrypt SSL-certificate, FQDN and password protection of the sites. And an optional Tasker app setup for enabling Bluetooth connectivity check to resume/suspend logging.
Index step-by-step installation guide:
- DigitalOcean Docker installation
- Easy setup
or - Advanced setup
- Tasker App setup (optional for Android)
DigitalOcean Docker installation:
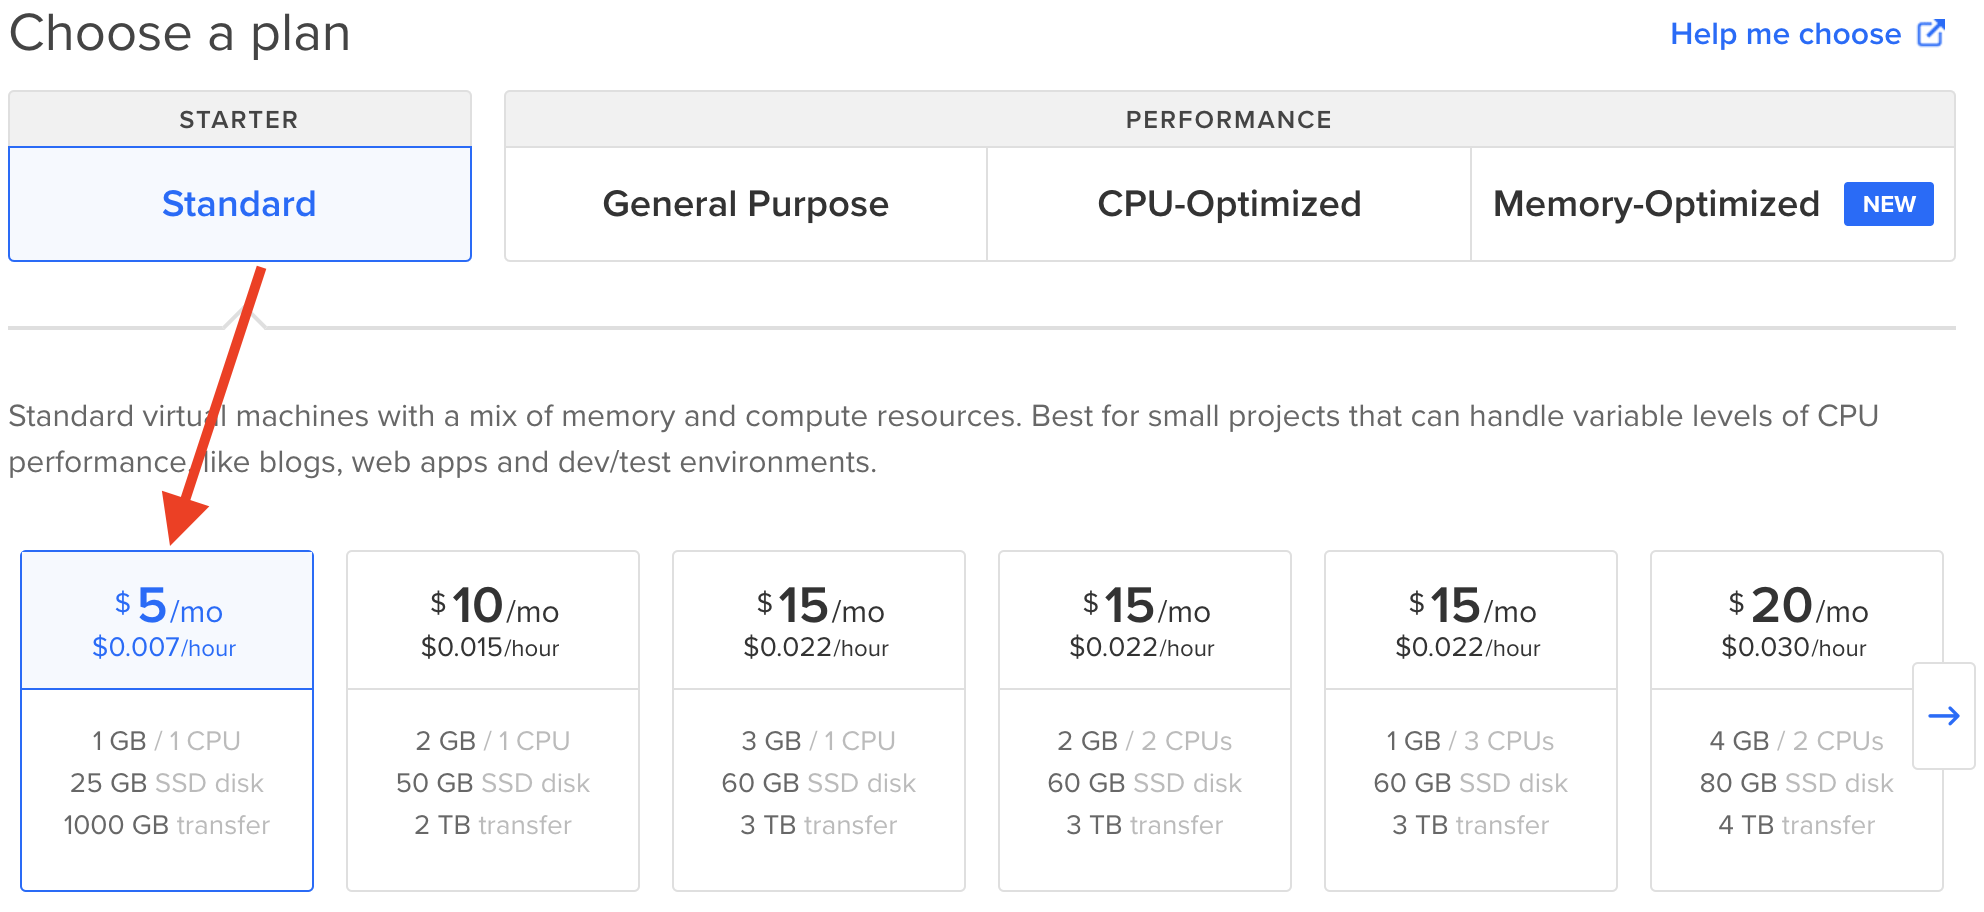
- Create a DigitalOcean Droplet and choose the Docker image from Marketplace:
 The Standard $5 /mo plan should suffice for this purpose:

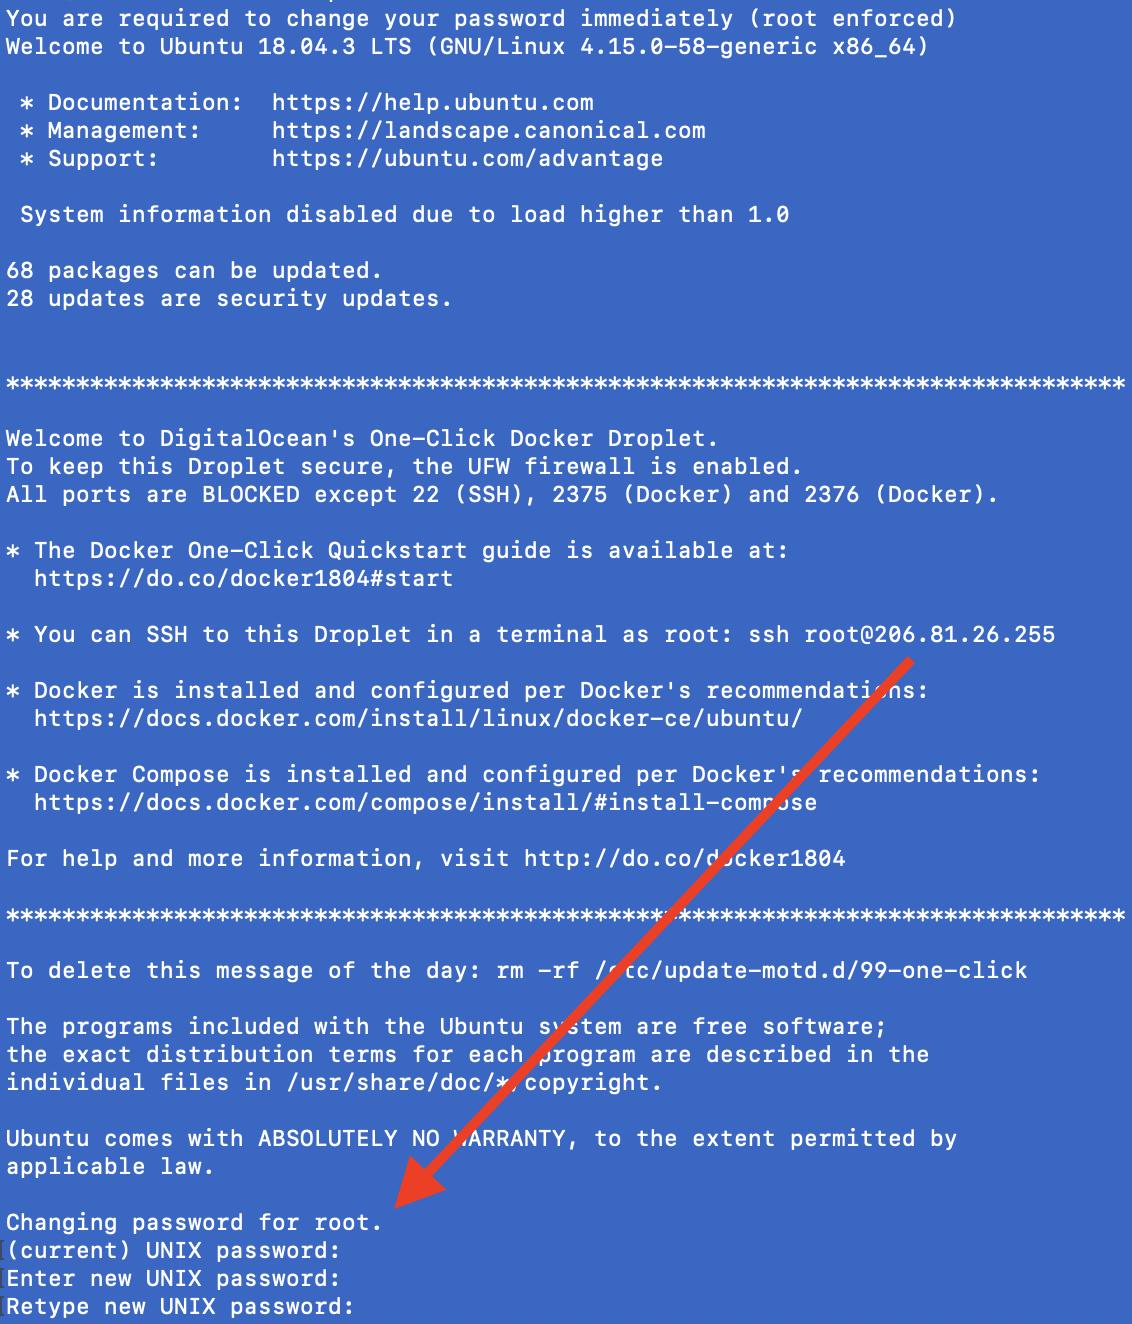
- Log into your newly created Droplet by using the SSH command from a Terminal window or use i.e PuTTY (check your email for the root password):
ssh -l root ip_address_of_droplet
- After logging in, you are asked to change the root password. Enter the current password, a new one and confirm again with your chosen password:

- You are actually now done with the installation of the Droplet (virtual machine) itself.
- Depending on you want the Easy or Advanced setup going forward, skip to the guide you want to use:
Easy setup (recommended)

Advanced setup (HTTPS, Let's Encrypt SSL-certificate, FQDN and password protection of sites)

Easy setup method:
- Open up your favourite text editor (Windows Notepad, BBEdit, Notepad++, etc) and paste in the following text and save it as docker-compose.yml. Remember to change the environment variables for the passwords if you want and the IP address after VIRTUAL_HOST:
version: '3'
services:
  teslamate:
    image: teslamate/teslamate:latest
    restart: unless-stopped
    environment:
      - DATABASE_USER=teslamate
      - DATABASE_PASS=secret # change this to whatever you like
      - DATABASE_NAME=teslamate
      - DATABASE_HOST=db
      - MQTT_HOST=mosquitto
      - VIRTUAL_HOST=_your_ip_ # if you're going to access the UI from another machine replace
                               # "localhost" with the hostname / IP address of the Docker Droplet.
      - TZ=Europe/Berlin       # (optional) replace to use local time in debug logs. See "Configuration".
    ports:
      - 4000:4000
    cap_drop:
      - all

  db:
    image: postgres:11
    restart: unless-stopped
    environment:
      - POSTGRES_USER=teslamate
      - POSTGRES_PASSWORD=secret # change this to whatever you like
    volumes:
      - teslamate-db:/var/lib/postgresql/data

  grafana:
    image: teslamate/grafana:latest
    restart: unless-stopped
    environment:
      - DATABASE_USER=teslamate
      - DATABASE_PASS=secret # change this to whatever you like
      - DATABASE_NAME=teslamate
      - DATABASE_HOST=db
    ports:
      - 3000:3000
    volumes:
      - teslamate-grafana-data:/var/lib/grafana

  mosquitto:
    image: eclipse-mosquitto:1.6
    restart: unless-stopped
    ports:
      - 1883:1883
    volumes:
      - mosquitto-conf:/mosquitto/config
      - mosquitto-data:/mosquitto/data

volumes:
    teslamate-db:
    teslamate-grafana-data:
    mosquitto-conf:
    mosquitto-data:
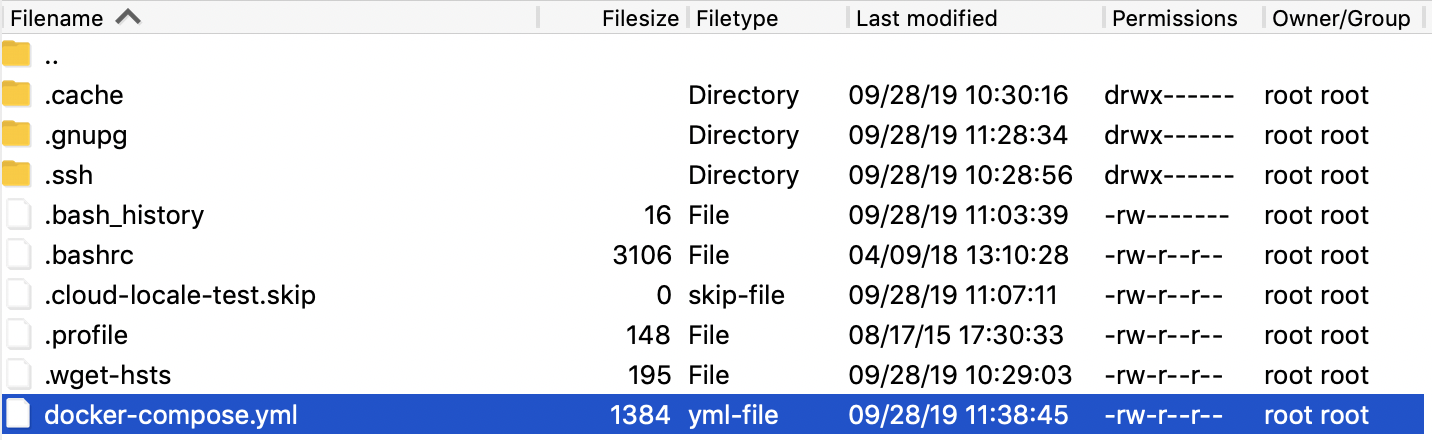
- Use your favourite SFTP-Client (FileZilla, Cyberduck, WinSCP, etc) to connect and upload the docker-compose.yml file to your Droplet. (Don’t worry if you can’t see all the files below, they might be hidden from view in the client software.):

- Go back to the Terminal window (or if you used PuTTY, etc) and type in:
docker-compose up -d
Note: The -d option runs container in the background (detached mode).
- Open your Internet browser and type in your docker_ip_address:port_number to access the dashboard or Grafana:
http://ip-of-your-machine:4000 (Dashboard - Sign in with your Tesla account)

http://ip-of-your-machine:3000 (Grafana)
- [OPTIONAL] If you need to upgrade to newer releases, this can be done with the pull command (always check the changelog for release notes before doing any upgrades!):
docker-compose down
docker-compose pull
And restart with:
docker-compose up -d
- That’s pretty much it! For more in-depth details and information, please visit the developer page at GitHub.
Note: If the Droplet (virtual machine) is shutdown or rebooted, the services will start automatically on boot. There is no need to do anything to get it up and running again.
Advanced setup method:
- Open up your favourite text editor (Windows Notepad, BBEdit, Notepad++, etc) and paste in the following text and save it as docker-compose.yml:
version: '3'

services:
  teslamate:
    image: teslamate/teslamate:latest
    restart: unless-stopped
    depends_on:
      - database
    environment:
      - DATABASE_USER=${TM_DB_USER}
      - DATABASE_PASS=${TM_DB_PASS}
      - DATABASE_NAME=${TM_DB_NAME}
      - DATABASE_HOST=database
      - MQTT_HOST=mosquitto
      - VIRTUAL_HOST=${FQDN_TM}
      - TZ={$TM_TZ}
    labels:
      - 'traefik.enable=true'
      - 'traefik.port=4000'
      - "traefik.http.middlewares.redirect.redirectscheme.scheme=https"
      - "traefik.http.middlewares.auth.basicauth.usersfile=/auth/.htpasswd"
      - "traefik.http.routers.teslamate-insecure.rule=Host(`${FQDN_TM}`)"
      - "traefik.http.routers.teslamate-insecure.middlewares=redirect"
      - "traefik.http.routers.teslamate.rule=Host(`${FQDN_TM}`)"
      - "traefik.http.routers.teslamate.middlewares=auth"
      - "traefik.http.routers.teslamate.entrypoints=websecure"
      - "traefik.http.routers.teslamate.tls.certresolver=tmhttpchallenge"

  database:
    image: postgres:11
    restart: unless-stopped
    environment:
      - POSTGRES_USER=${TM_DB_USER}
      - POSTGRES_PASSWORD=${TM_DB_PASS}
      - POSTGRES_DB=${TM_DB_NAME}
    volumes:
      - teslamate-db:/var/lib/postgresql/data

  grafana:
    image: teslamate/grafana:latest
    restart: unless-stopped
    environment:
      - DATABASE_USER=${TM_DB_USER}
      - DATABASE_PASS=${TM_DB_PASS}
      - DATABASE_NAME=${TM_DB_NAME}
      - DATABASE_HOST=database
      - GRAFANA_PASSWD=${GRAFANA_PW}
      - GF_SECURITY_ADMIN_USER=${GRAFANA_USER}
      - GF_SECURITY_ADMIN_PASSWORD=${GRAFANA_PW}
      - GF_AUTH_BASIC_ENABLED=true
      - GF_AUTH_ANONYMOUS_ENABLED=false
      - GF_SERVER_ROOT_URL=https://${FQDN_GRAFANA}
    volumes:
      - teslamate-grafana-data:/var/lib/grafana
    labels:
      - 'traefik.enable=true'
      - 'traefik.port=3000'
      - "traefik.http.middlewares.redirect.redirectscheme.scheme=https"
      - "traefik.http.routers.grafana-insecure.rule=Host(`${FQDN_GRAFANA}`)"
      - "traefik.http.routers.grafana-insecure.middlewares=redirect"
      - "traefik.http.routers.grafana.rule=Host(`${FQDN_GRAFANA}`)"
      - "traefik.http.routers.grafana.entrypoints=websecure"
      - "traefik.http.routers.grafana.tls.certresolver=tmhttpchallenge"

  mosquitto:
    image: eclipse-mosquitto:1.6
    restart: unless-stopped
    volumes:
      - mosquitto-conf:/mosquitto/config
      - mosquitto-data:/mosquitto/data

  proxy:
    image: traefik:v2.0
    restart: unless-stopped
    command:
      - "--global.sendAnonymousUsage=false"
      - "--providers.docker"
      - "--providers.docker.exposedByDefault=false"
      - "--entrypoints.web.address=:80"
      - "--entrypoints.websecure.address=:443"
      - "--certificatesresolvers.tmhttpchallenge.acme.httpchallenge=true"
      - "--certificatesresolvers.tmhttpchallenge.acme.httpchallenge.entrypoint=web"
      - "--certificatesresolvers.tmhttpchallenge.acme.email=${LETSENCRYPT_EMAIL}"
      - "--certificatesresolvers.tmhttpchallenge.acme.storage=/etc/acme/acme.json"
    ports:
      - 80:80
      - 443:443
    volumes:
      - ./.htpasswd:/auth/.htpasswd
      - ./acme/:/etc/acme/
      - /var/run/docker.sock:/var/run/docker.sock:ro

volumes:
    teslamate-db:
    teslamate-grafana-data:
    mosquitto-conf:
    mosquitto-data:
- Use your favourite SFTP-Client (FileZilla, Cyberduck, WinSCP, etc) to connect to the Droplet and upload the docker-compose.yml file. (Don’t worry if you can’t see all the files below, they might be hidden from view in the client software.):
- Create a .htpasswd file for the directory containing user and password for the TeslaMate Settings access. This can be done online her:
https://www.htaccesstools.com/htpasswd-generator/
- Go back to the Terminal window (or if you used PuTTY, etc) and create the .htpasswd file and paste the contents from the previous step:
nano .htpasswd
Copy and paste the hash-generated text string from step 3 and quit Nano by pressing Ctrl+X (Control+X). Make sure you press Y (Yes) when asked to save modified buffer and acknowledge the filename .htpasswd by confirming with the ENTER key.

- You now have to create the .env file. Again we use Nano and the same procedure as before from the Terminal window:
nano .env
Copy and paste the code below. Make the changes you want and use separate urls! Quit Nano by pressing Ctrl+X (Control+X). Make sure you press Y (Yes) when asked to save modified buffer and acknowledge the filename .env by confirming with the ENTER key.
TM_DB_USER=teslamate
TM_DB_PASS=yourpassword
TM_DB_NAME=teslamate

GRAFANA_USER=teslamate
GRAFANA_PW=yourpassword

FQDN_GRAFANA=your_grafana_url
FQDN_TM=your_teslamate_url

TM_TZ=Europe/Berlin

LETSENCRYPT_EMAIL=your@email.com

- Back at the Terminal window create a folder for the SSL cert information to be stored:
mkdir acme
- And to finish of the installation from the Terminal window. (This typically takes a minute to finish.):
docker-compose up -d
Note: The -d option runs container in the background (detached mode).
- Open your Internet browser and type in your FQDN_urls to access both the sites:
https://FQDN_teslamate_url (TeslaMate Dashboard and Settings site)

https://FQDN_grafana_url (Grafana site)
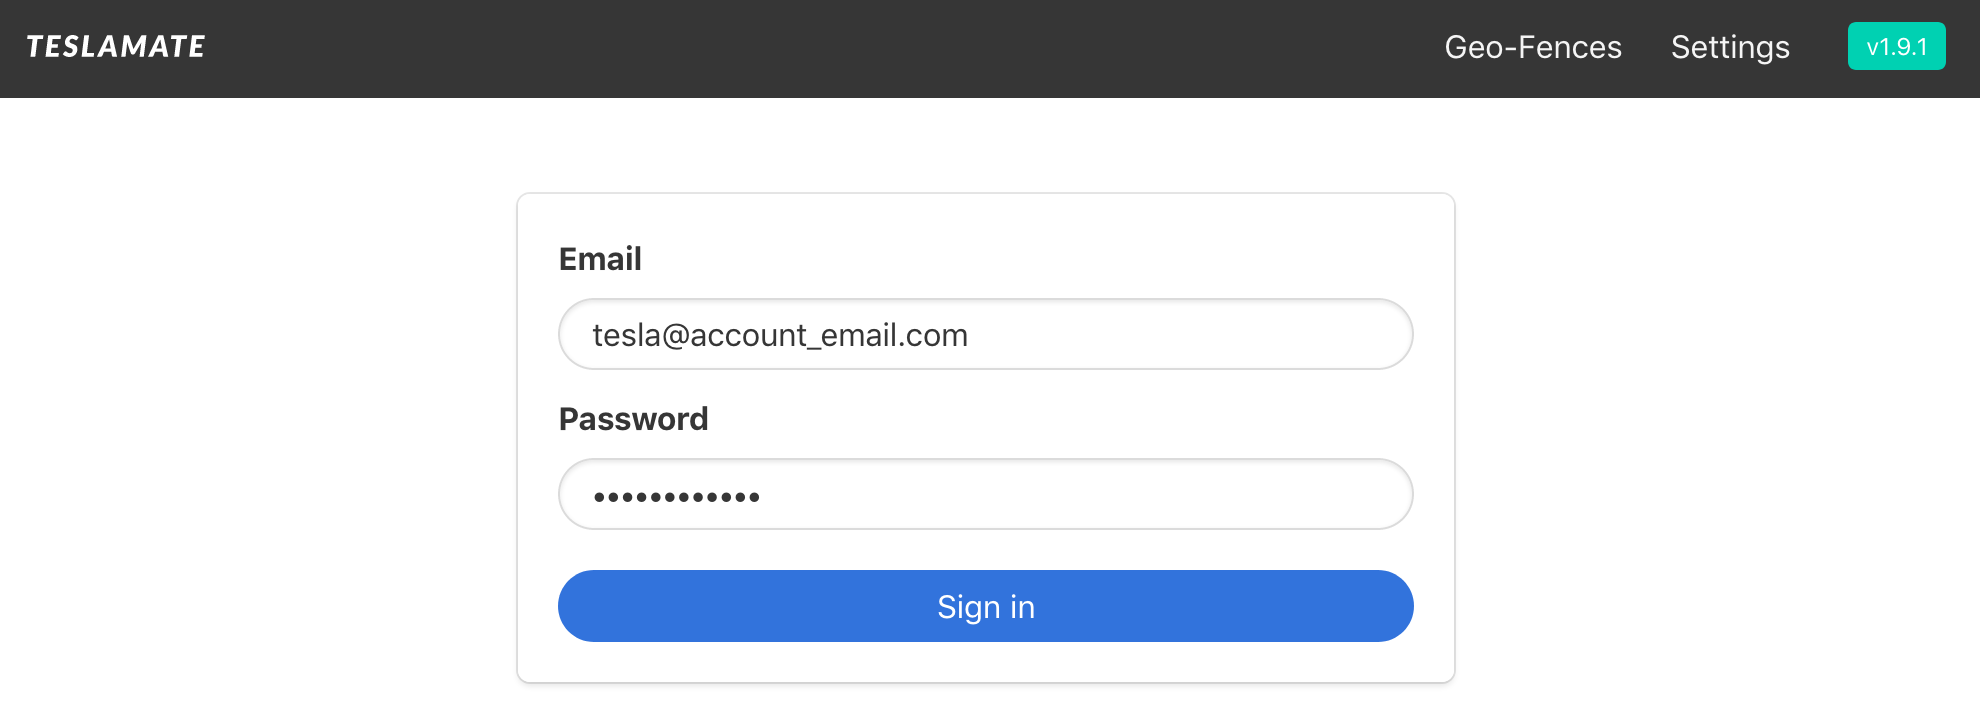
- When accessing the TeslaMate Dashboard and Settings site, use the username and password you chose when creating .htpasswd. Then on the next login, use your Tesla account credentials:

When accessing the Grafana site, use the username and password you entered in the .env file for GRAFANA_USER and GRAFANA_PW:

- [OPTIONAL: Upgrade] If you need to upgrade to newer releases, this can be done with the pull command (always check the changelog for release notes before doing any upgrades!):
docker-compose down
docker-compose pull
And restart with:
docker-compose up -d
- That’s pretty much it! For more in-depth details and information, please visit the developer page at GitHub.


Note: If the Droplet (virtual machine) is shutdown or rebooted, the services will start automatically on boot. There is no need to do anything to get it up and running again.
Tasker App setup:
Here are instructions for creating Tasker tasks (paid app) to resume and suspend logging when phone is connected via Bluetooth to the vehicle. This guide only works if TeslaMate is behind a reverse-proxy with HTTPS and basic access authentication. (E.g. if you use a FQDN.)
- You first need to install both Tasker and RESTask for Tasker:
Tasker: https://play.google.com/store/apps/details?id=net.dinglisch.android.taskerm

RESTask for Tasker: https://play.google.com/store/apps/details?id=com.freehaha.restask
- Open Tasker
- Do the following as shown in the pictures below:- Select the TASKS tab
– Add a Task by pressing the plus sign in the bottom right ➕
– Name the task TM Resume (or anything you like)
– Press the checkmark ✔
 On the Task Edit view:
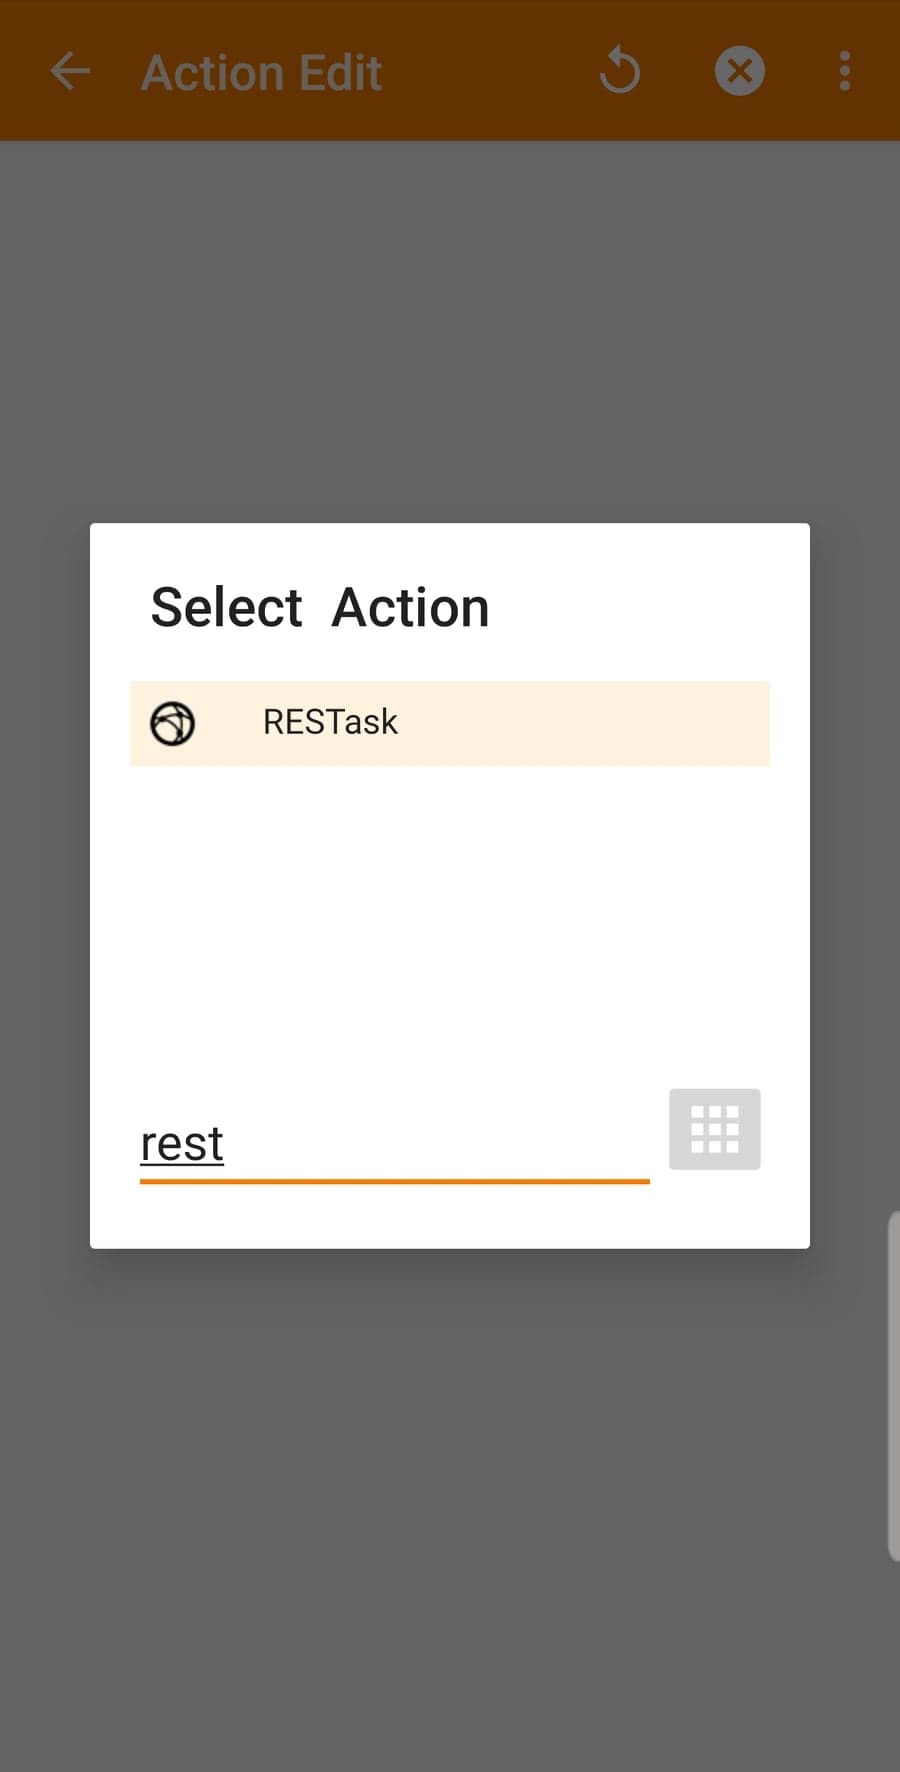
– Add an Action by pressing the plus sign in the bottom right ➕On the Select Action Category dialog:
– Type rest in the Filter field at the bottom
– Select RESTask
On the Action Edit view:
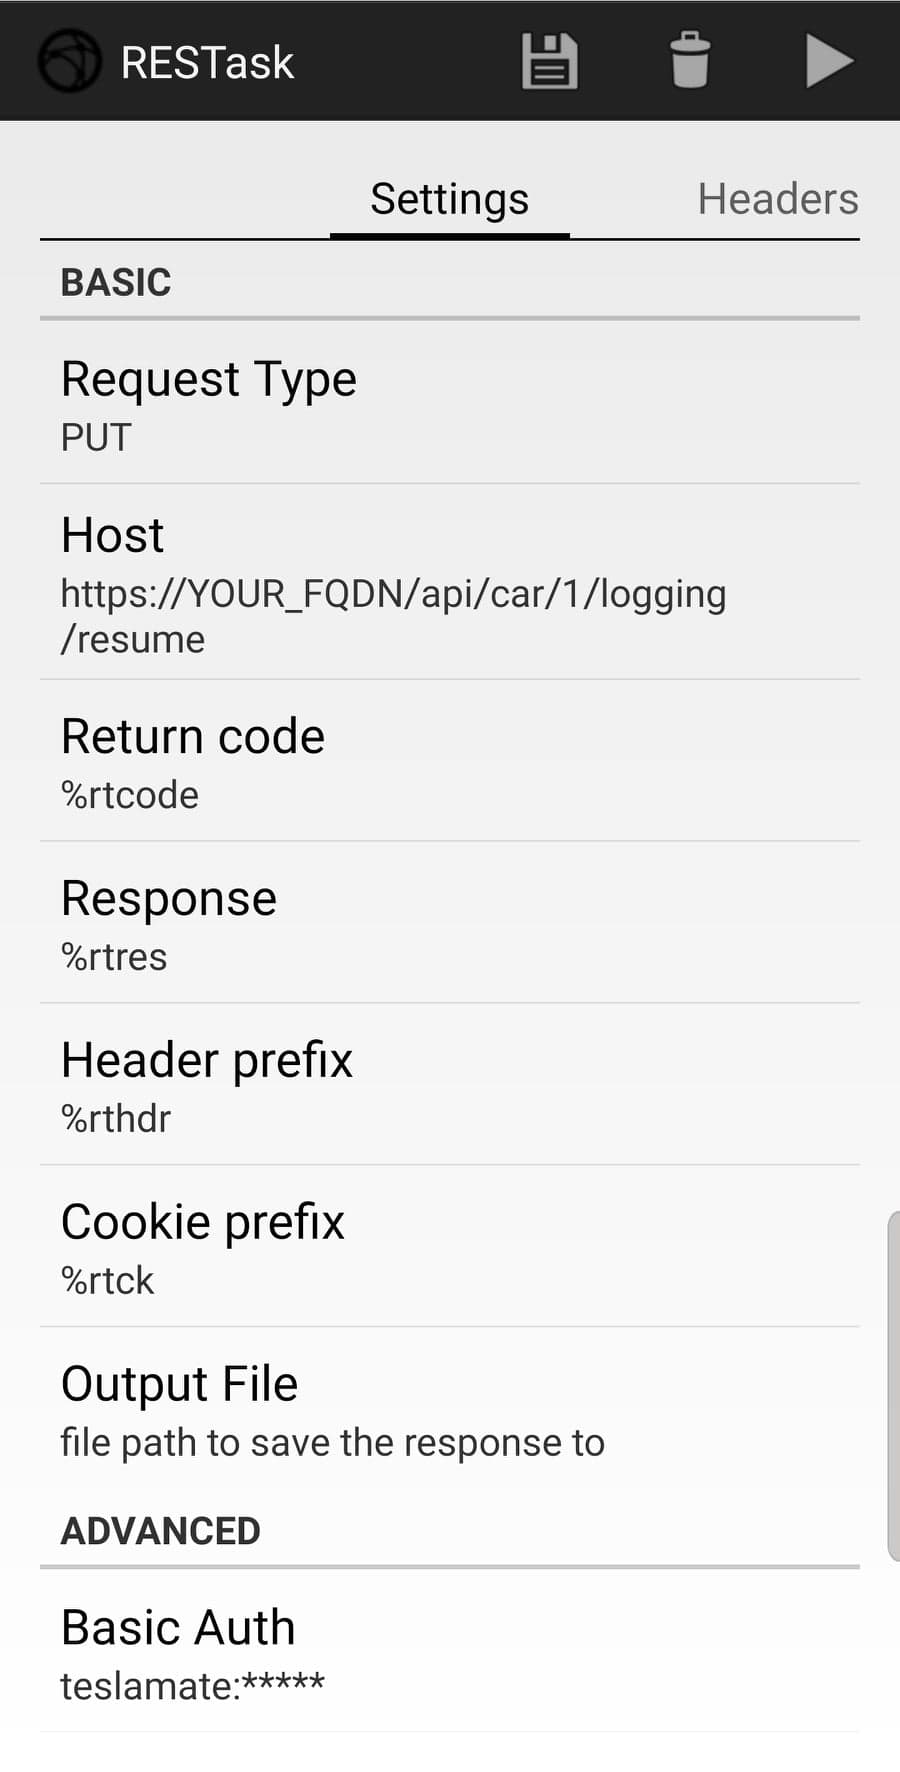
– Press the configuration edit button 📝On the RESTask view:
– Change Request Type to PUT
– Change Host to https://YOUR_FQDN/api/car/1/logging/resume (replace YOUR_FQDN with the FQDN_TM url in the .env file)
– Change Basic Auth to the credentials used in the .htpasswd file
– Press the play button to test ▶️ You should get a 204 response if it’s successful. (Check your host url, username and settings if not.)
– Save and exit by pressing the save button 💾
– Save and exit again by pressing the back arrow in Action Edit view ⬅️
– Save and exit once more by pressing the back arrow in Task Edit view ⬅️
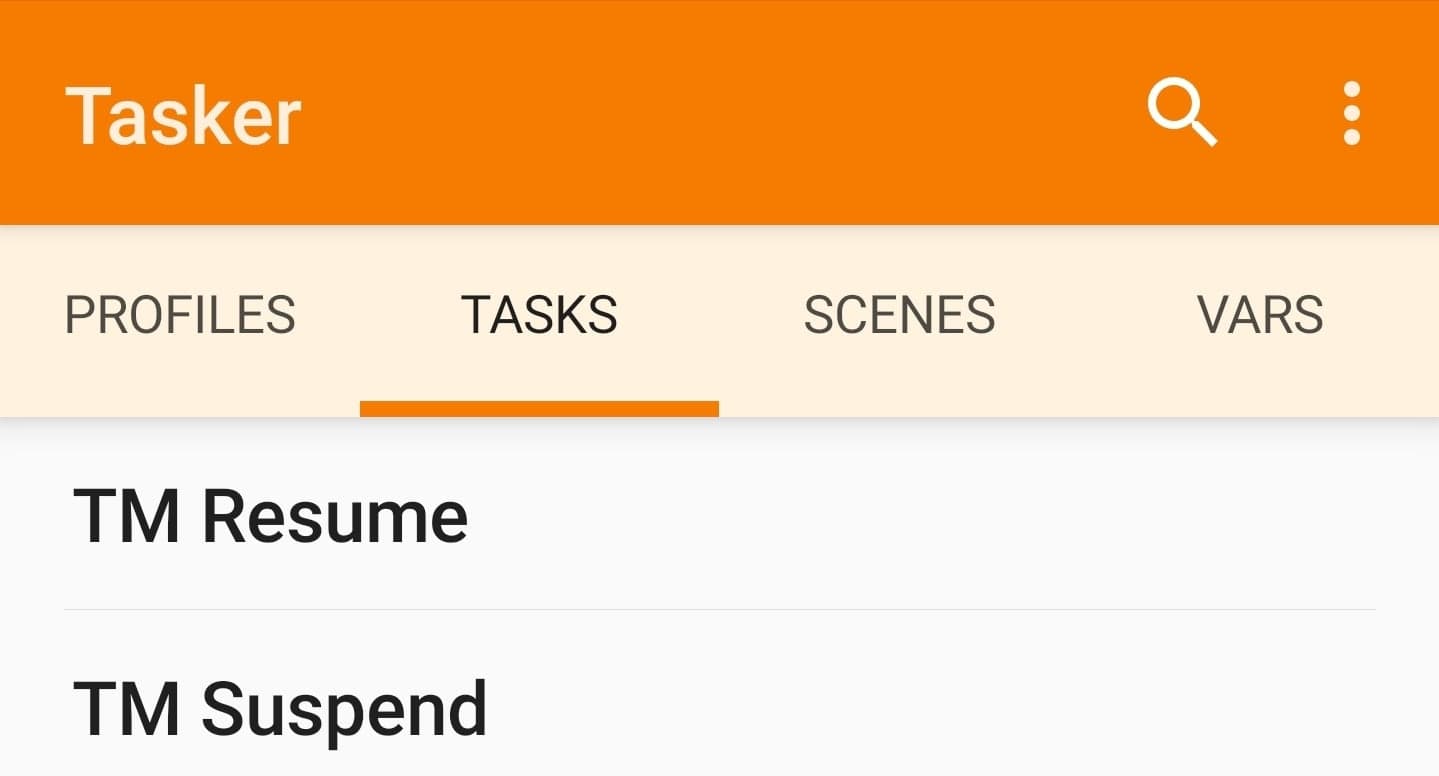
Repeat the entire process and create one more task and call it TM Suspend (or anything you like):
– This time change address of Host to https://YOUR_FQDN/api/car/1/logging/suspendYou should now have two tasks in the TASKS view:
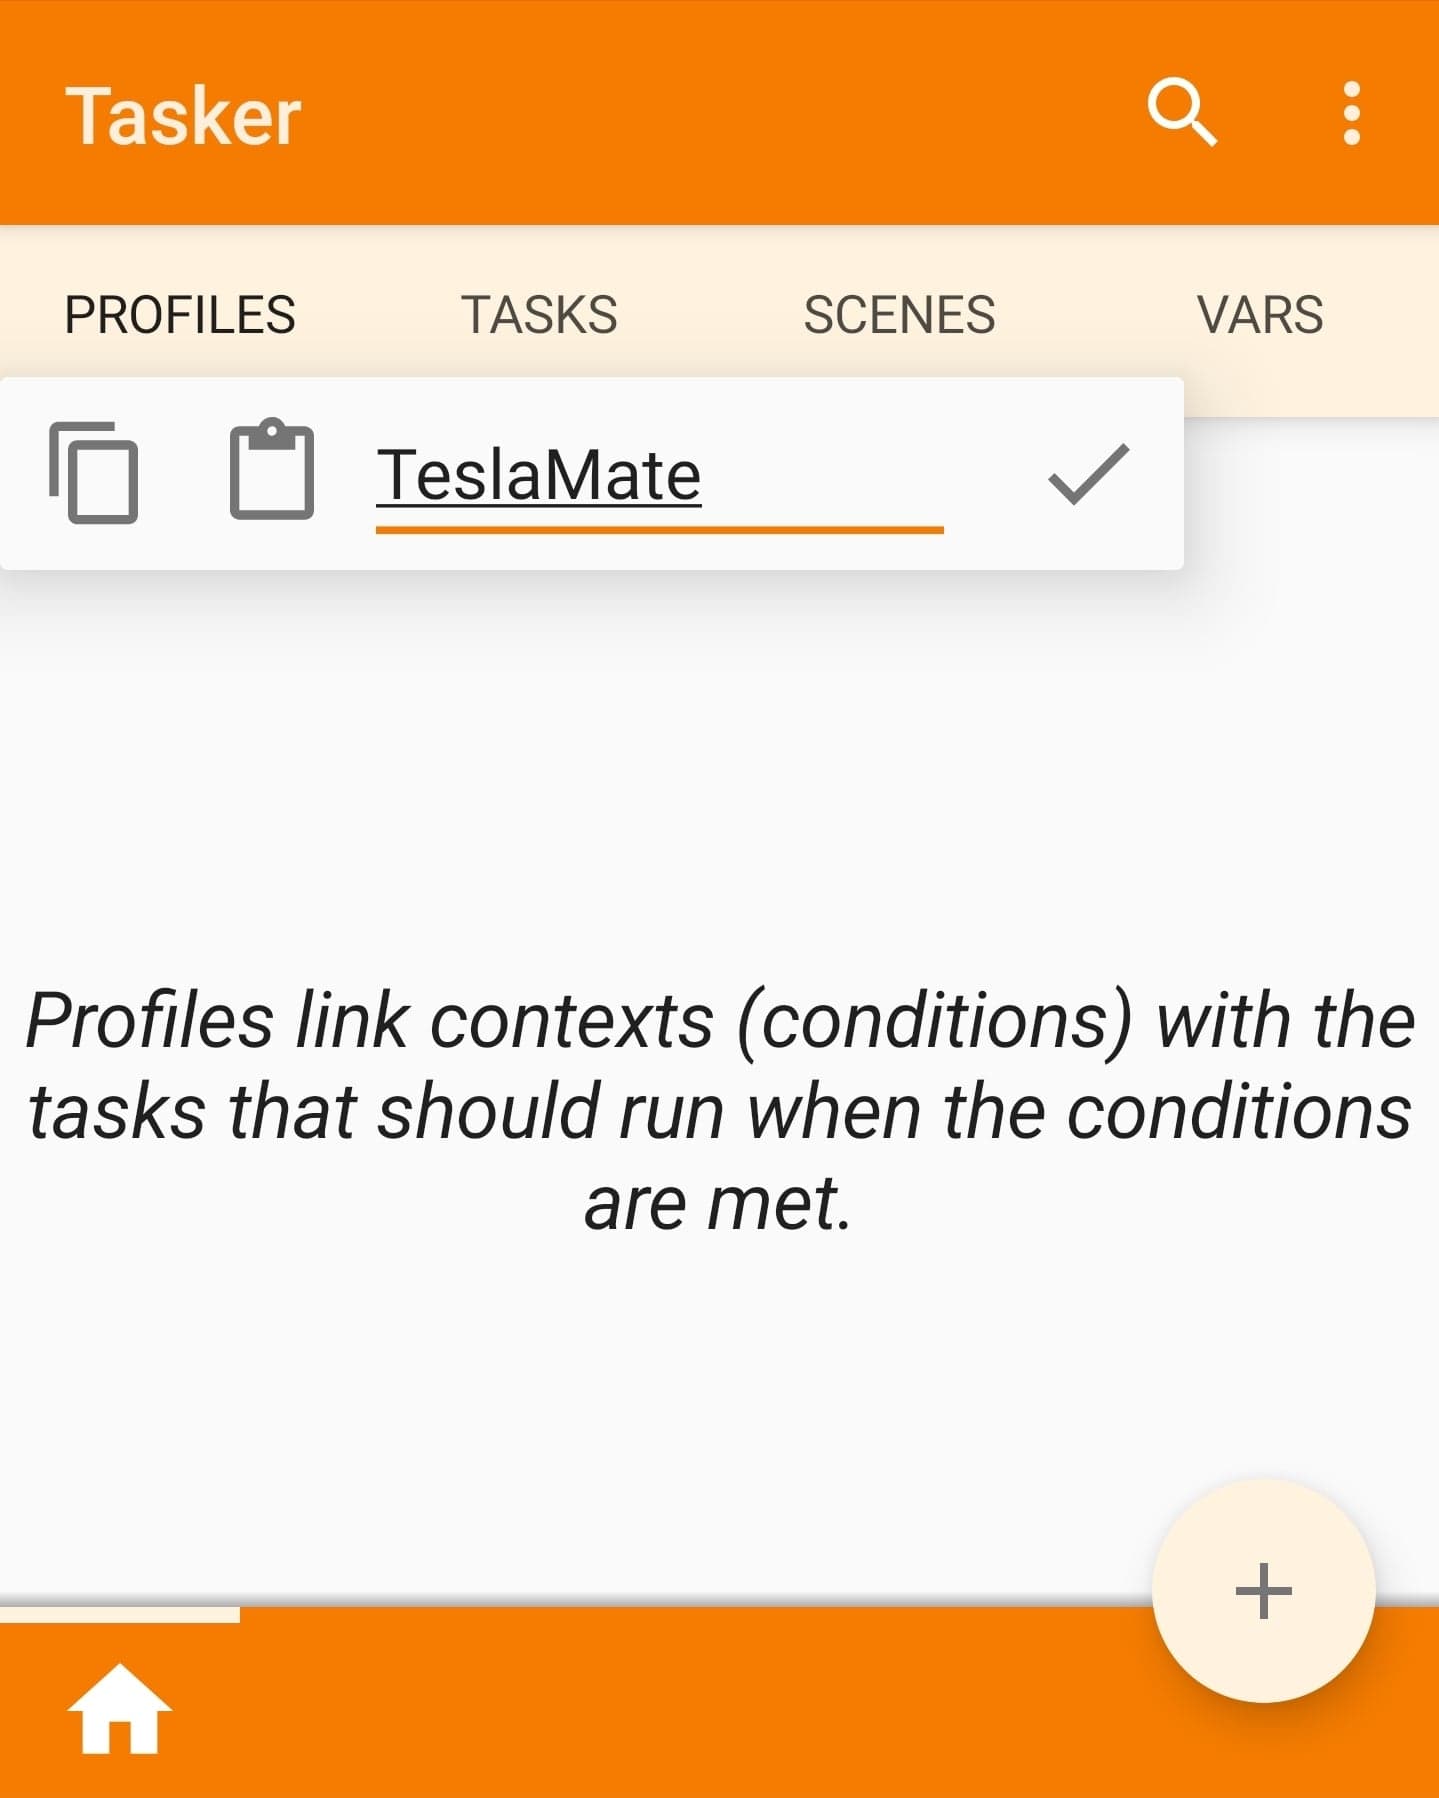
 Select the PROFILES tab:
– Add a Profile by pressing the plus sign in the bottom right ➕
– Name the task TeslaMate (or anything you like)
– Press the checkmark ✔️
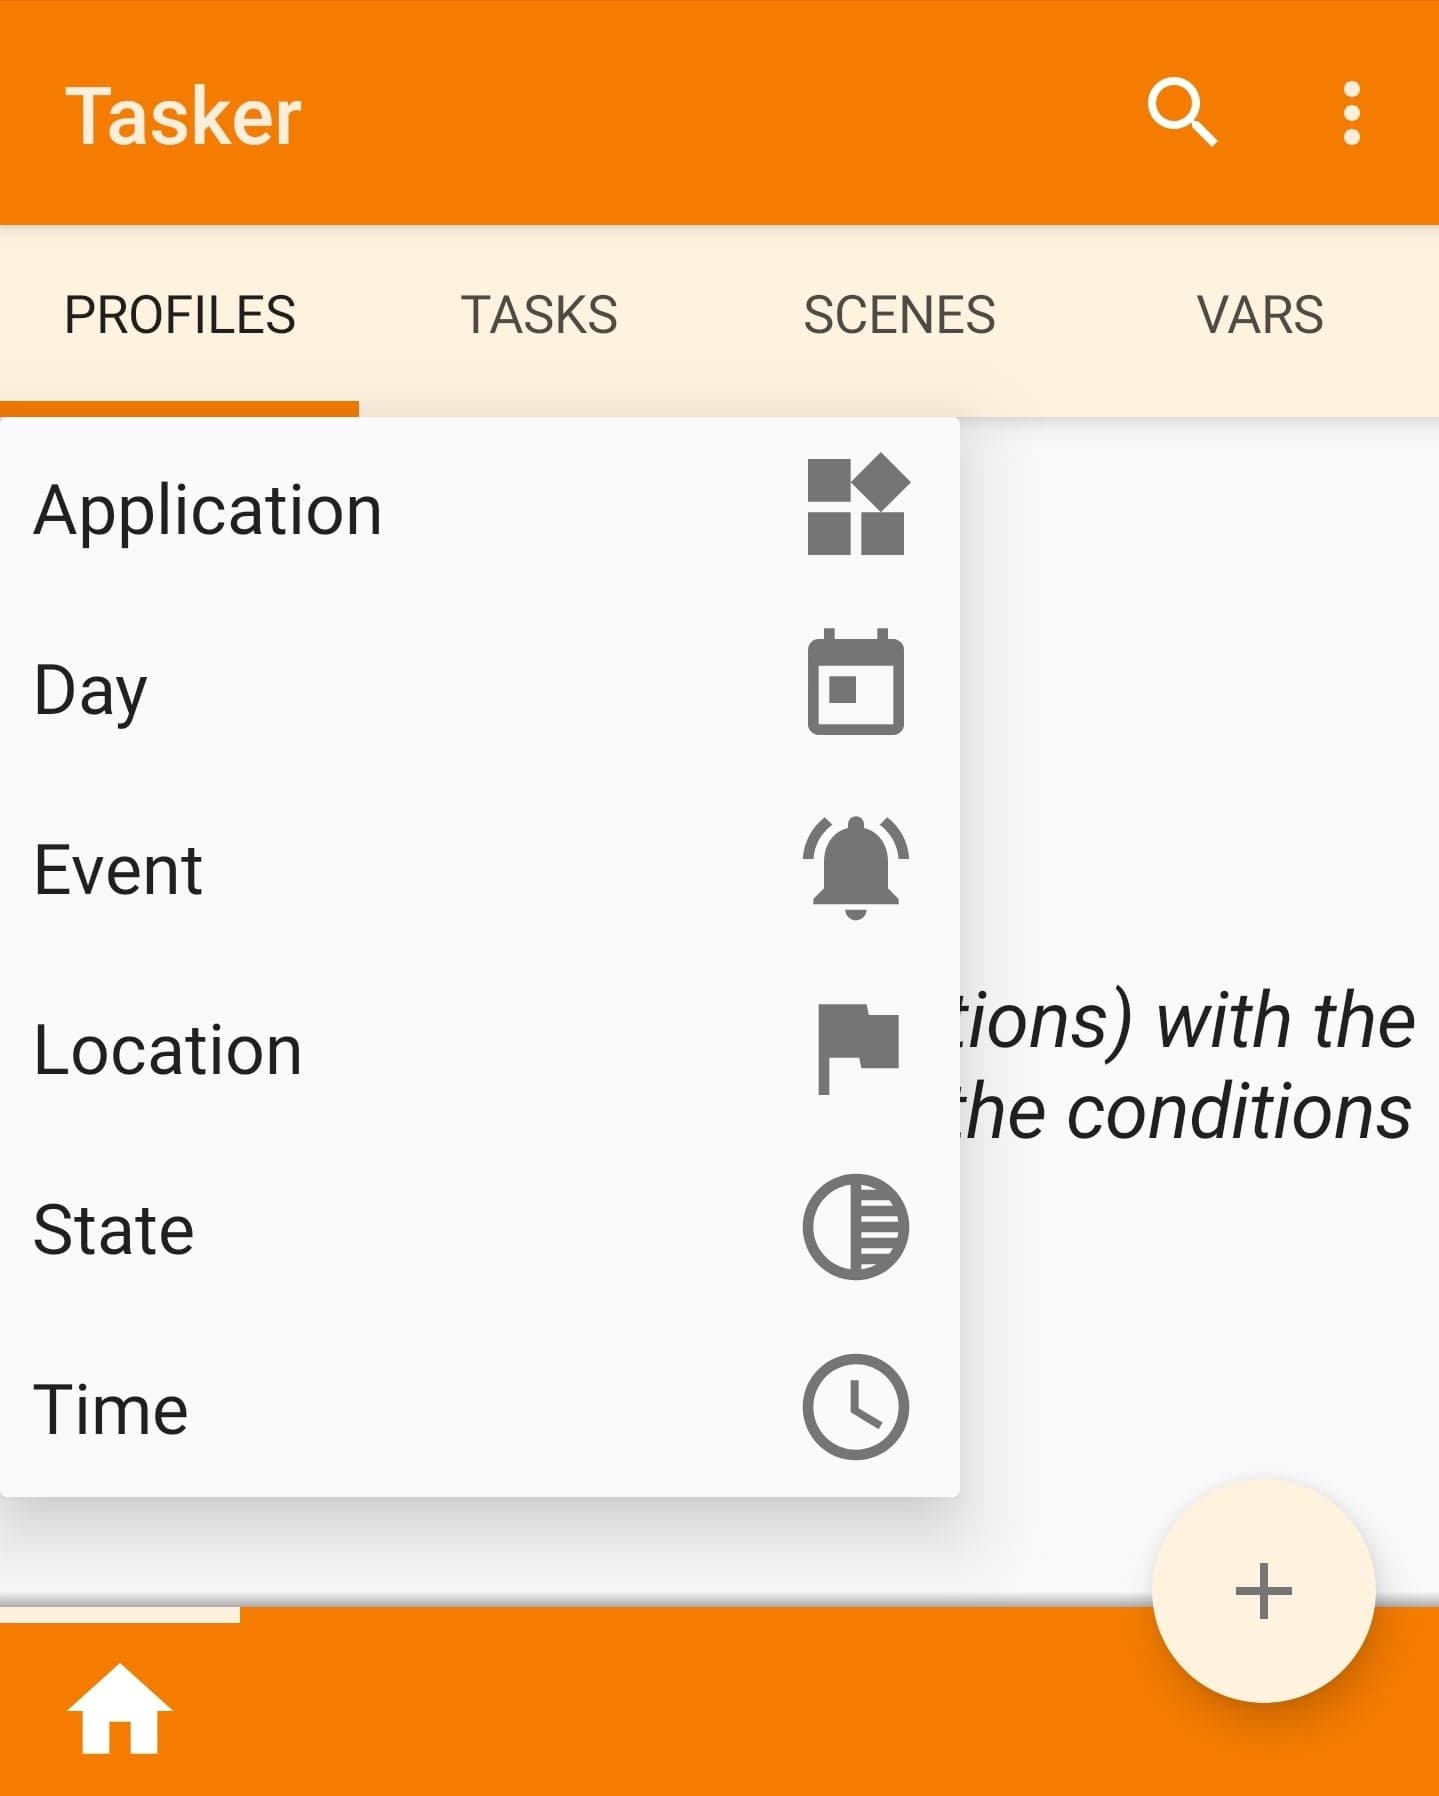
 Select the State option:
On the Select State Category dialog:
– Type bt in the Filter field at the bottom
– Select BT Connected
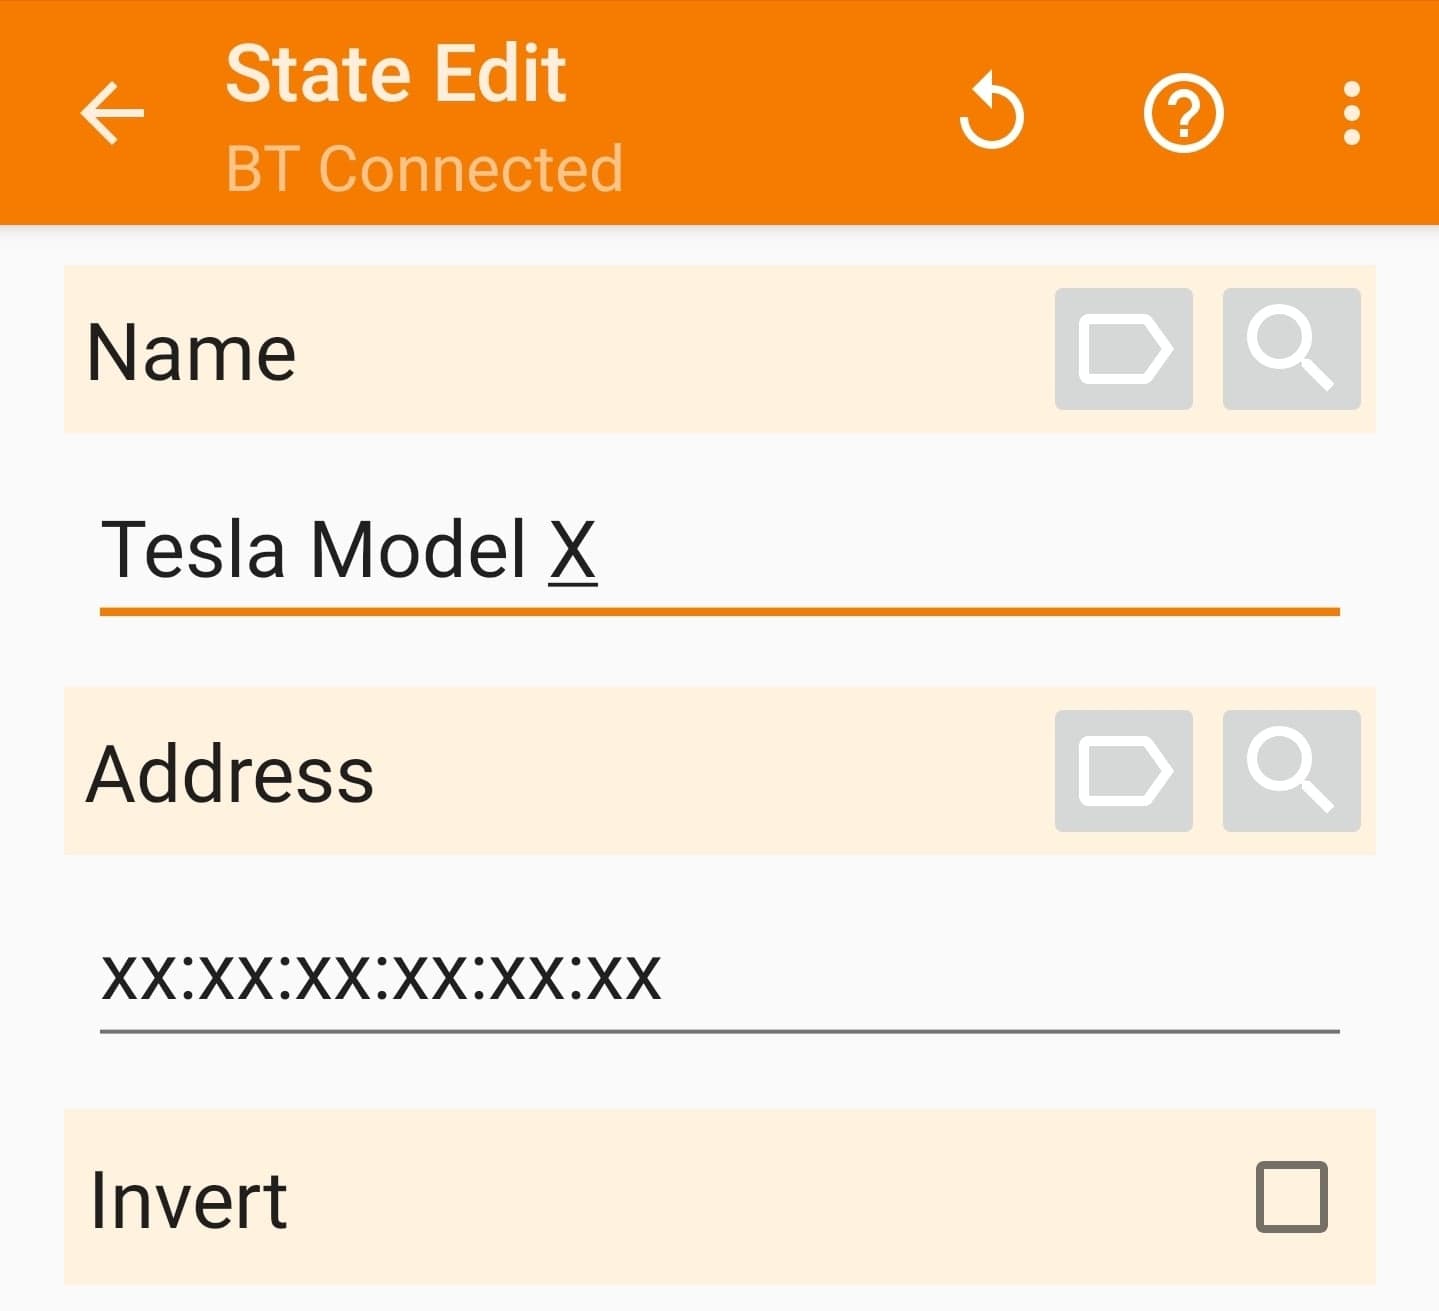
 On the State Edit view:
– In the Name option press the search button 🔍
– Choose your vehicle
– In the Address option press the search button 🔍
– Choose your vehicle
– Save and exit by pressing the back arrow ⬅️
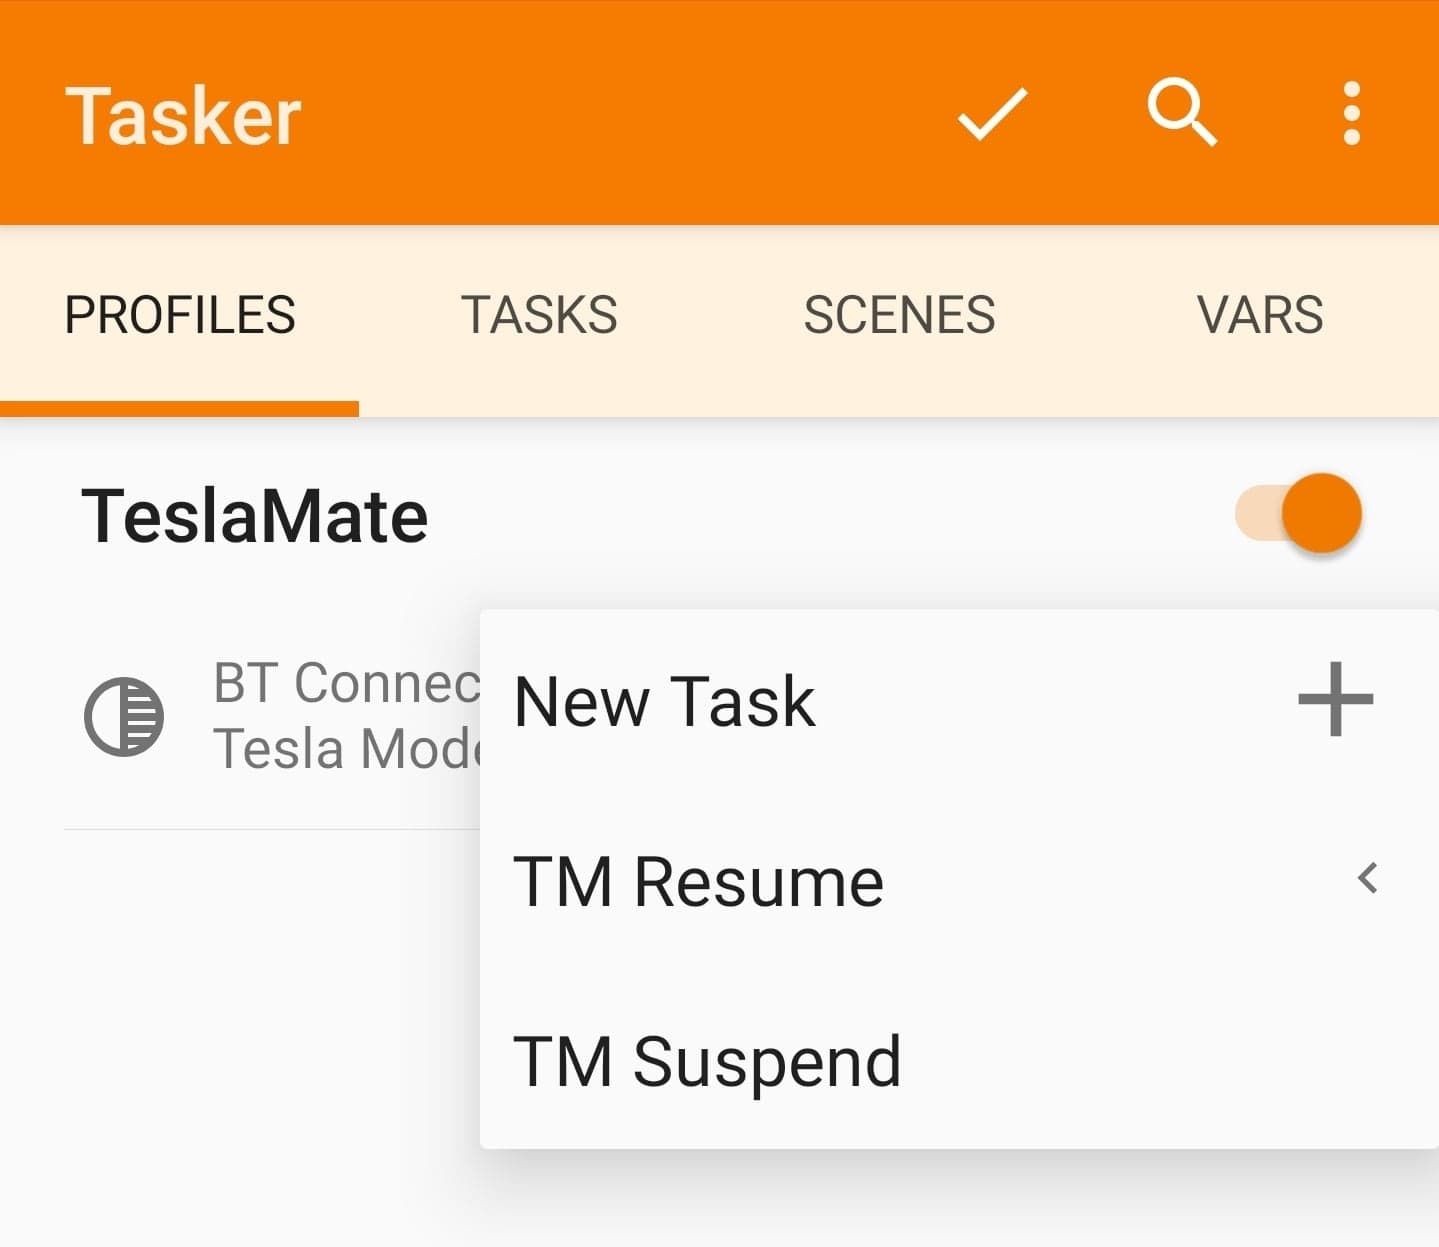
 Back at the PROFILES tab again:
– Choose TM Resume (or whatever you named it before)
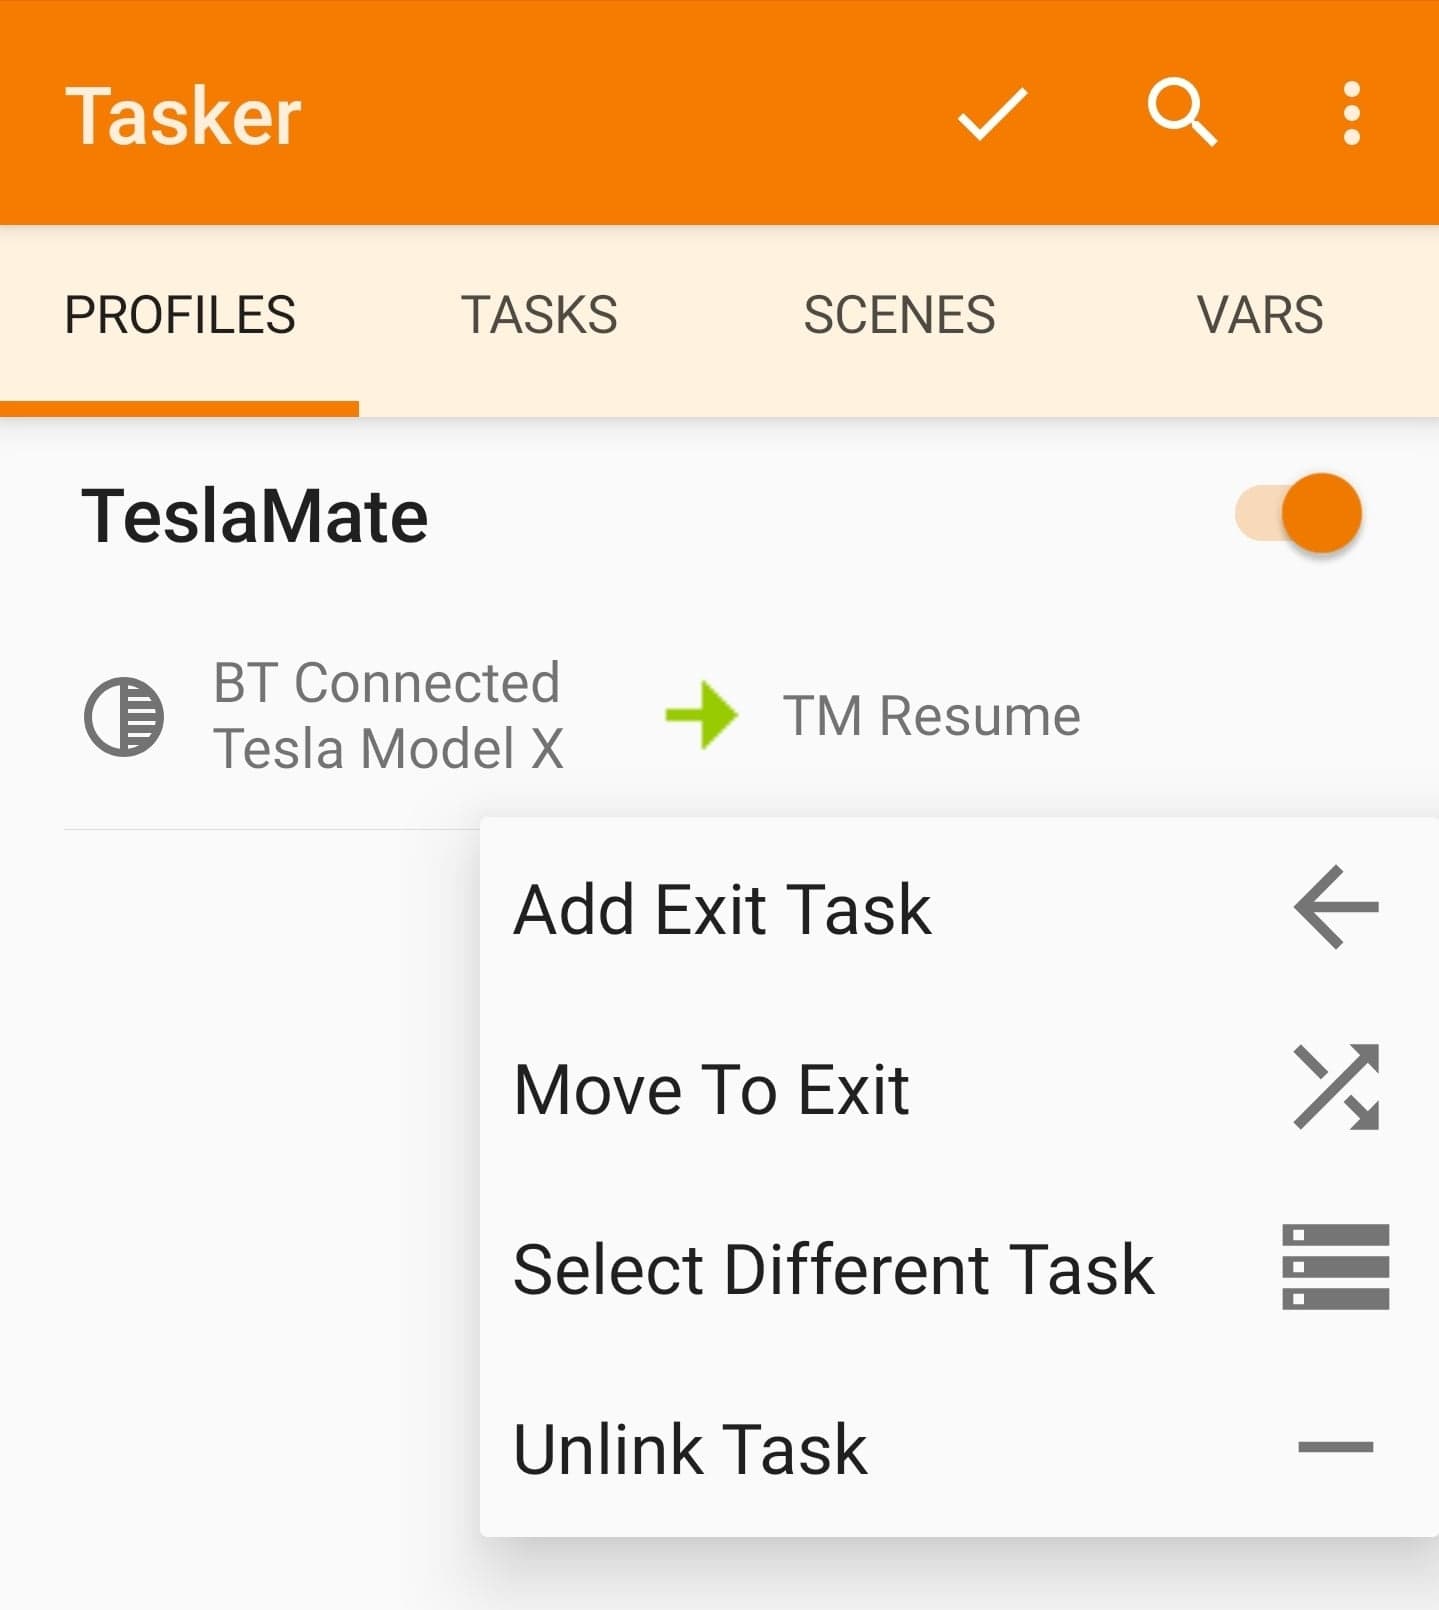
 Press and hold on the text TM Resume (or whatever you named it):
– Press Add Exit Task
– Choose TM Suspend
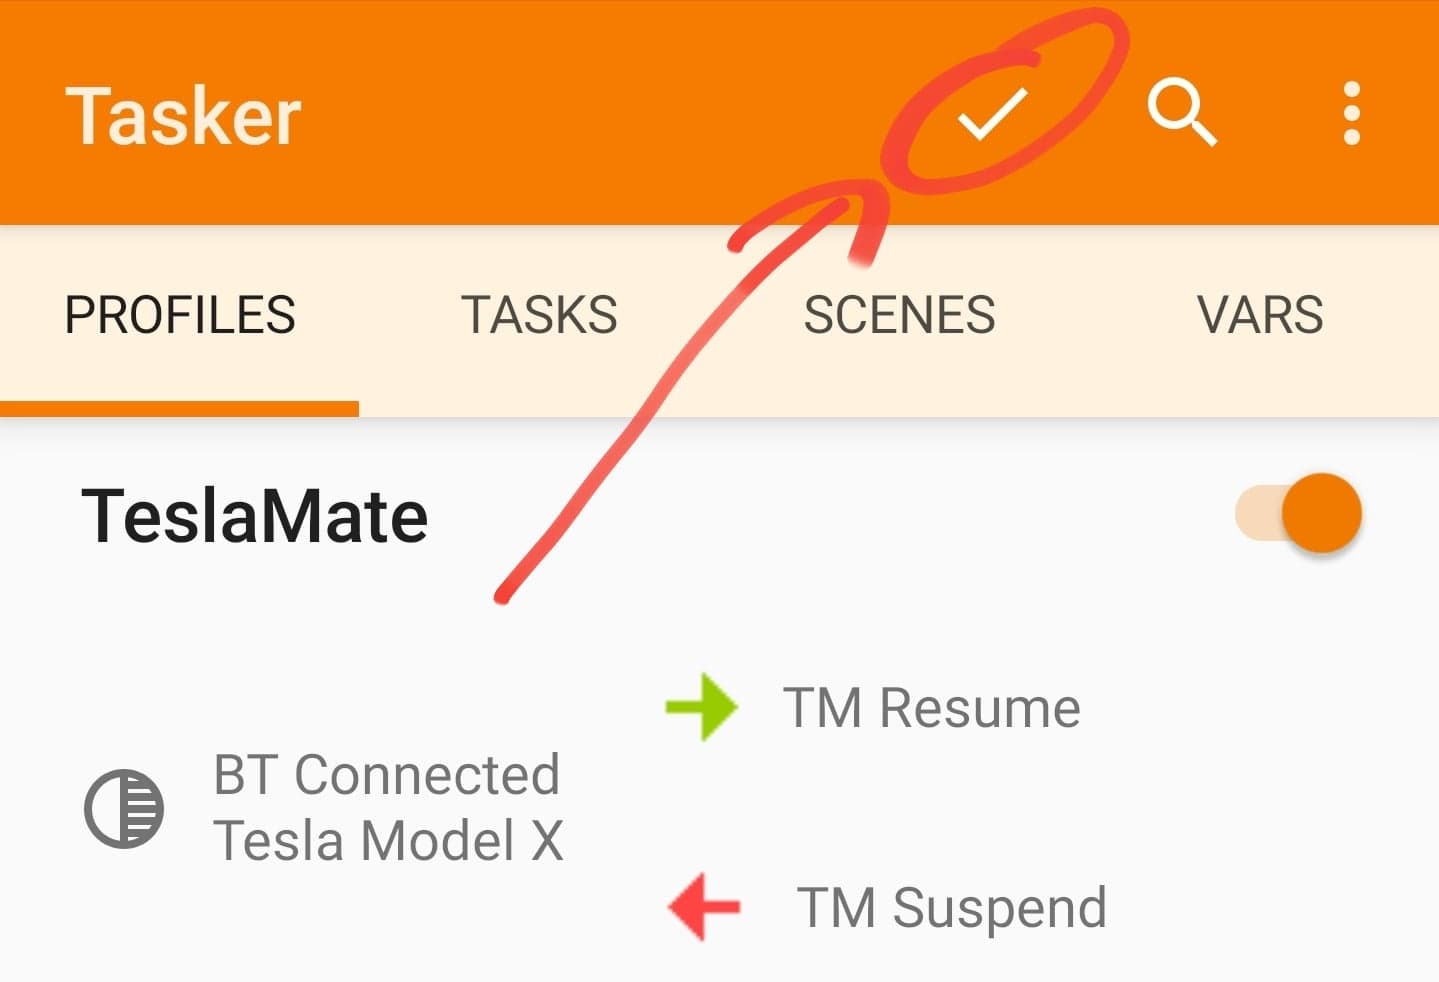
 PROFILES view:
– You should now have a similar screen (depending on what names you chose above)
– Save everything by pressing the checkmark ✔️

- If the vehicle sleeps TeslaMate will now automatically resume logging as soon as your phone connects to the vehicles Bluetooth. And likewise suspend logging whenever it disconnects from the phone.
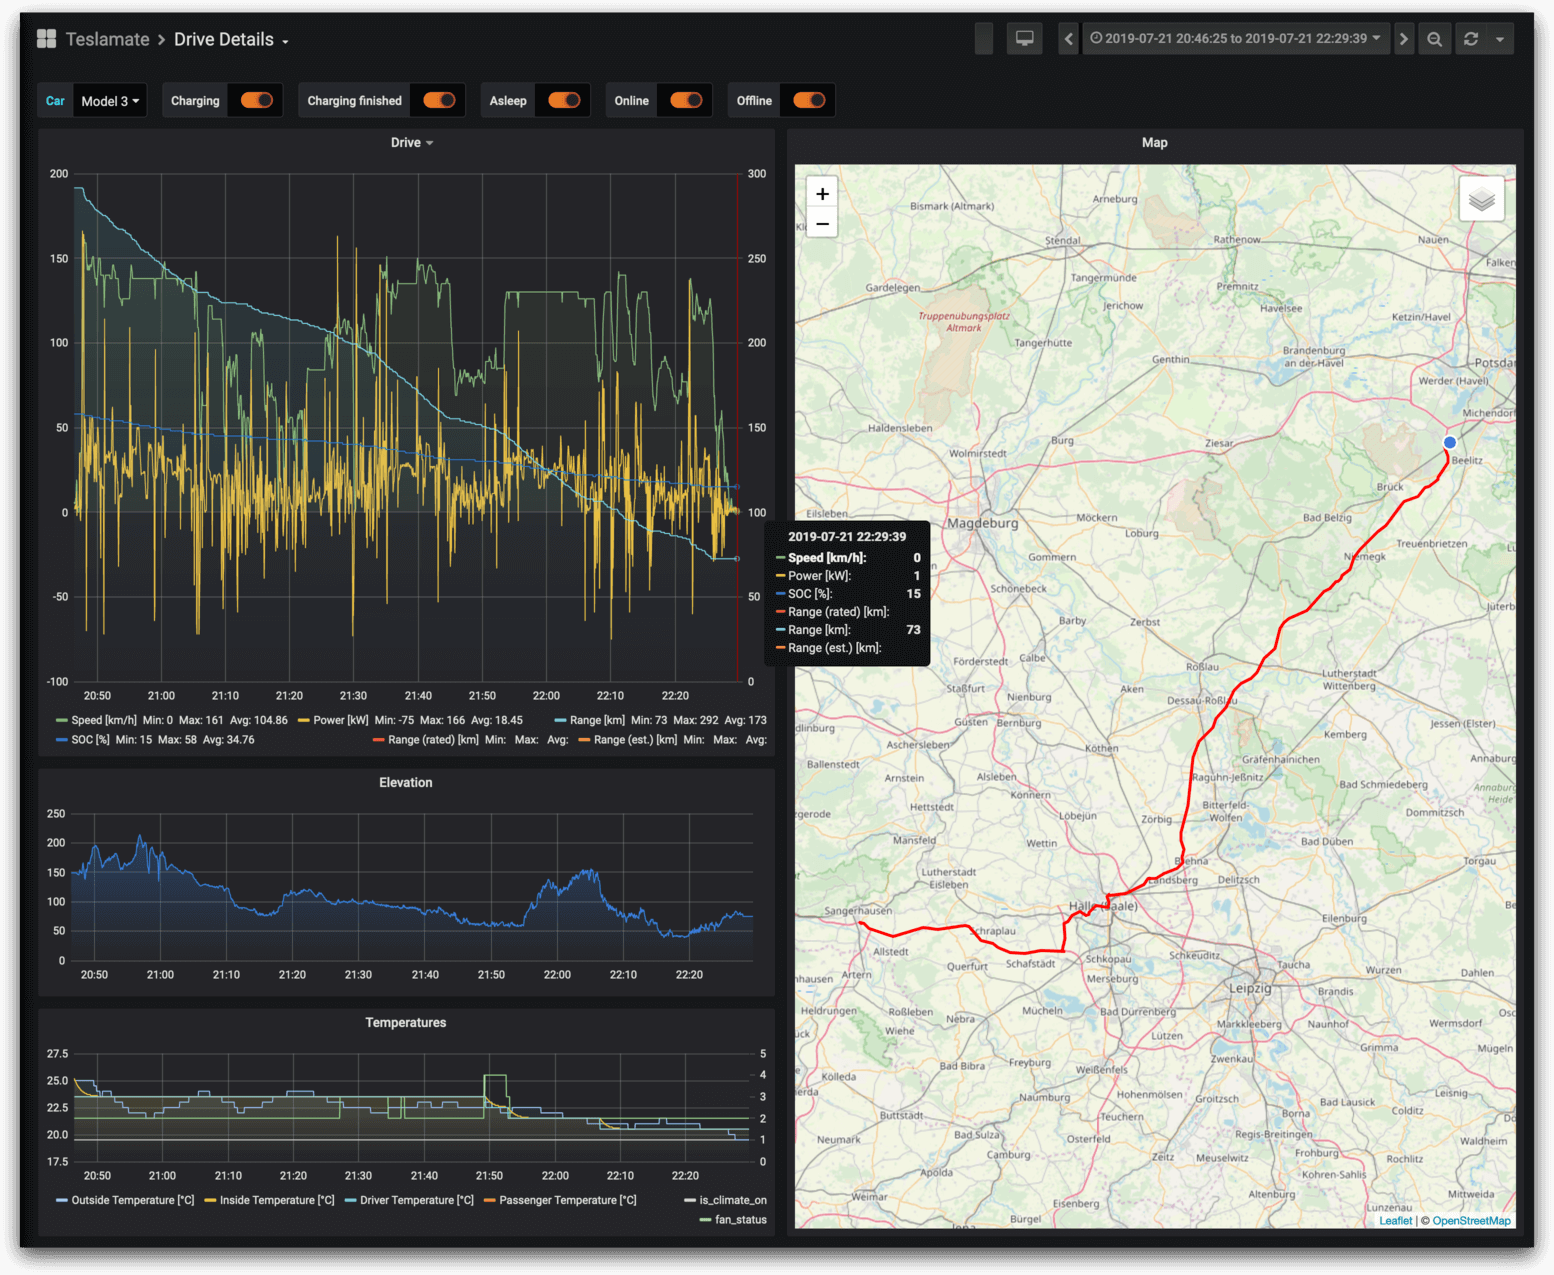
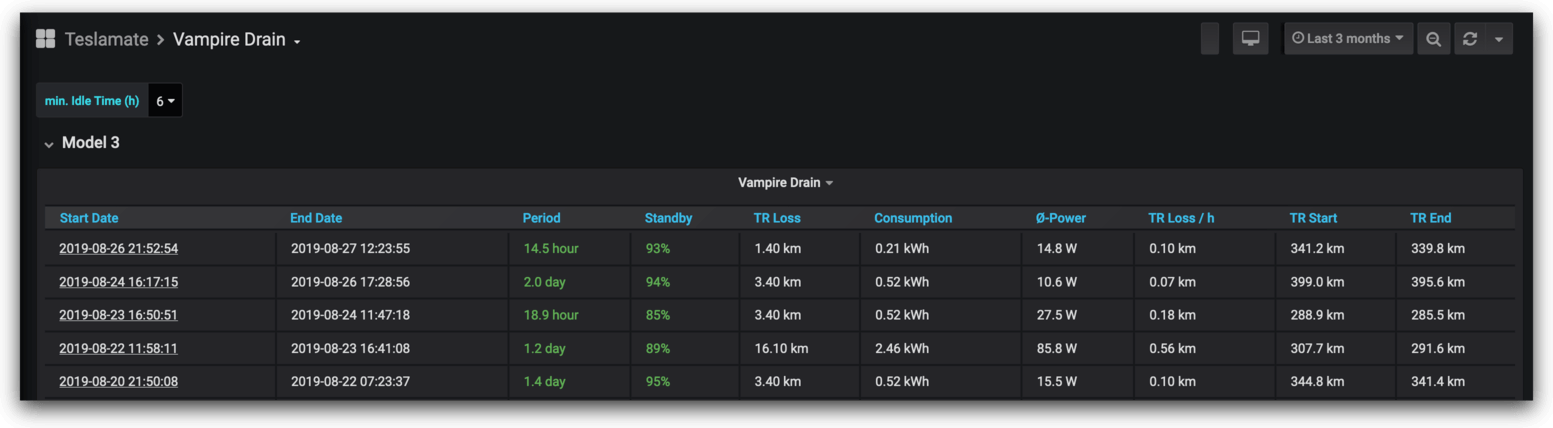
- You can easily check if it’s working as intended by going to you TeslaMate Dashboard and see the status changes.
- That’s it! 🙂


Please share if you liked the guide! Want a new Tesla? Get it here: http://ts.la/satheesh5341
One thought on “TeslaMate – Tesla logger (step-by-step Docker installation guide – DigitalOcean)”