Seat Belt Assembly - 2nd Row - LH (Remove and Replace)

FRT No: 20051002

Warning: If the 12V power supply is disconnected, do not attempt to open any doors with door glass in closed position. Failure to follow this instruction could result in door glass shatter.
Note: Before disconnecting the 12V power supply, ensure that the driver’s door window is fully open. Failure to follow this instruction could result in vehicle lockout.

Removal

  1. Open the liftgate and both rear doors for access.
  2. Disconnect 12V power.
  3. Remove the LH rear sill panel trim (refer to procedure).
  4. Remove the bolt that secures the seat belt lower forward anchor to the body and move the belt aside (torque 40 Nm).
  5. Fold the LH seat back down for access.
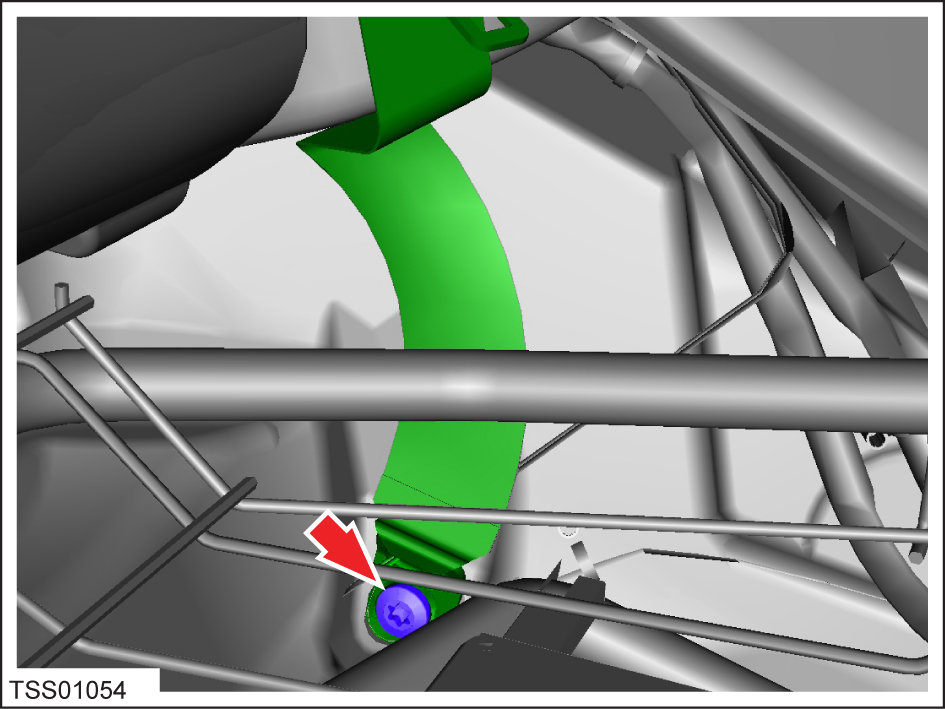
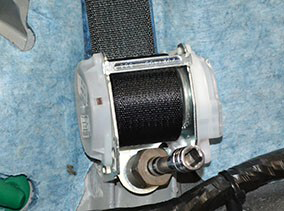
  6. Remove and discard the bolt that secures the seat belt reel to the body (torque 40 Nm).
    Caution: This bolt is particularly difficult to remove on vehicles built before approximately October 1st, 2013. If the vehicle was built before approximately October 1st, 2013, refer to the steps and information below to reduce the risk of breaking the bolt during removal.
    Note: The preferred method of removing the bolt is to use an inductive heater to melt the adhesive patch material:
    Warning: Persons that have a pacemaker or any other kind of electronic or metal surgical implant must stay at least 1 m (3 ft) away from the inductive heater while it is in use.
    Warning: Remove all metallic items (such as coins, keys, electronics, and tools) from pockets before using the inductive heater.
    Warning: Ensure that there is a properly-maintained fire extinguisher in the work area before using the inductive heater.
    Warning: Use the inductive heater in a well-ventilated area.
    1. Extend the belt out of the retractor as much as possible. Restrain the belt to keep it out of the work area.
    2. Pull the adjacent wiring harness away from the work area.
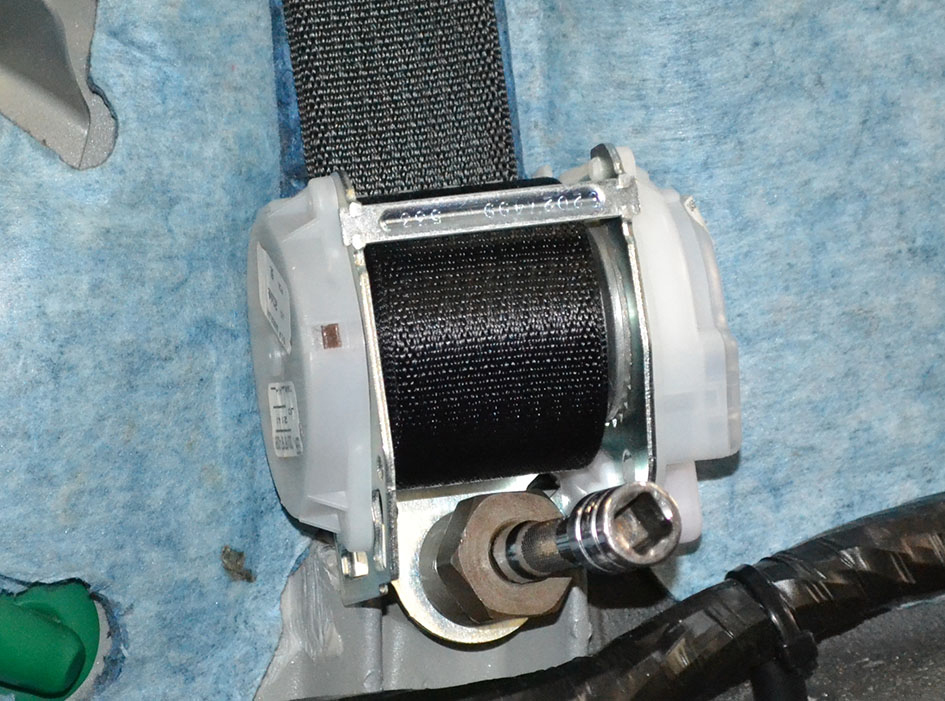
    3. Position the heater coil around the bolt, then heat the bolt for 20 seconds.
    4. Allow the bolt to cool for 2 minutes.
      Warning: The inductive heater coil, bolt, and adjacent areas will be extremely hot.
    5. Remove and discard the bolt.
    6. Use a coated M10x1.5 straight flute cut tap to chase the threads.
      Note: Do not lubricate the tap.
      Note: Start the tap by hand. Once the tap is fully engaged in the threads, a tap handle can be used for additional leverage.
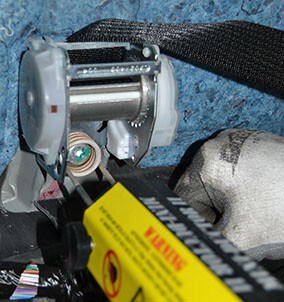
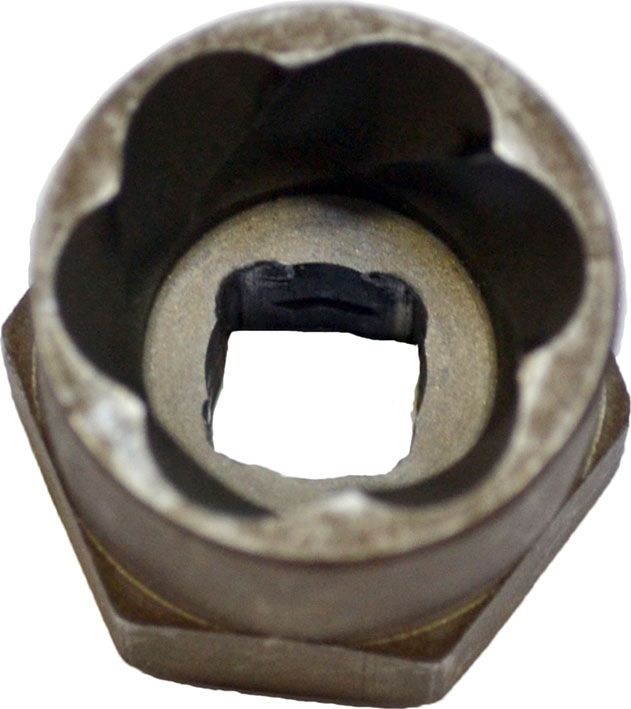
    Note: If an inductive heater is not available, use a 19 mm spiral-fluted bolt extractor to apply extra torque to the bolt head:
    1. Attach an extension to the extractor.
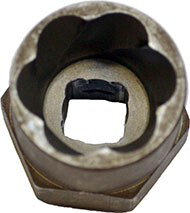
    2. Position the extractor on the bolt head, making sure that it is as straight as possible.
    3. Hammer the extension to force the extractor onto the bolt head.
    4. Slowly remove the bolt.
      Note: The extractor might move slightly on the bolt head as torque is applied. Periodically stop unscrewing the bolt and re-hammer the extension so that the extractor is straight and fully seated on the bolt head.
    5. Discard the bolt.
    6. Use a coated M10x1.5 straight flute cut tap to chase the threads.
      Note: Do not lubricate the tap.
      Note: Start the tap by hand. Once the tap is fully engaged in the threads, a tap handle can be used for additional leverage.
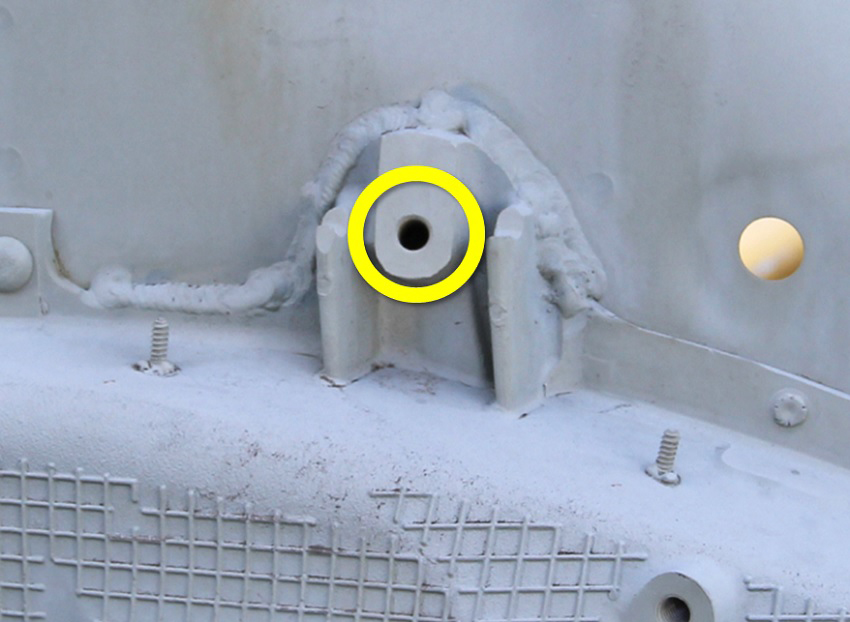
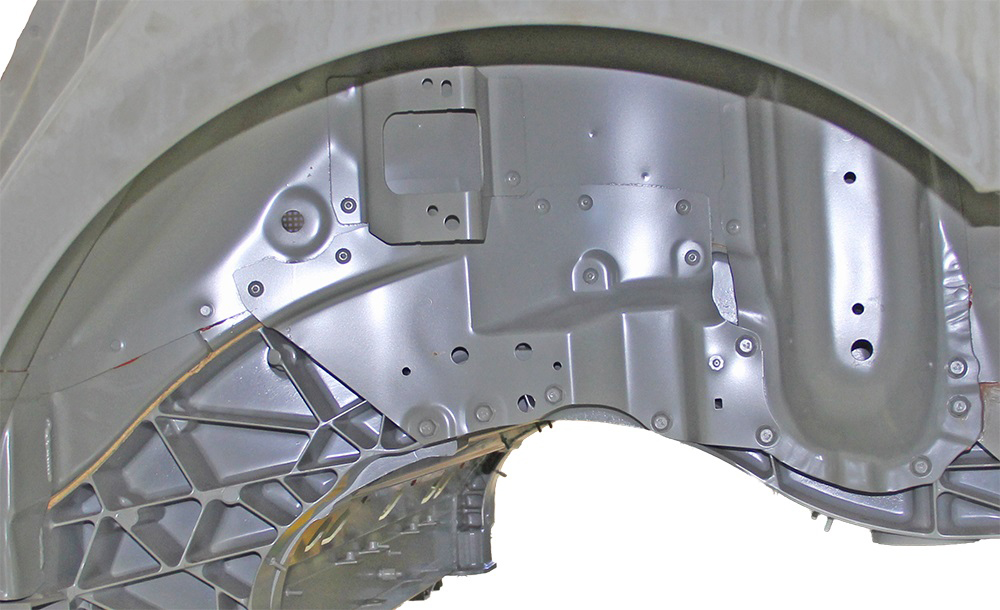
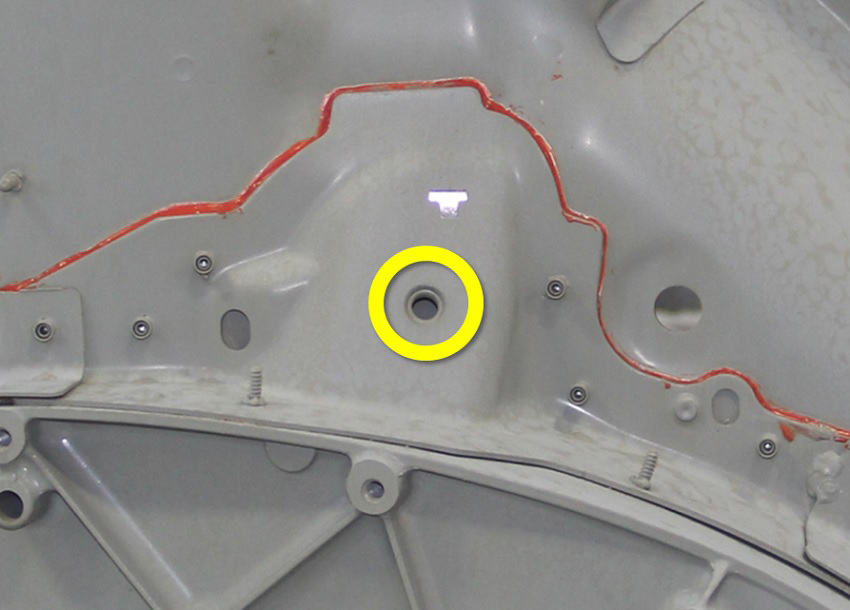
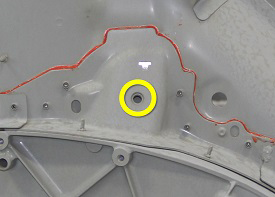
    Note: If the bolt head breaks off of the shaft:
    Caution: Perform the following procedure to reduce the risk of damaging the threads. If the threads are damaged on a vehicle with a 2nd generation rear node, the vehicle must be sent to a Tesla Approved Body Shop. Primer Free Heli-Coil inserts can be used to repair the 2nd row lower seat belt threads in vehicles with a 1st generation rear node. Refer to TN-15-92-001, "Installing Heli-Coil Inserts".
    1st generation rear node Lower seat belt hole, 1st generation rear node
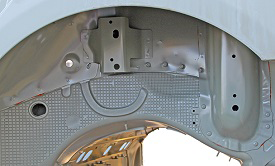
    2nd generation rear node Lower seat belt hole, 2nd generation rear node
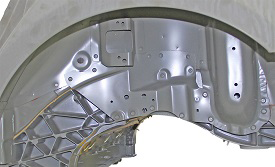
    1. Use a rotary multi-tool with a fiber-reinforced cutoff wheel to grind the bolt shaft surface smooth.
      Note: Do not use a die grinder.
    2. Use a center punch to punch a hole in the exact center of the bolt shaft.
    3. Use a 3 mm or 4 mm cobalt high speed steel drill bit to drill through the center of the bolt shaft. Drill the hole as straight as possible, stopping occasionally to remove chips from the drilling area.
    4. Use a 6 mm cobalt steel drill bit to expand the hole. Stop drilling occasionally to remove chips from the drilling area.
    5. Use a spiral flute screw extractor to remove the remains of the bolt shaft.
      Note: If the bolt is not removable with the screw extractor, expand the hole using a 8 mm cobalt steel stub-length drill bit, then use a pick to remove the remains of the bolt shaft.
      Caution: If an 8 mm drill bit is used, the hole must be drilled perfectly straight to prevent damage to the threads.
    6. Use a coated M10x1.5 straight flute cut tap to chase the threads.
      Note: Do not lubricate the tap.
      Note: Start the tap by hand. Once the tap is fully engaged in the threads, a tap handle can be used for additional leverage.
  7. Remove the curtain airbag tether bolt from the seat belt bracket (torque 10 Nm).
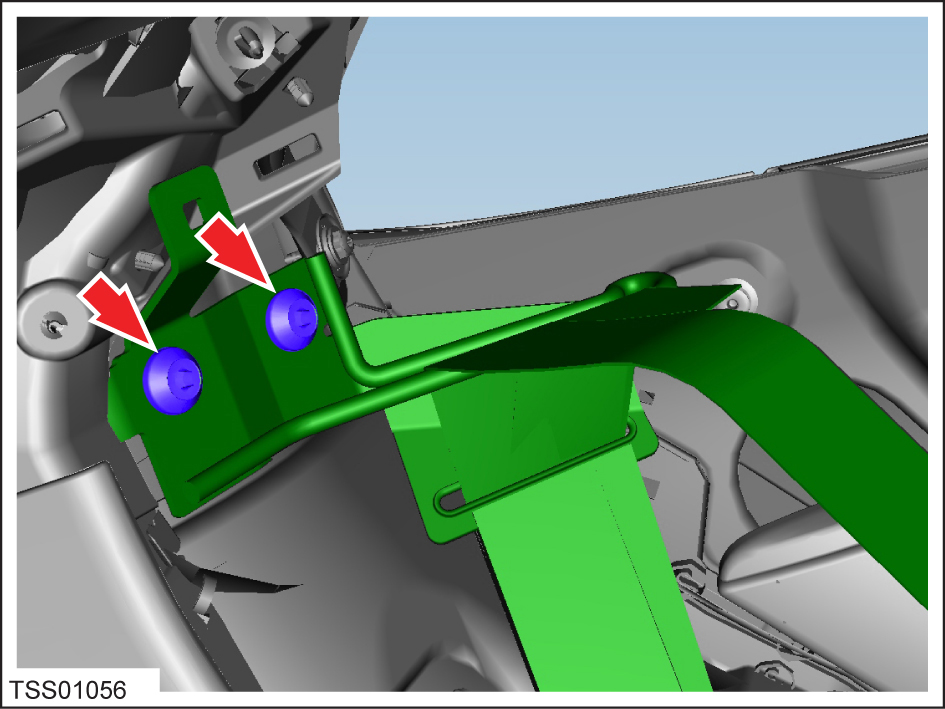
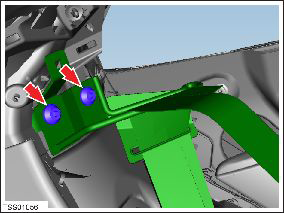
  8. Remove the bolts (x2) that secure the seat belt bracket to the body (torque 40 Nm).
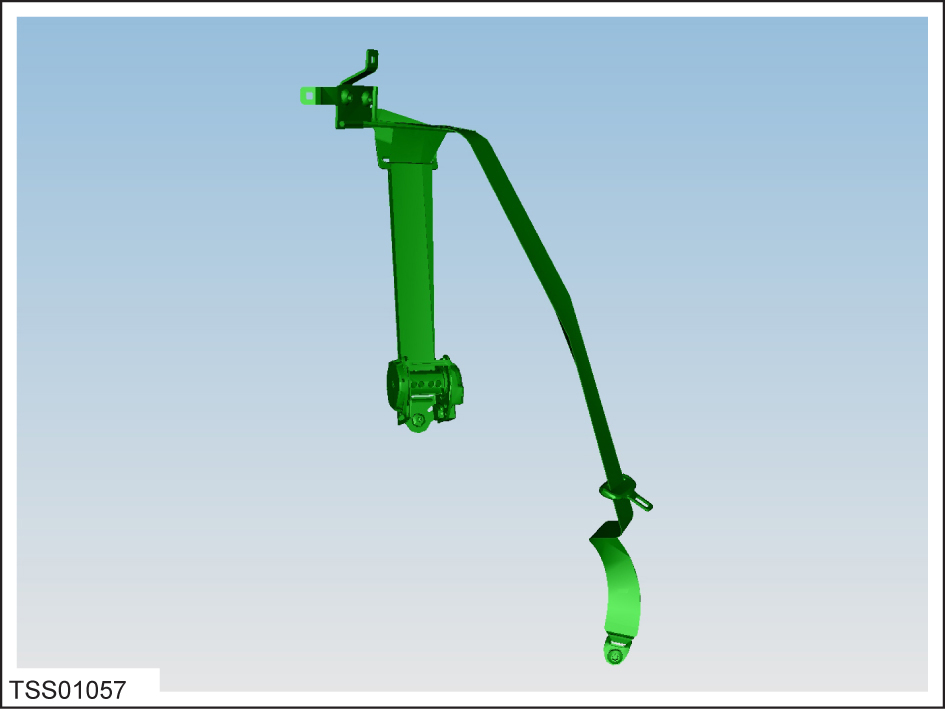
  9. Remove the seat belt reel assembly.

Installation

Installation procedure is the reverse of removal, except for the following:
  1. If the seat belt reel was secured to the body with a bolt that had adhesive patch material, thoroughly clean the female threads in the rear node and replace the bolt with one that does not have adhesive patch material.
  2. If the vehicle has a molded-in-color C-pillar middle trim panel, route the seat belt lower forward anchor and seat belt tongue through the C-pillar middle trim panel before installing the lower forward anchor bolt.