Coolant Heater - Electric - Battery - 2nd Generation (Remove and Replace)

FRT No: 18307202

Warning: Only technicians who have been trained in High Voltage Awareness are permitted to perform this procedure. Proper personal protective equipment (PPE) and insulating HV gloves with a minimum rating of class 00 (500V) must be worn any time a high voltage cable is handled. Refer to Tech Note TN-15-92-003, "High Voltage Awareness Care Points" for additional safety information.

This procedure only applies to vehicles with the 2nd generation High Voltage configuration. For vehicles with the 1st generation High Voltage configuration, refer to Coolant Heater - Electric - Battery - 1st Generation (Remove and Replace).

Removal

  1. Perform the vehicle electrical isolation procedure (refer to procedure).
  2. Remove the extension box from the underhood storage compartment (refer to procedure).
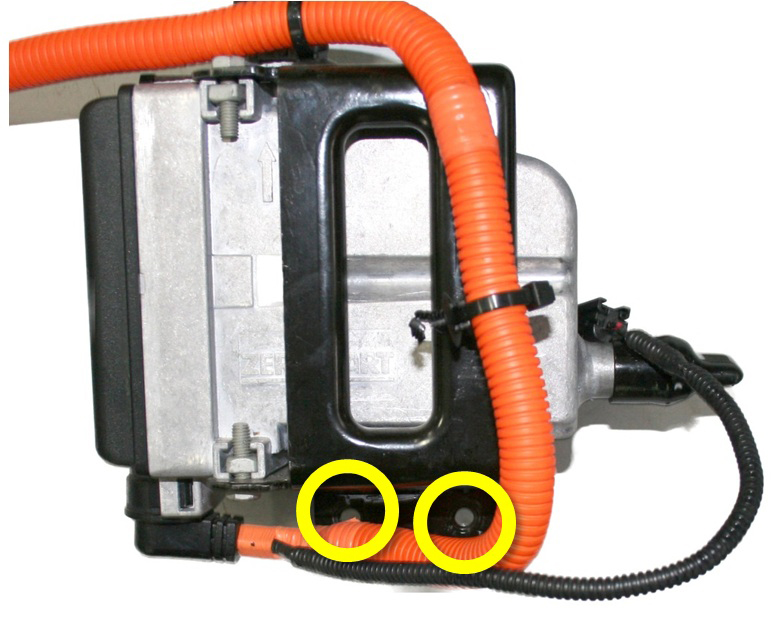
  3. Slide the harness connector off of the base of the coolant heater assembly.
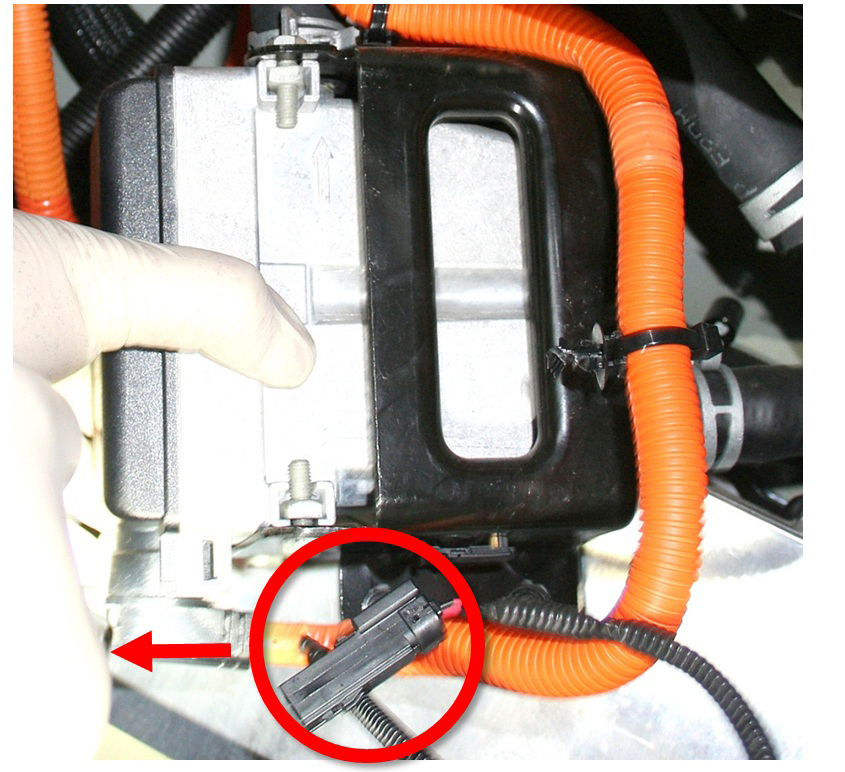
  4. At the base of the coolant heater bracket, disconnect the harness that leads to the DCDC converter.
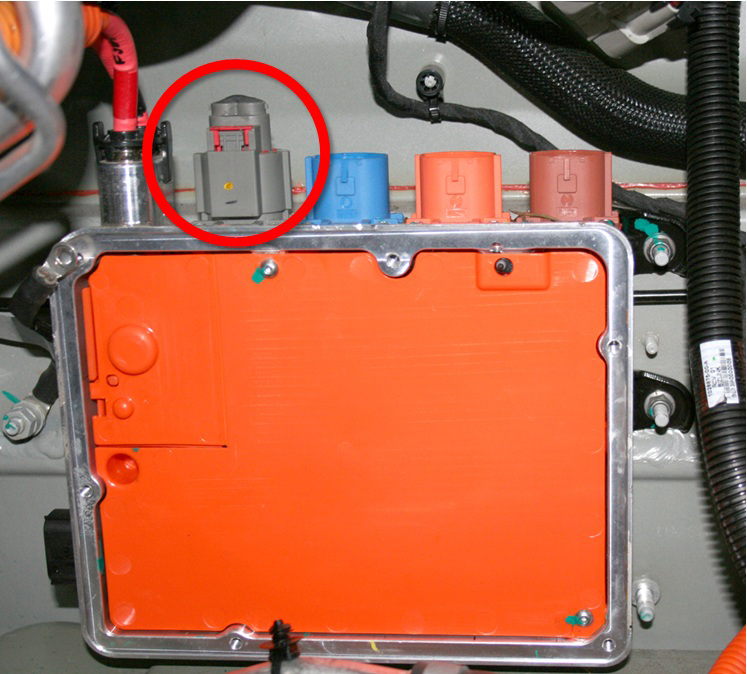
  5. Release the gray harness from the forward junction box (FJB).
    Caution: When looking at the FJB from the front of the vehicle, this connector is the second from the left. Do not release the leftmost connector.
  6. Release any clips that secure the coolant heater assembly to the body.
  7. Release the 2 bolts that secure the coolant heater assembly to the crossmember (torque 8 Nm).

Caution: Although the cooalnt heater assembly is now loose within the vehicle, do not attempt to remove it at this time.

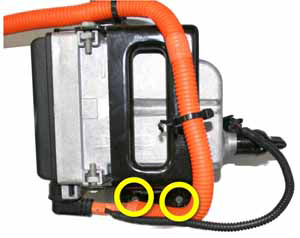
  1. Clamp the input and output coolant hoses on the coolant heater:
    1. Clamp the hose on the lower LH nipple as close to the coolant heater as possible.
    2. Clamp the hose on the upper nipple outboard of the battery inlet temperature sensor.
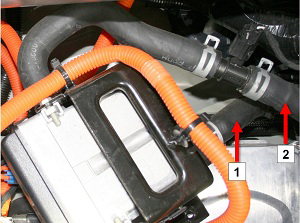
    1 Clamp hose to lower LH nipple
    2 Clamp hose to upper nipple
  2. Place absorbent material beneath the coolant hoses.
  3. Place a container beneath the coolant heater to catch any spilled coolant.

Caution: During the next steps, do not allow coolant to spill onto the High Voltage Battery, forward junction box, DCDC converter, coolant heater, or any harnesses.

  1. Release the coolant hose from the lower LH side of the coolant heater. Drain the coolant from the coolant heater into the container.
  2. Place a cap or plug over the lower LH side nipple on the coolant heater.
  3. Release the coolant hose outboard of the battery inlet temperature sensor. Drain excess coolant into the container.
    Note: Do not release the coolant hose from the top of the coolant heater.
  4. Place a cap or plug over the upper nipple on the coolant heater.
  5. Remove the coolant heater from the vehicle.

Installation

Installation procedure is the reverse of removal, except for the following:
  • Ensure that all areas are clean and dry before installing the coolant heater.

  • When all components have been reinstalled, refill and bleed the cooling system (refer to procedure).