Removal
-
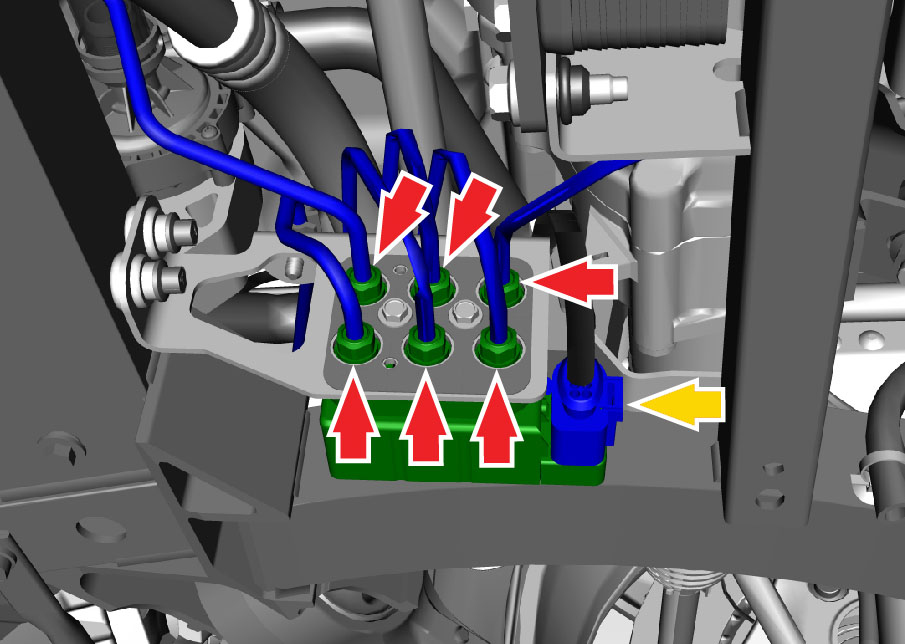
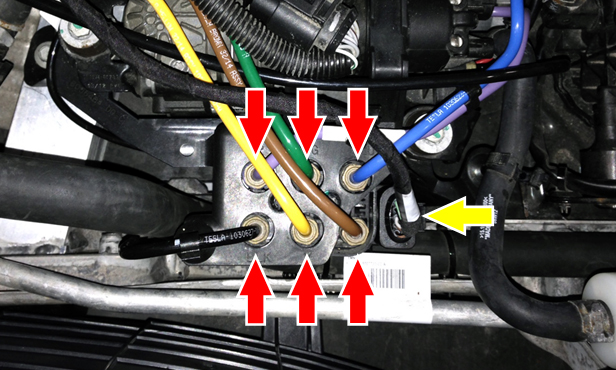
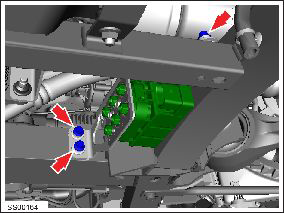
Disconnect the harness connector (yellow arrow).
- For vehicles manufactured before November 2014:

- For vehicles manufactured November 2014 and later:

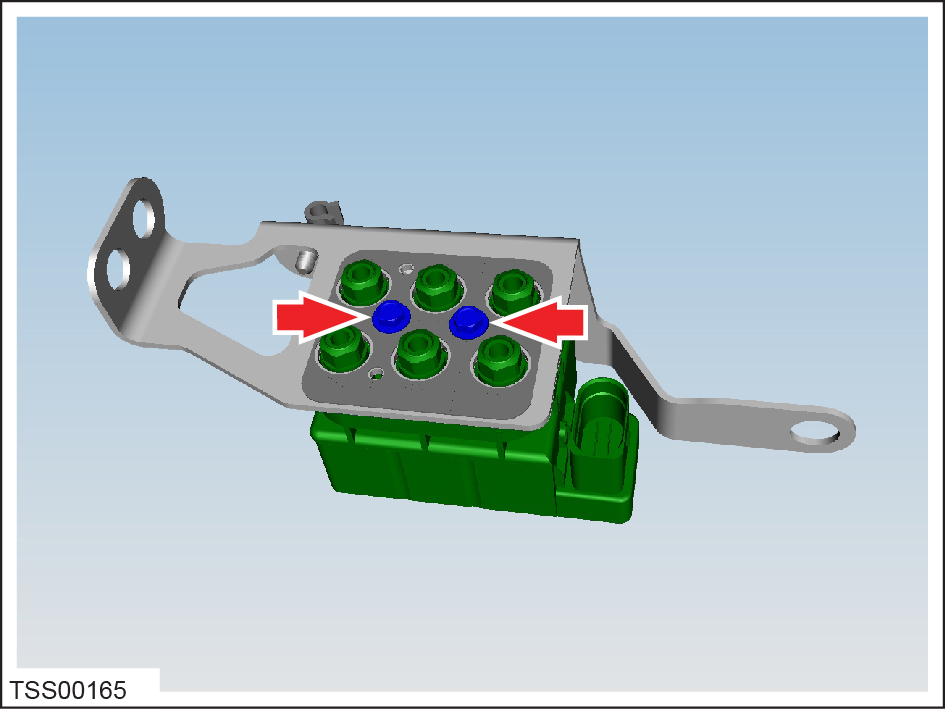
- For vehicles manufactured before November 2014:
-
Remove the bolts (x3) that secure the solenoid bracket to the subframe (torque
5.5 Nm).
-
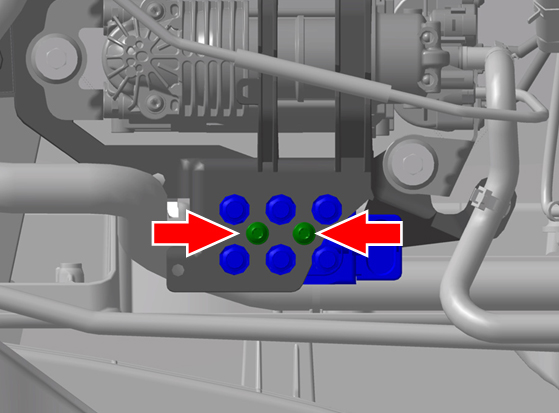
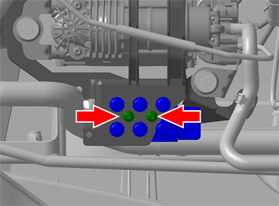
Remove the hardware that secures the solenoid to the bracket.
- For vehicles manufactured before November 2014: Remove the bolts (x2) that
secure the solenoid to the mounting bracket (torque 4 Nm).

- For vehicles manufactured November 2014 and later: Remove the bolts (x2)
that secure the solenoid to the compressor bracket (torque 4 Nm).
- For vehicles manufactured before November 2014: Remove the bolts (x2) that
secure the solenoid to the mounting bracket (torque 4 Nm).