Oil Seal - Differential to Driveshaft Assembly - LH (Remove and Replace)

FRT No: 40301002

Special tools required for this procedure:

Supplier Part Number Description
Tesla 1051509-00-A Output Seal Installation Tool
Tesla 1052583-00-A Seal Puller
Note: Technicians may use this tool or equivalent.
Tesla 1057312-00-A Axle Extractor

Removal

  1. If the vehicle has air suspension, use Toolbox to depressurize the air spring back to the reservoir (refer to procedure).
  2. On the touchscreen, touch Controls > E-Brake and Power Off > Tow Mode.
    Warning: Once "Tow Mode" is selected, the vehicle is in Neutral.
  3. Remove the road wheel (refer to procedure).
  4. Remove the mid aero shield (refer to procedure).
  5. Drain the gearbox fluid (refer to procedure).
    Note: It is not necessary to drain the gearbox fluid if the vehicle is level throughout this procedure.
  6. Disconnect the toe link from the LH knuckle (torque 130 Nm).
  7. Disconnect the upper link from the knuckle (torque 140 Nm).
  8. Remove the park brake caliper (refer to procedure).
  9. Release the wheel speed sensor harness from the securing clip and bracket.
  10. Disconnect the shock absorber from the knuckle (torque 140 Nm).
    Tip: If necessary, use a pry bar or drift punch to align the lower shock bushing while removing the bolt.
  11. Use the axle extractor tool to release the driveshaft from the transmission. Rest the driveshaft on the lower control arm.
    Caution: Ensure that the axle extractor tool does not contact any of the differential retaining studs.
    Caution: Do not strain the brake hose or electrical wiring while pulling the knuckle.
    Note: Place suitable absorbent material around the affected area to absorb any fluid spillage.
  12. Protect the driveshaft's output flange oil seal face and spline to prevent damage.
  13. Using 1052583-00-A or an equivalent seal puller, remove the output shaft oil seal from the differential casing.
    Caution: Plug the transmission to prevent ingress of dirt or moisture.

Installation

Installation procedure is the reverse of removal, except for the following:
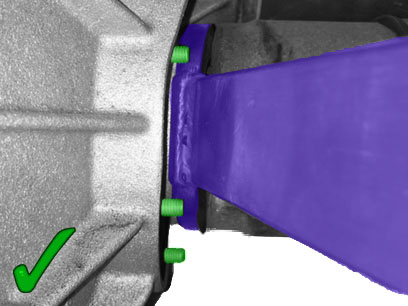
Caution: Ensure that the mating faces are clean and free from debris.
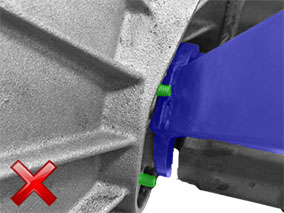
Caution: Do not reuse the snap-ring. Install a new snap-ring before reinstalling the driveshaft.
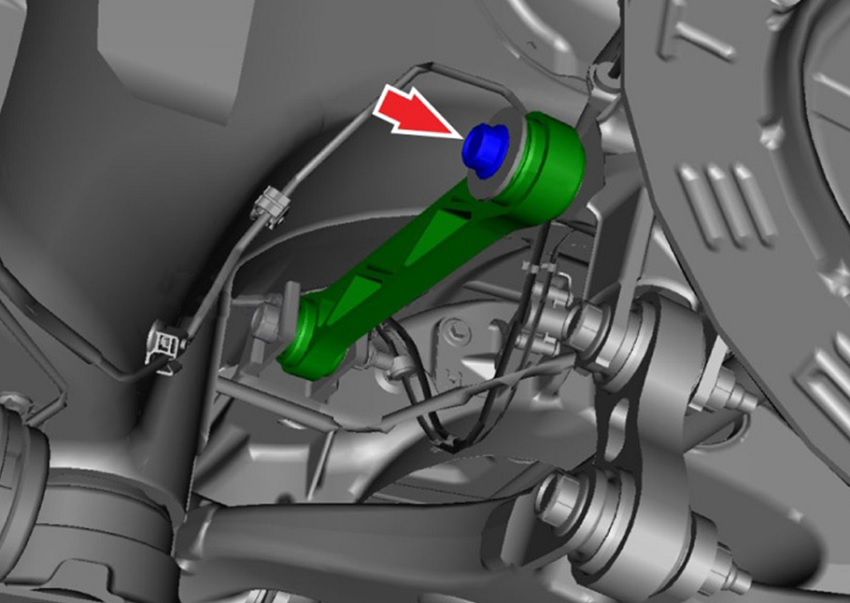
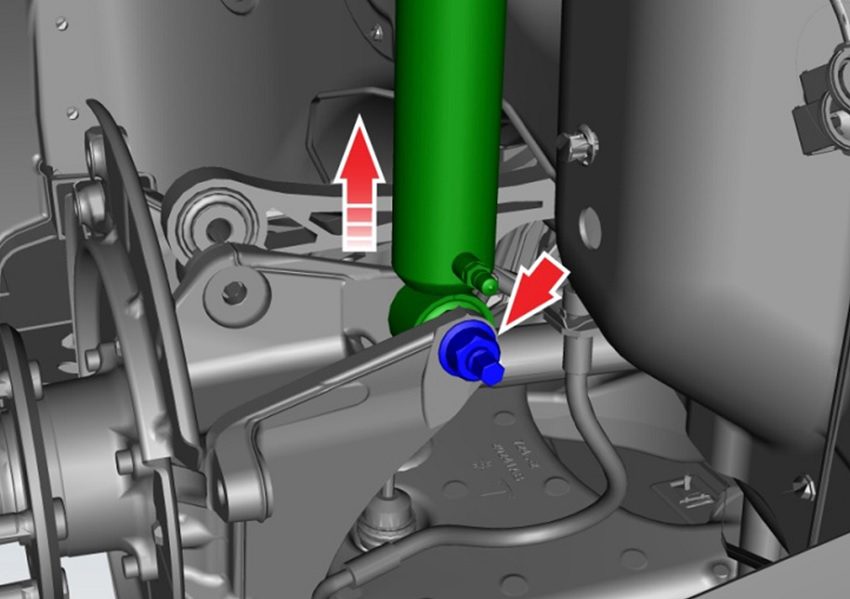
Caution: Ensure that the bolt that secures the spring assembly to the knuckle is inserted towards the rear of the vehicle; the head of the bolt faces the front of the vehicle and the nut is tightened at the rear.
Tip: It might be helpful to lift the lower control arm with a floor jack to line up the rear suspension during reassembly. Do not torque the bolts at this time.
Caution: Only fully tighten suspension nuts and bolts when the vehicle is on a 4-post lift and the suspension is in the ride height position.
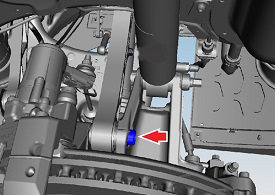
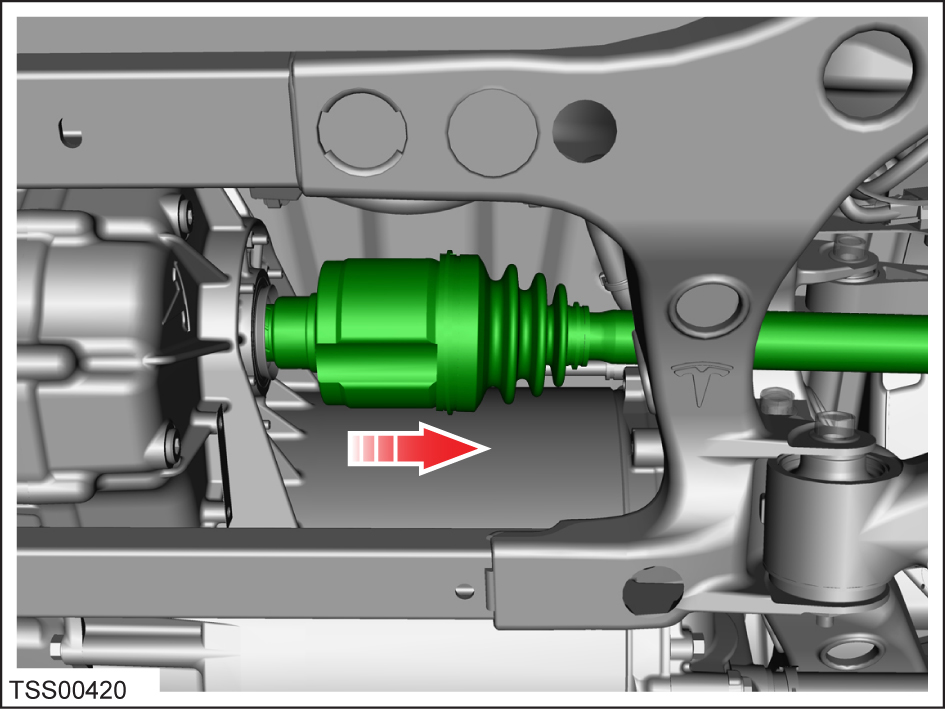
  • When installing the driveshaft into the drive unit:
    • Ensure that the opening of the snap ring is facing towards the bottom of the drive unit.
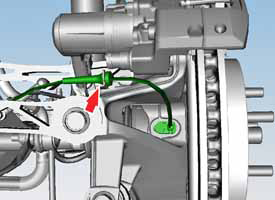
    • Do not damage or displace the oil seal.
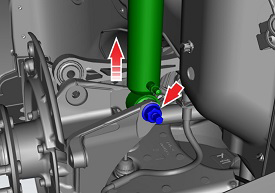
    • Verify that the driveshaft is fully seated by carefully pushing it into the drive unit until there is an audible "click" from the snap ring.
  • Check and top up gearbox fluid.
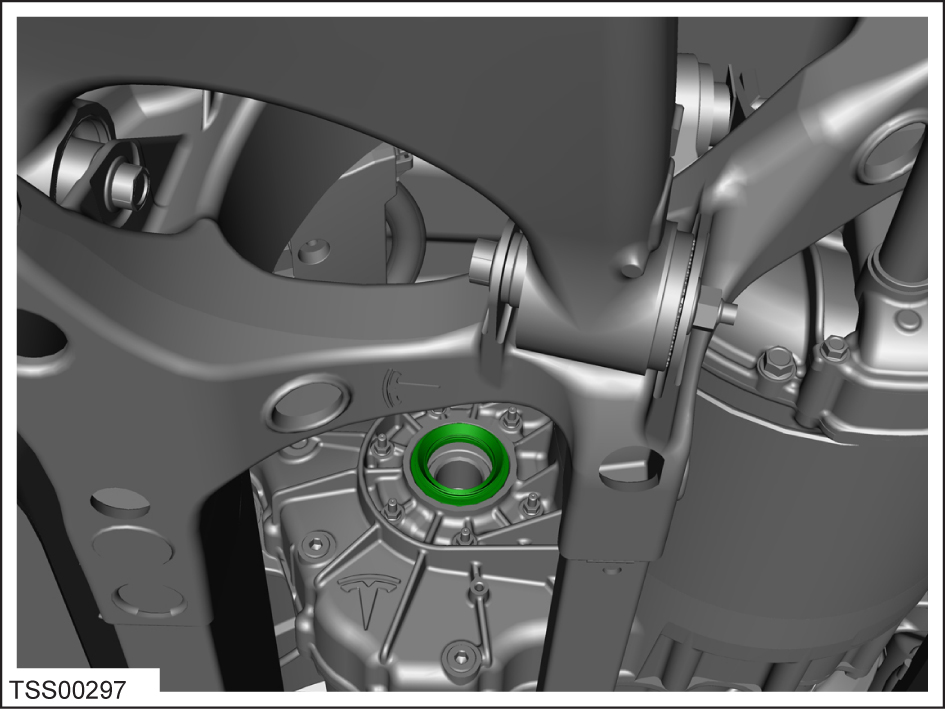
  • Check the differential casing oil seal register for burrs and other damage.
  • Using the 1051509-00-A output seal installation tool, install a new output shaft oil seal.