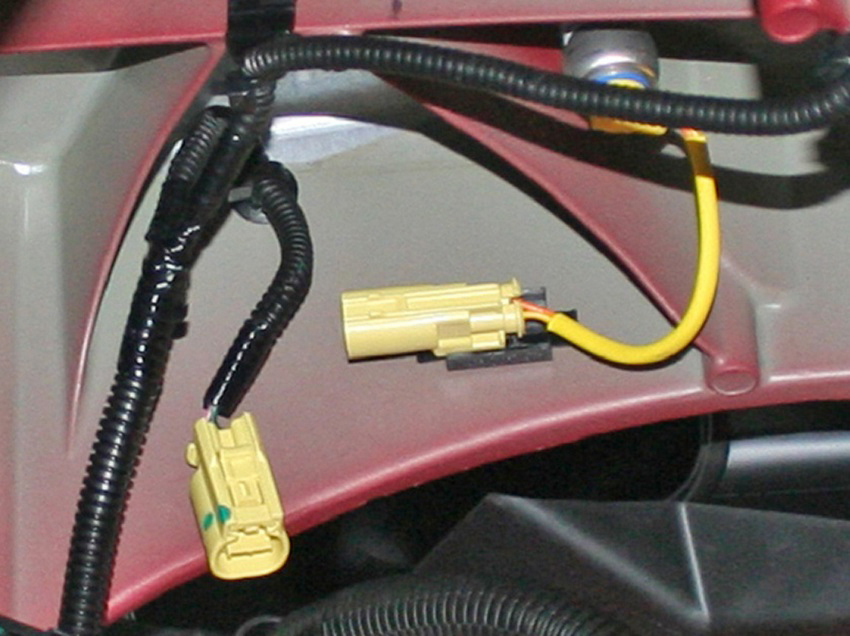
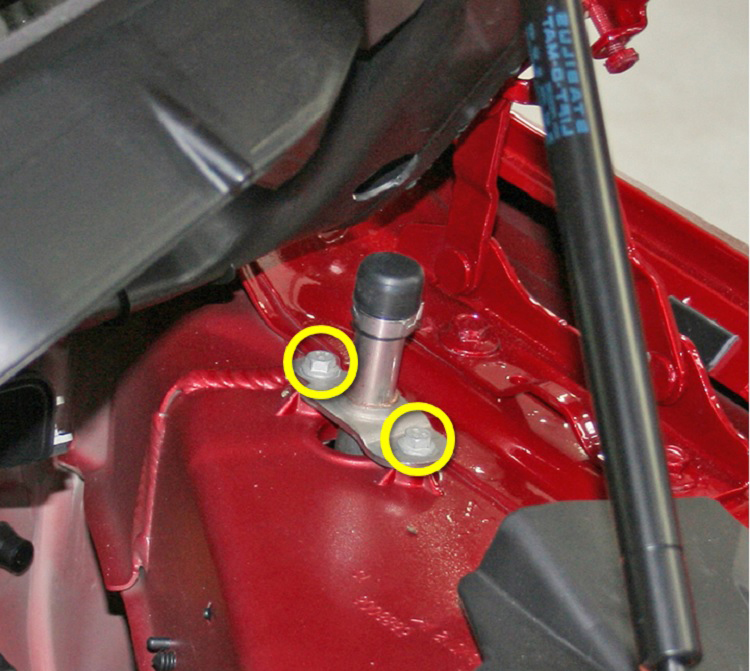
Actuator - Pedestrian Protection - LH (Remove and Replace)

FRT No: 20300102

Warning: If the 12V power supply is disconnected, do not attempt to open any doors with door glass in closed position. Failure to follow this instruction could result in door glass shatter.
Note: Before disconnecting the 12V power supply, ensure that the driver’s door window is fully open. Failure to follow this instruction could result in vehicle lockout.
Note: This procedure does not currently apply to North American vehicles.

Removal

  1. Disconnect 12V power.
  2. Remove the LH underhood apron (refer to procedure).
  3. Remove the front wheel (refer to procedure).
  4. Loosen the rear portion of the front wheel arch liner to access the actuator harness.
    Note: It is not necessary to remove the entire front wheel arch liner.
  5. Disconnect the actuator harness.
  6. Remove the fir tree clip that secures the actuator harness.
  7. Lower the vehicle.
  8. Lift the cowl screen to access the actuator.
    Note: It is not necessary to remove the cowl screen.
  9. Release the bolts (x2) that secure the actuator to the shock tower (torque 11 Nm).
  10. Remove the actuator by lifting it up and guiding the harness through the hole near the shock tower.

Installation

Installation procedure is the reverse of removal, except for the following:
  • When installing the bolts (x2) that secure the actuator to the shock tower, tighten the forward bolt first.
  • If the actuators deployed, remove and replace the pedestrian protection sensor (refer to procedure).
  • If the actuators deployed, remove and replace the hood hinges (refer to procedure).
  • If the actuators deployed, inspect the following for damage and replace as necessary:
    • Hood
      Note: Inspect for deformation in the plastic above the hood hinges, the surface above the hinges, and the surface above the striker.
    • Primary hood latch
    • Secondary hood latch
    • Hood striker
  • Use Toolbox to clear all DTCs.