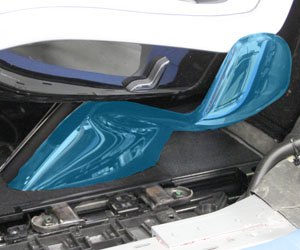
Seat Assembly - 2nd Row - LH (With Broken Seat Track Motor) (Remove and Install)

FRT No: 13050501

Caution: Only perform this procedure if the seat is unable to move backward and forward in order to allow access to all fasteners that secure the seat.. If the seat is able to fully move, refer to Seat Assembly – 2nd Row – LH (Remove and Install).

This procedure requires drilling through the gearbox housing to access the gear in the outer track, inserting a square drill bit though the gear and into the motor, and using a drill to spin the motor. This causes the seats to move, which provides access to the fasteners that secure the seat. This procedure requires replacing the outer track.

Special tools required for this procedure:

Supplier Part Number Description
Tesla 1085692-00-A MX 2nd Row Seat Track Removal Kit
Tesla 1086947-00-A 90 Degree Pneumatic Drill
If the seat is unable to track fully forward and backward, drill through the gearbox housing to access the gear in the outer track. Insert a square drill bit though the gear and into the motor. Use a drill to spin the motor, causing the seat to move. This procedure requires replacing the outer track.

Removal

  1. Remove the 2nd row middle floor panel (refer to procedure).
  2. Connect a laptop with Toolbox to the vehicle.
  3. On the touchscreen, select Factory Mode > Seat Install Mode.
  4. Move the center seat completely forward.
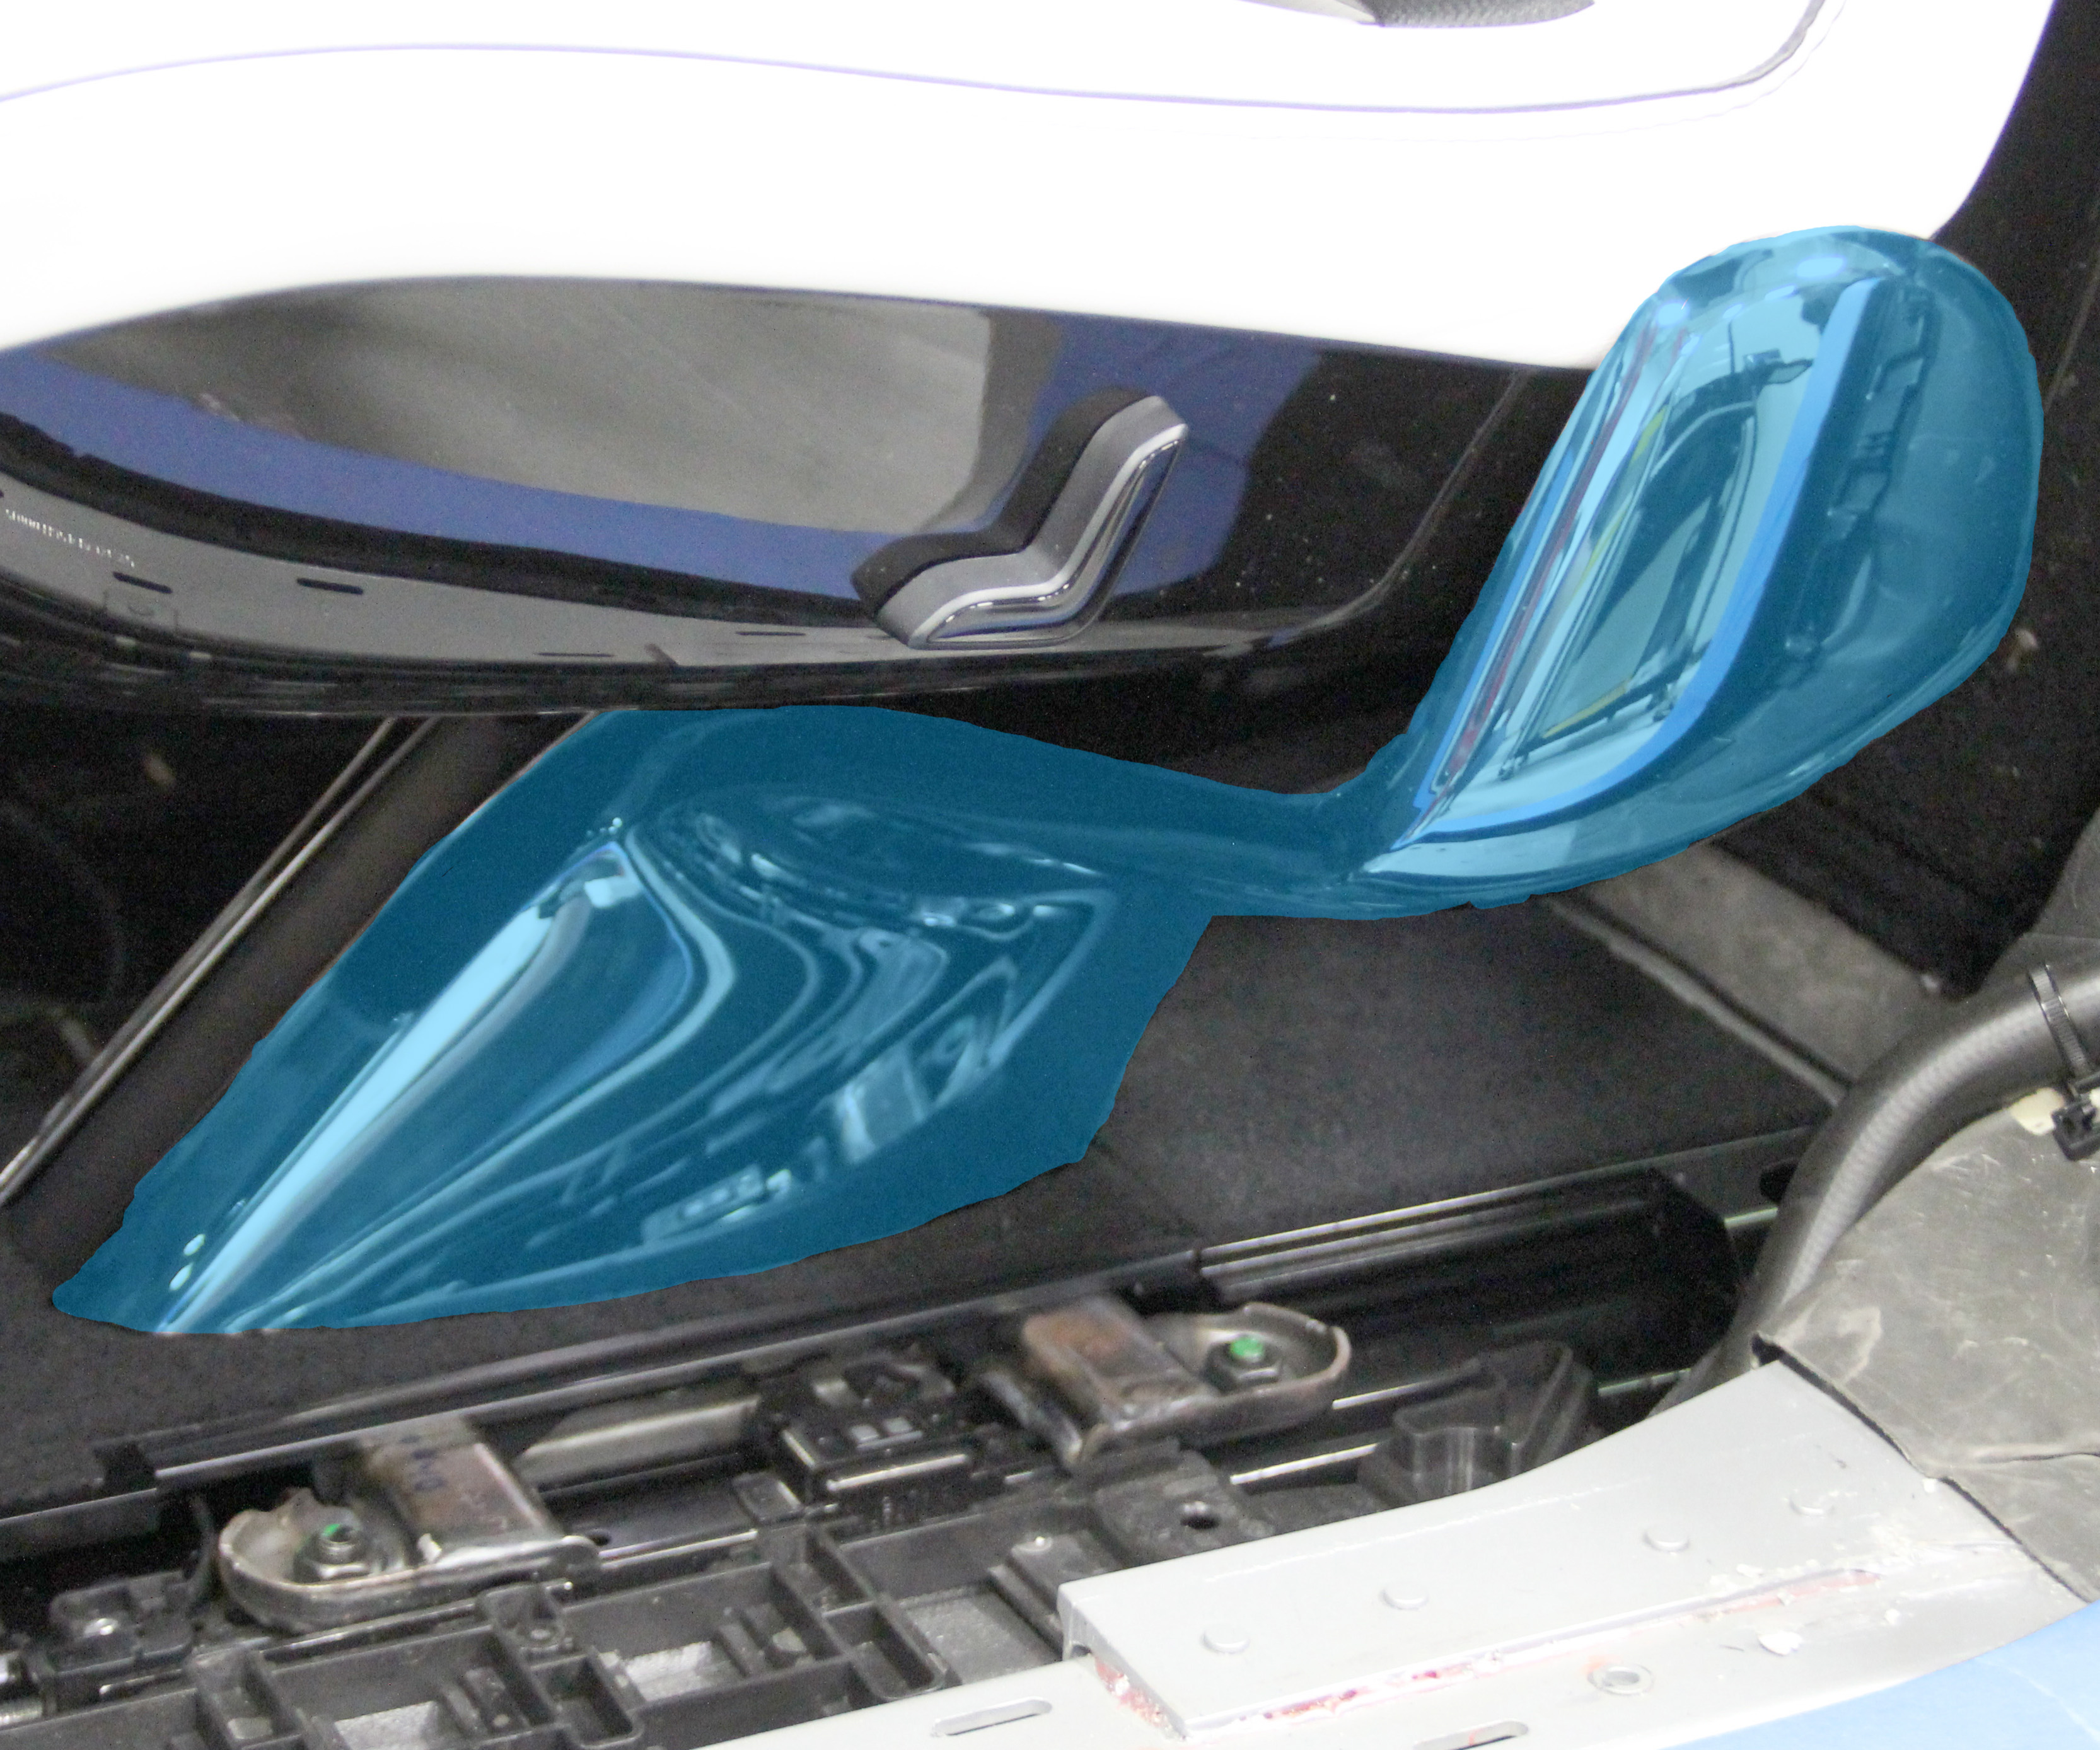
  5. Remove the outboard and inboard podium trim panels from the seat base.
    Caution: Replace any broken clips.
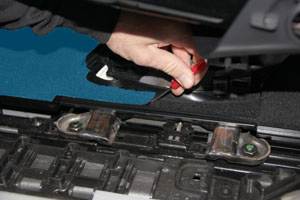
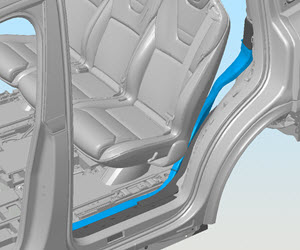
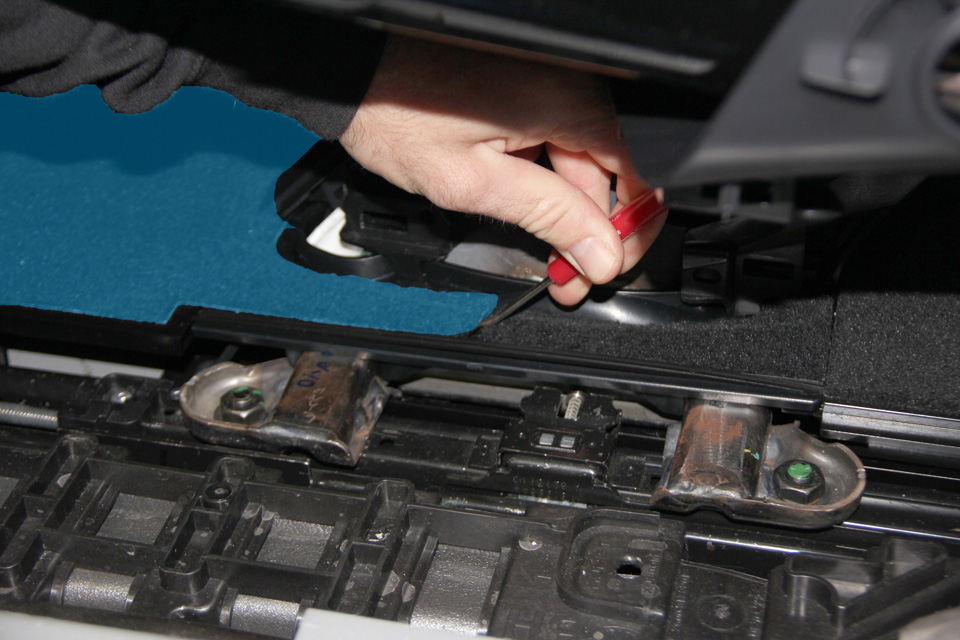
  6. Using a pick or similar tool, remove the carpet at the base of the LH seat to access the fasteners that secure the front sliding panel.
    Caution: This part is a one-time use component.
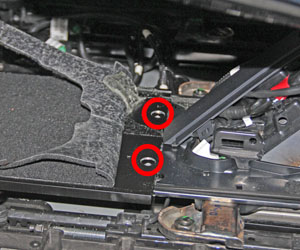
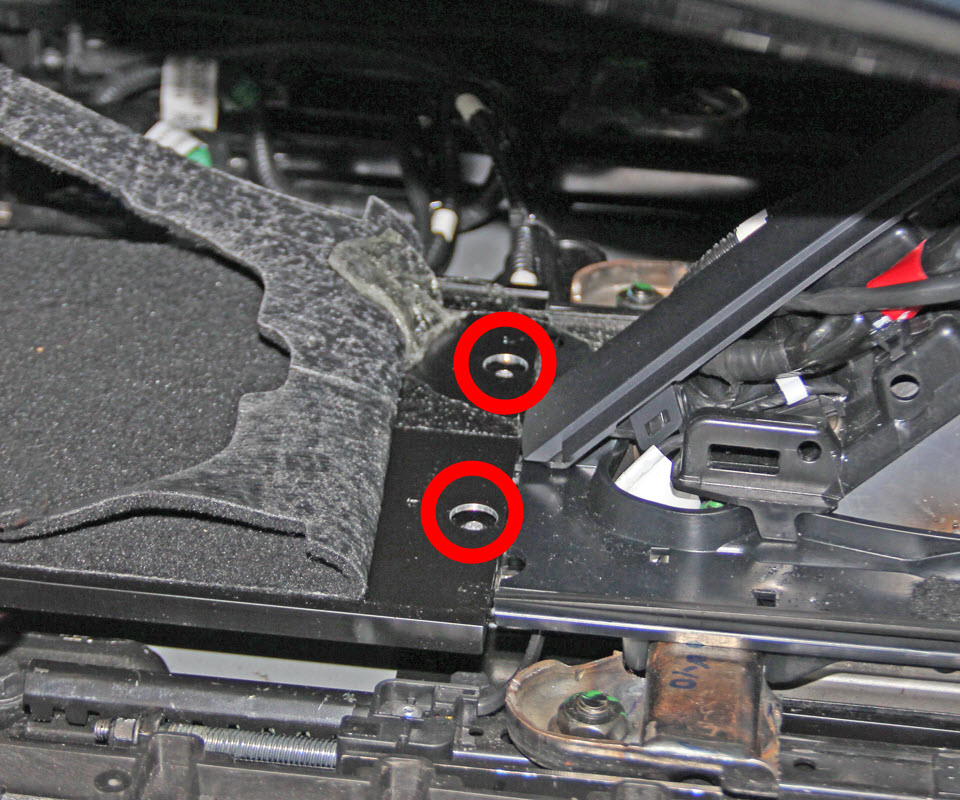
  7. Release the screws (x2) that secure the front sliding panel to the seat tracks (torque 2.5 Nm).
  8. Release the front sliding panel from the seat tracks.
  9. Release the fasteners that secure the LH outboard support bracket (torque 2.5 Nm).
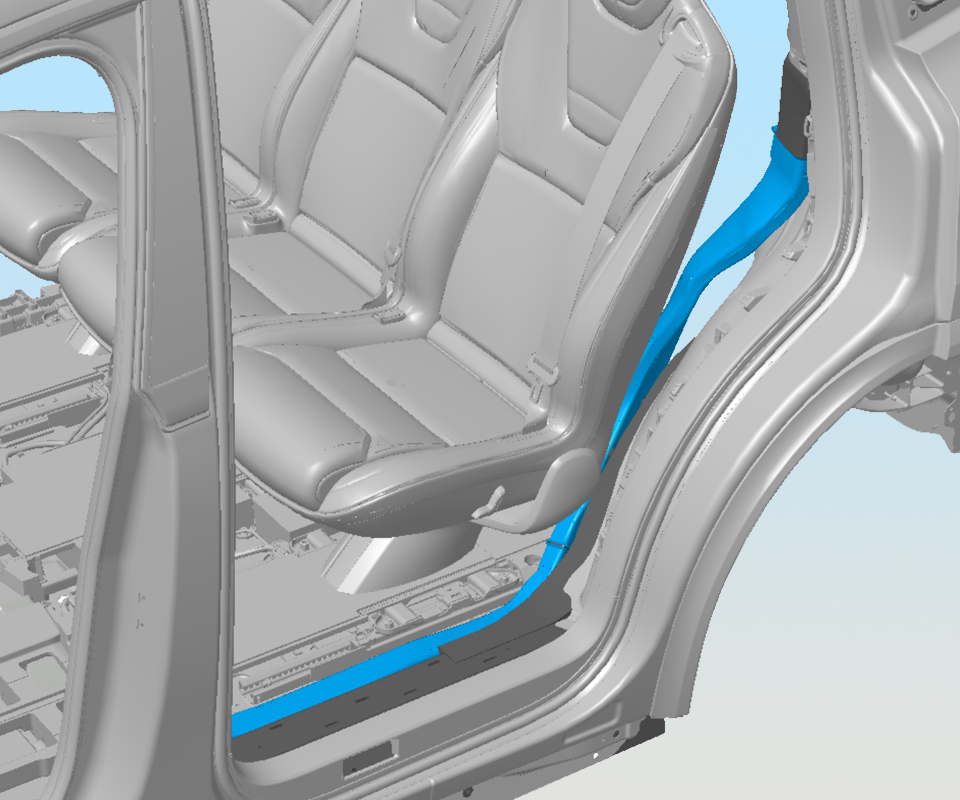
  10. Remove the rocker duct and the C-Pillar feeder duct together as an assembly.
  11. Release the clip that secures the coolant hose. Carefully move the coolant hose outboard to provide better access to the base of the seat.
  12. Install the drill stop collar onto the 5/16 in (8 mm) drill bit. Adjust the bit length to 15.5 mm.
  13. Install the drill bit with the collar into the 90 degree pneumatic drill.
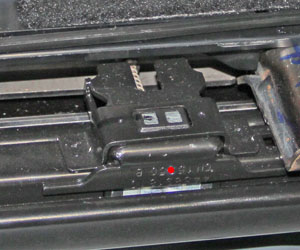
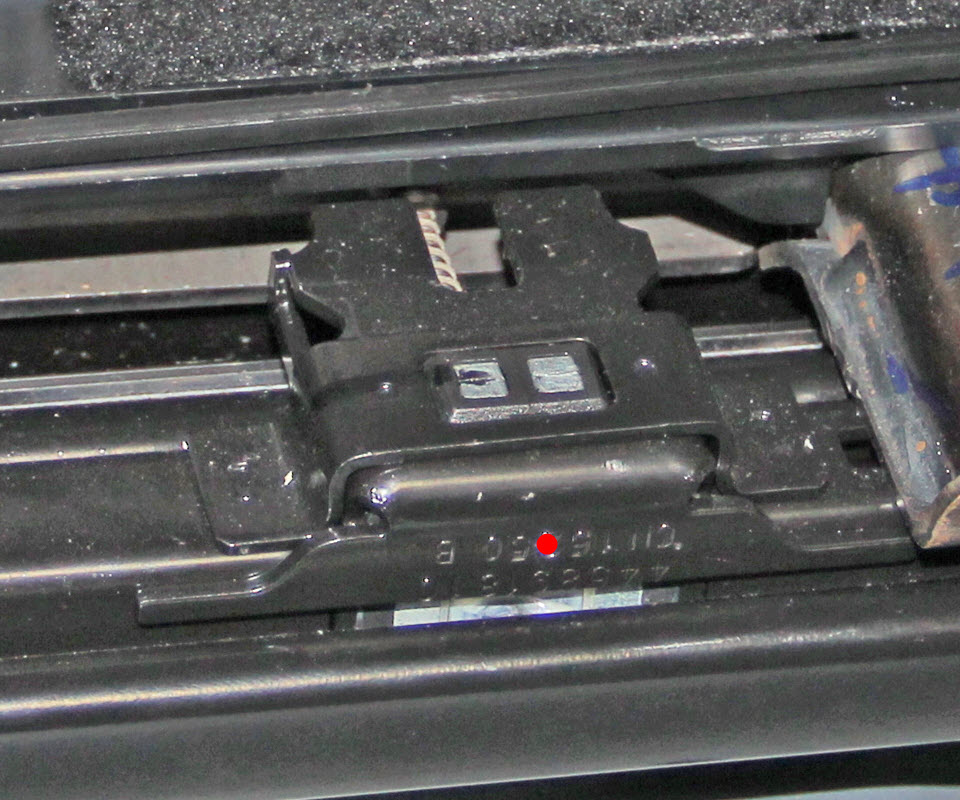
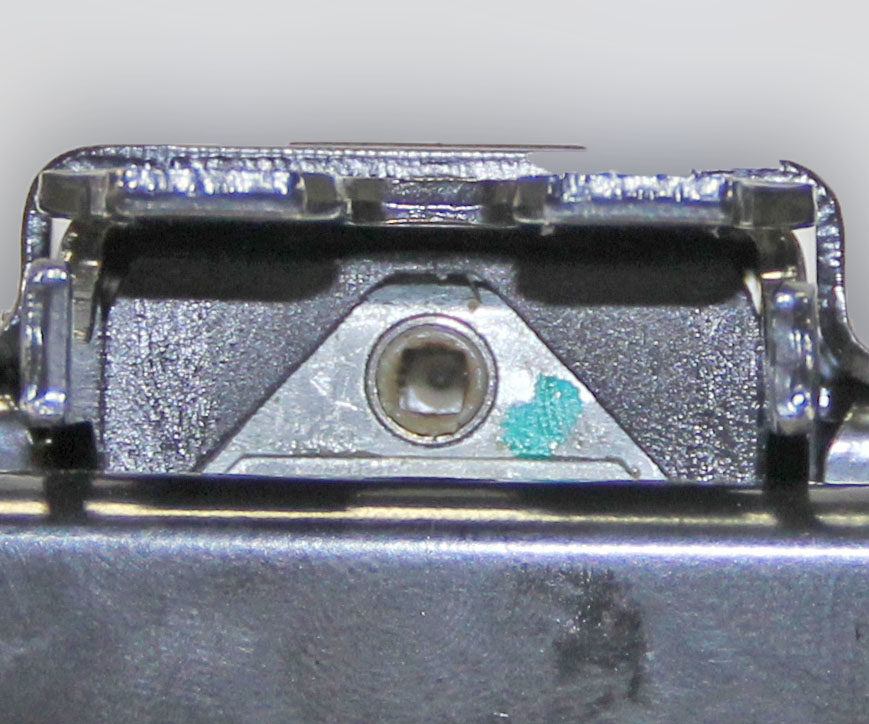
  14. Make a drill mark in the center of the gearbox housing.
  15. Drill through the gearbox housing to expose the gear, but do not drill through the gear at this time. If necessary, expand the hole so that the entire gear is visible.
    Warning: To avoid personal injury, eye protection must be worn when performing this operation.
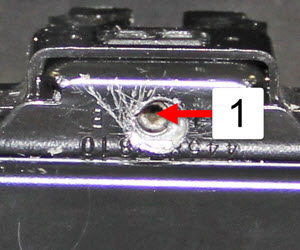
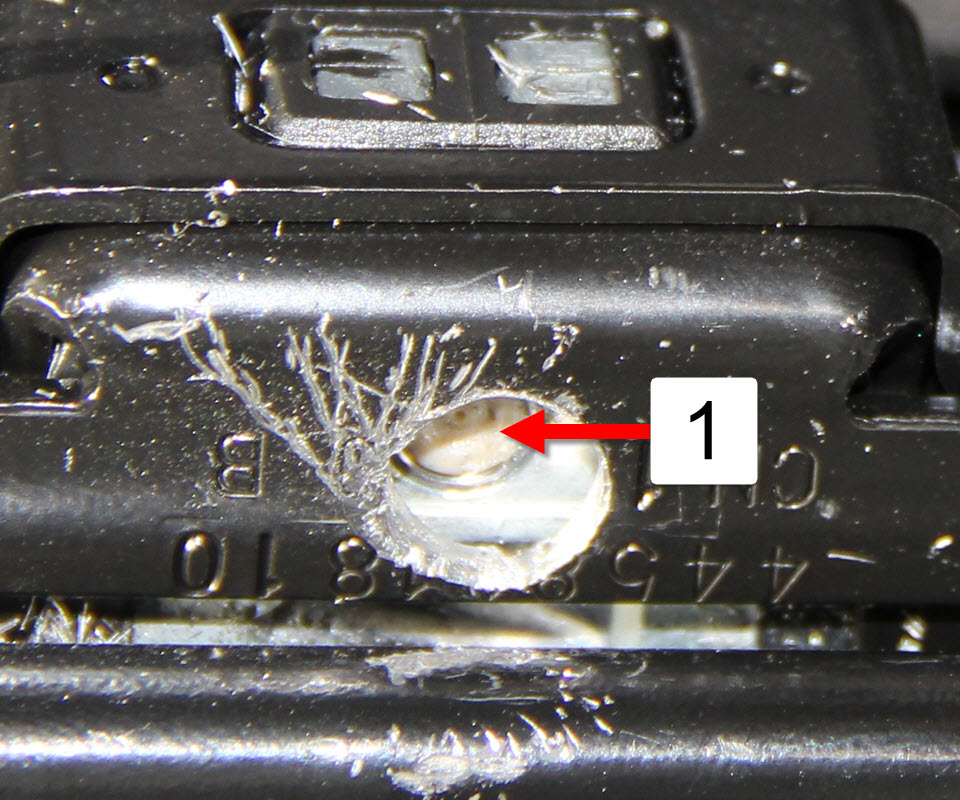
  16. Install the 3/16 in (9.5 mm) drill bit into the 90-degree pneumatic drill.
  17. Slowly drill through the gear to expose the driveshaft.
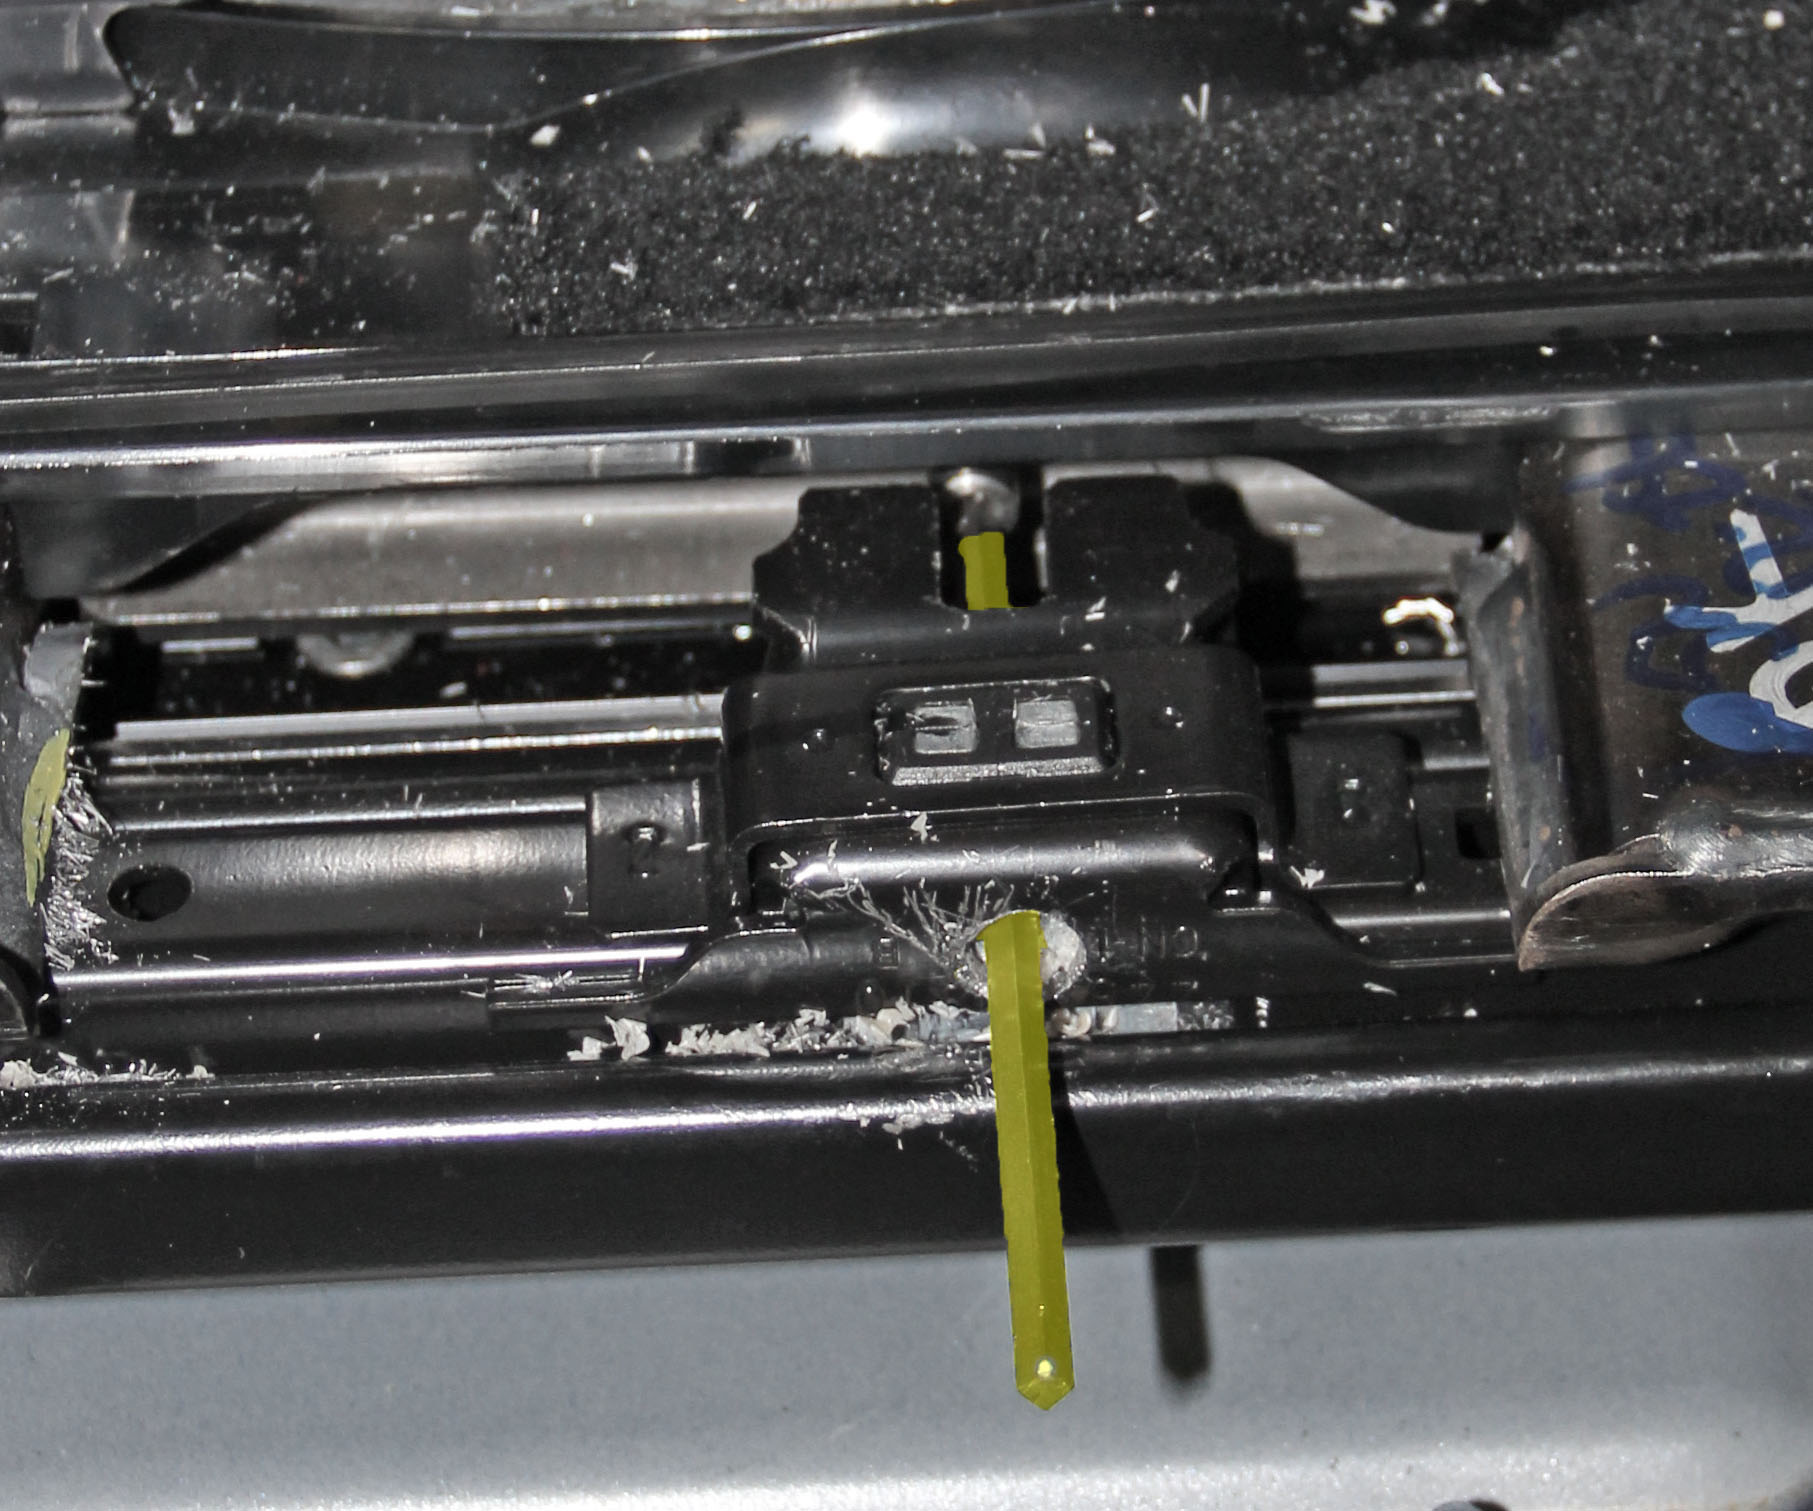
    View large image.

    1 Driveshaft exposed
  18. Working from above the track, use pliers to remove the driveshaft. Discard the driveshaft; ensure that a new driveshaft is installed during reinstallation.

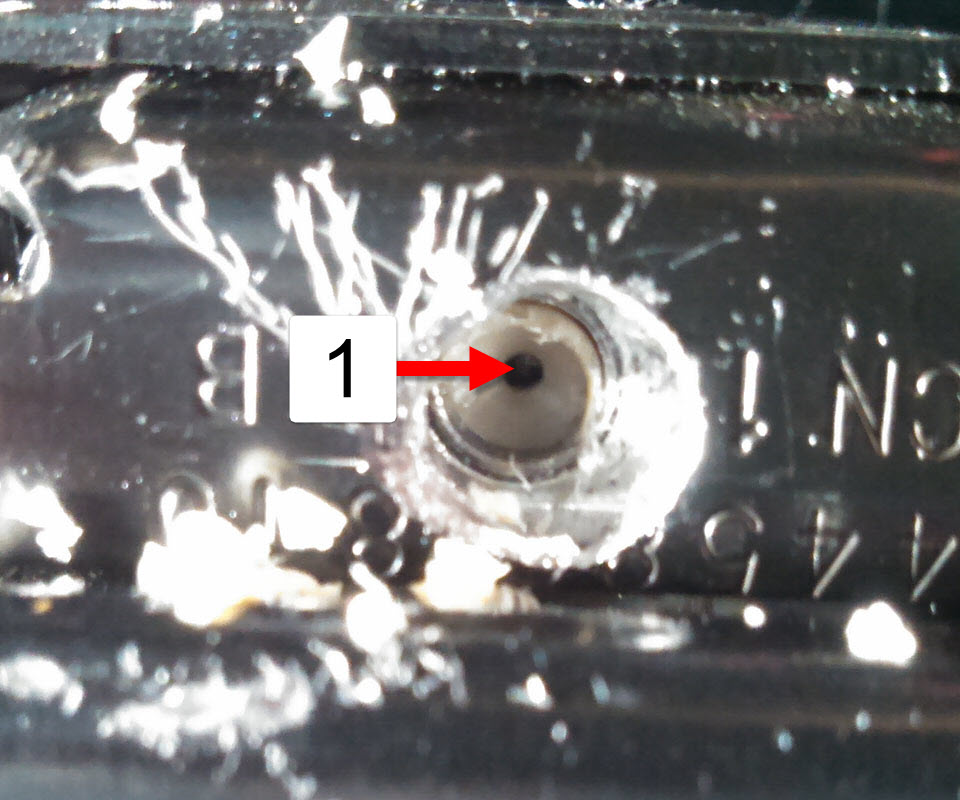
Caution: The goal of the next step is to expose the square hole in the gear that housed the driveshaft. When drilling, drill only small amounts at a time to avoid damaging the square hole. If the square hole is damaged, the seat must be cut out of the vehicle.

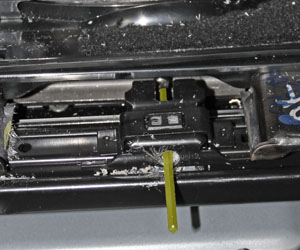
Inboard view of gearbox.

View large image.

  1. Using short bursts, carefully drill through the hole for the motor shaft to expose the square hole on the inboard of the gear.
    Caution: When drilling, drill only small amounts at a time to avoid damaging the square hole. If the square hole is damaged, the seat must be cut out of the vehicle.

    View large image.

    1 Square hole in gear
  2. Insert the square bit through the hole in the gearbox and into the motor.
  3. With the square bit still in place, position the drill at the end of the bit and tighten the chuck.
  4. Using the drill, ensure that the seat can be moved forward and backward.
    Note: If the seat does not move, the bit is not fully inserted into the motor.
  5. Using the drill, move the seat fully forward.
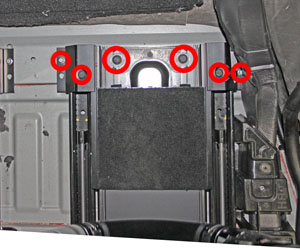
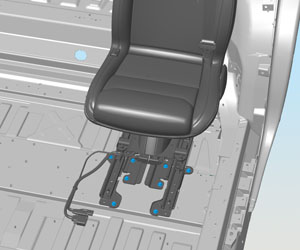
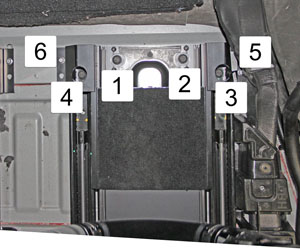
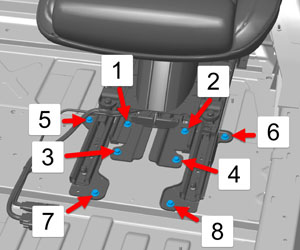
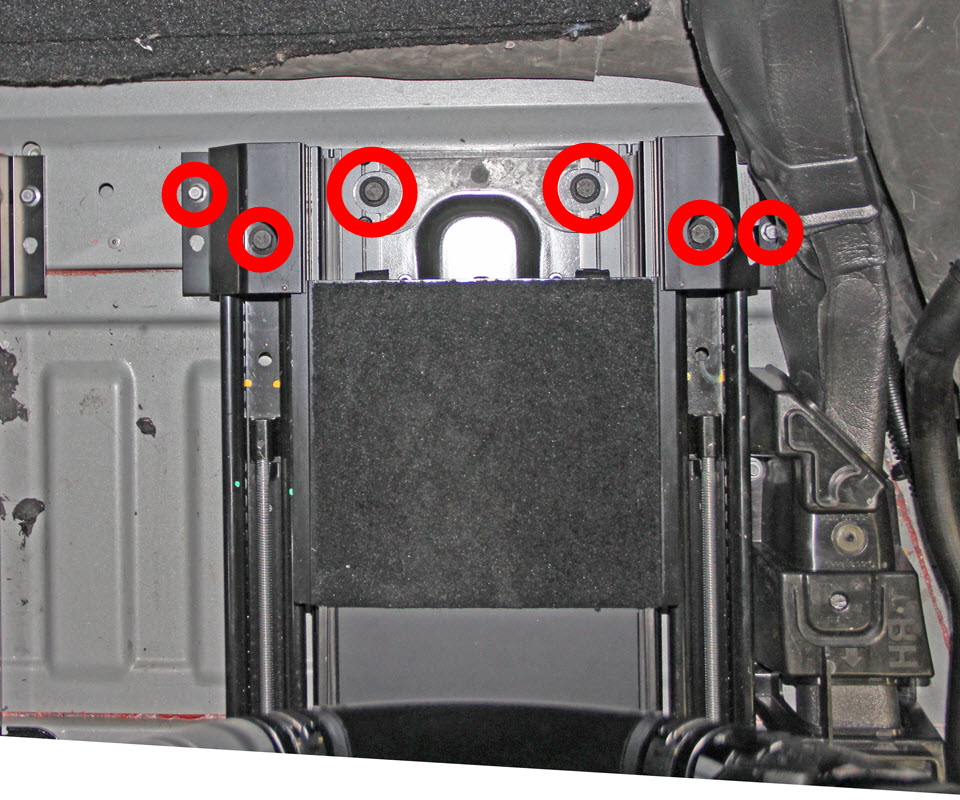
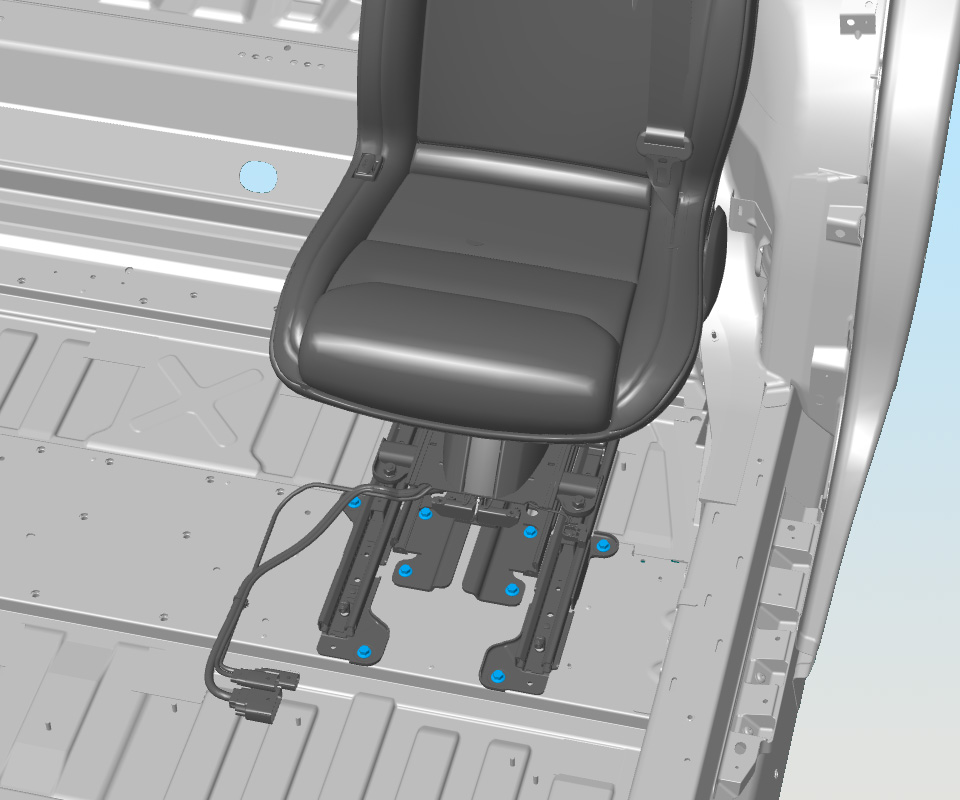
  6. Remove the bolts (x6) that secure the rear of the seat tracks.
  7. Using the drill, move the seat fully backward.
  8. Remove and discard the bolts (x8) that secure the front of the seat tracks.
  9. Disconnect 12V power (refer to procedure).

Warning: Wait at least 2 minutes before continuing to allow the airbag circuits to fully discharge.

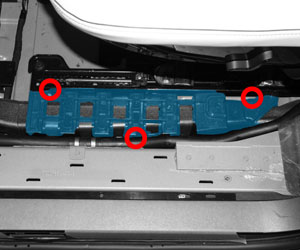
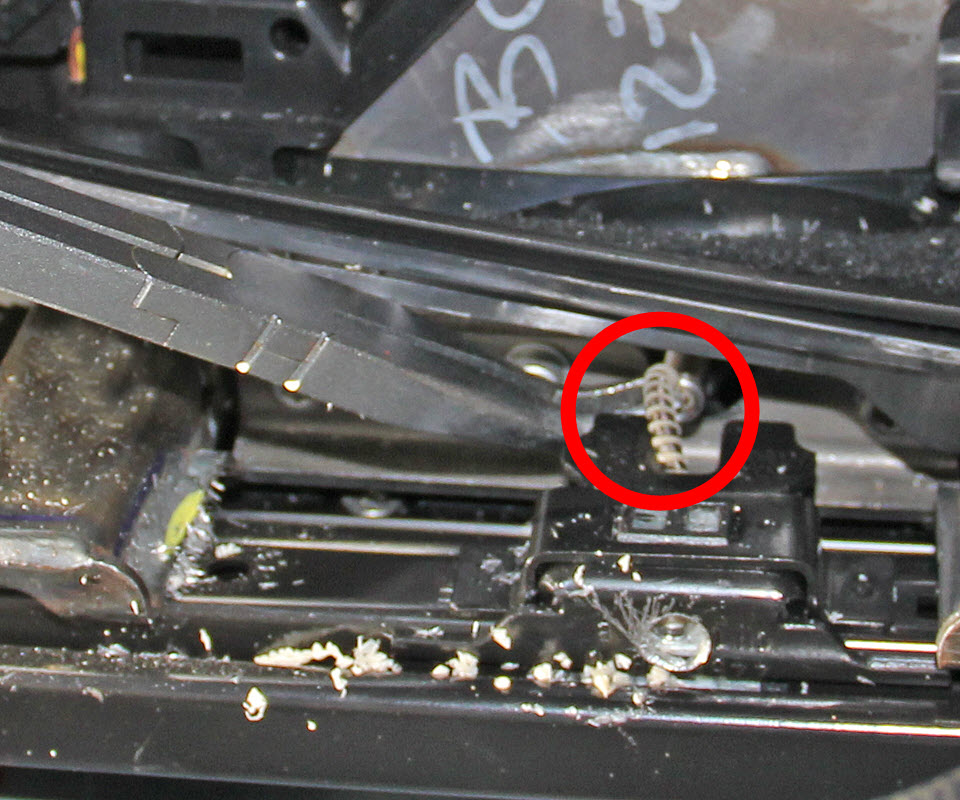
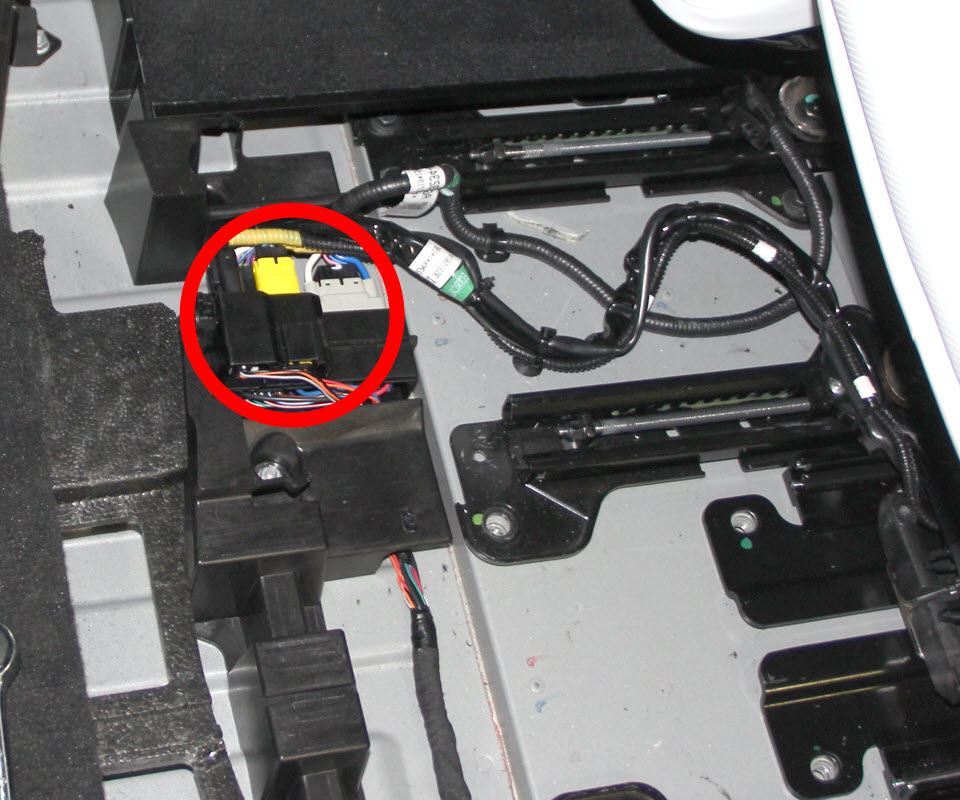
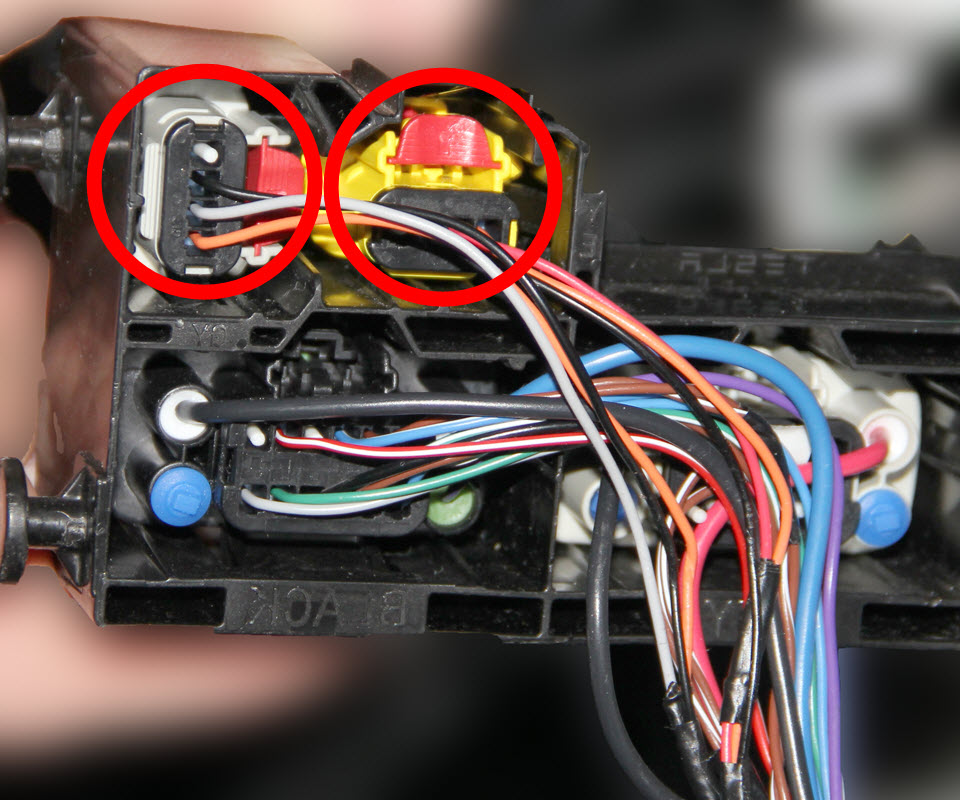
  1. Release the clip that secures the harnesses to the bracket in front of the seat.
  2. Working from the bottom of the harness block, use a pick or similar tool to release the locking tabs to disconnect the small yellow and gray harnesseses.
  3. Working from the top of the harness block, disconnect the large black harness.
  4. Prepare a padded surface for the seat when it is removed in the next step.
  5. With an assistant, carefully remove the seat from the vehicle and place it on the padded surface with the outboard side of the seat facing up.

Installation

Warning: Ensure that 12V is still disconnected.
  1. Install a new outer track onto the seat (refer to procedure).
    Note: Do not fully torque that nuts that secure the track at this time.
  2. Vacuum the seat and the interior of the vehicle to remove any shavings from drilling the old track.
  3. Position the seat inside the vehicle.
  4. Reconnect the seat harnesses.
  5. Reconnect 12V power.
  6. With Toolbox running, re-enter Seat Install Mode.
  7. Fully move the seat backward and forward.
  8. Fully torque the nuts that secure the outer track (torque 40 Nm).
  9. Fully track the seat backward and forward.
  10. Reinstall bolts for the rear of the seat in the following order. If any threads are damaged, discard the fastener and use a rivnut.
    • Bolts 1-4: 33 Nm
    • Bolts 5 & 6: 22 Nm
  11. Install new bolts for the front of the seat in the following order (torque 33 Nm):
  12. In the Toolbox Seat Install panel, run the Seat Calibration program.
  13. Install a new carpet at the base of the seat.
  14. Reinstall all components that were removed for access.