In this article I describe how to install a fresh copy of the freely available Ubiquiti UISP, also known as UNMS, on a self-hosted cloud server on DigitalOcean (referral link). This guide will focus on installing it on a Linux virtual server (or Droplet as it’s called on DigitalOcean). It’s very easy to install and only costs about $10 a month.
The minimal requirements for UISP:
- Supported Linux distros:
- Ubuntu 16.04.1 LTS (Xenial Xerus) 64-bit
- Ubuntu 18.04 LTS (Bionic Beaver) 64-bit
- Ubuntu 20.04 LTS (Focal Fossa) 64-bit
- Debian 9 64-bit
- 2 GB RAM (Minimal)
- 16 GB of fast SSD storage (Minimal)
- 64-bit (x64) CPU
So in this guide we will be using Ubuntu 18.04 LTS 64-bit. There are newer Ubuntu versions available, but to make sure that the server is working as intended and the installation files has been thoroughly testet – we are installing it on 18.04 LTS. (You can use the 20.04 LTS version as well, the guide is the same.)
You should also have a valid sub- or domain name, to be able to use SSL encryption from Let?s Encrypt on your portal site (but not required).
Installation guide:
- Start by going to DigitalOcean and create and account or log in to your existing account.
- On the top right corner you should see a green button with the word Create on it, click on it and choose Droplets.

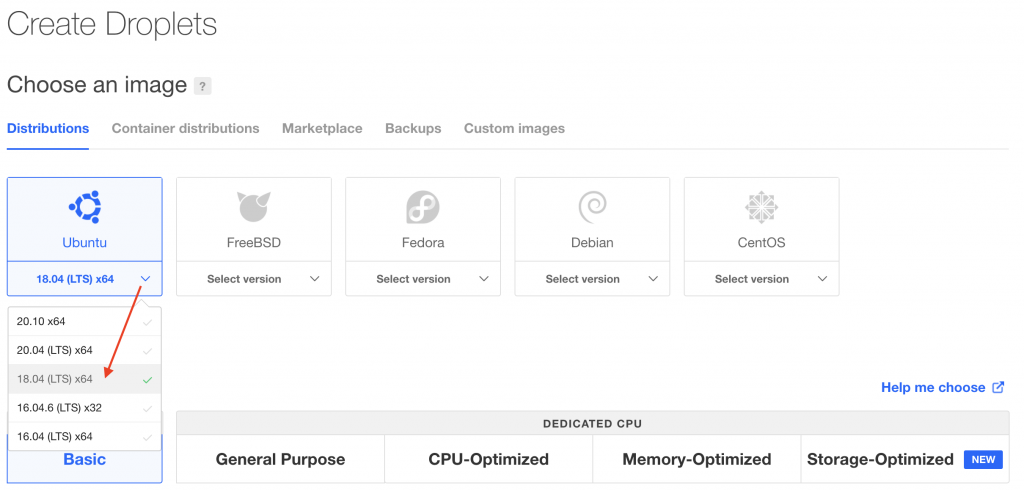
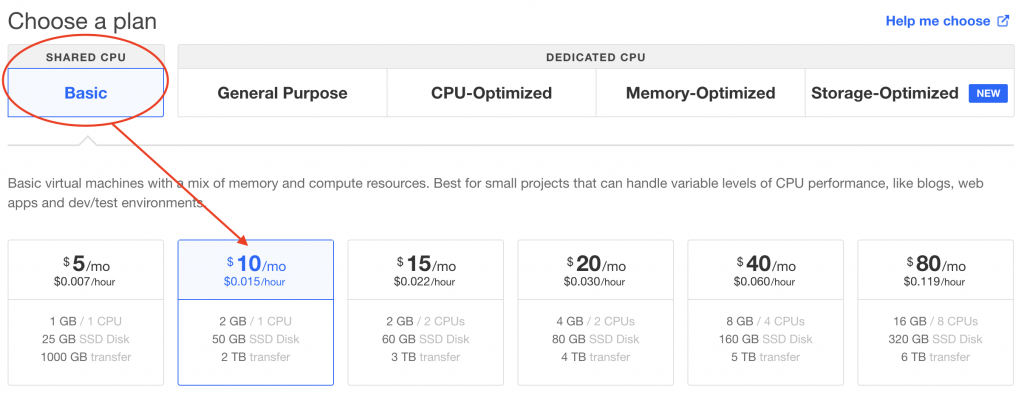
- On the Create Droplets page, choose Ubuntu under Distributions and select 18.04. (LTS) x64 from the dropdown menu.
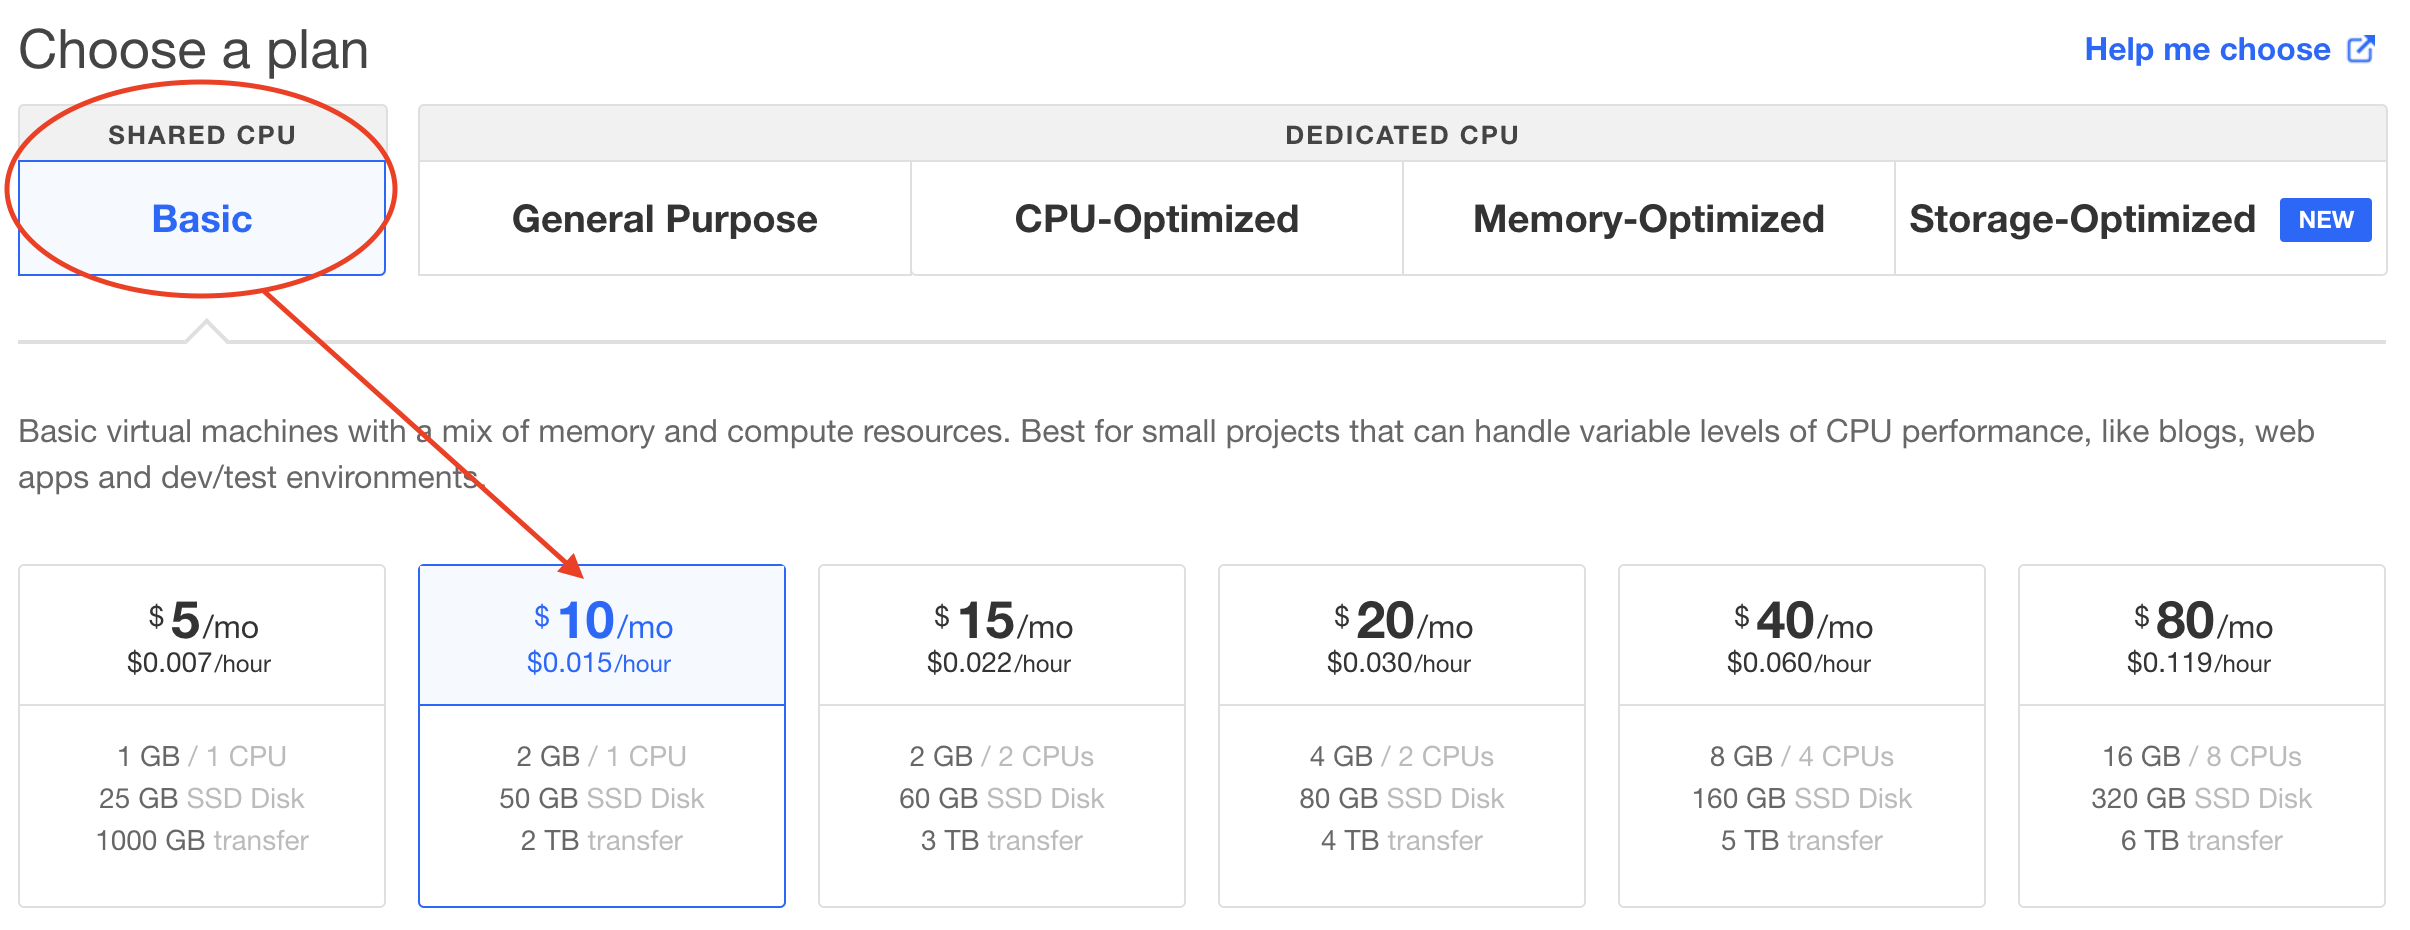
- Now, depending on the amount of clients and devices you may have, choose a plan accordingly. But for a normal installation like this with a few clients and devices, the minimal requirements stated earlier in the beginning of this guide should do just fine: Shared CPU -> Basic -> $10/mo
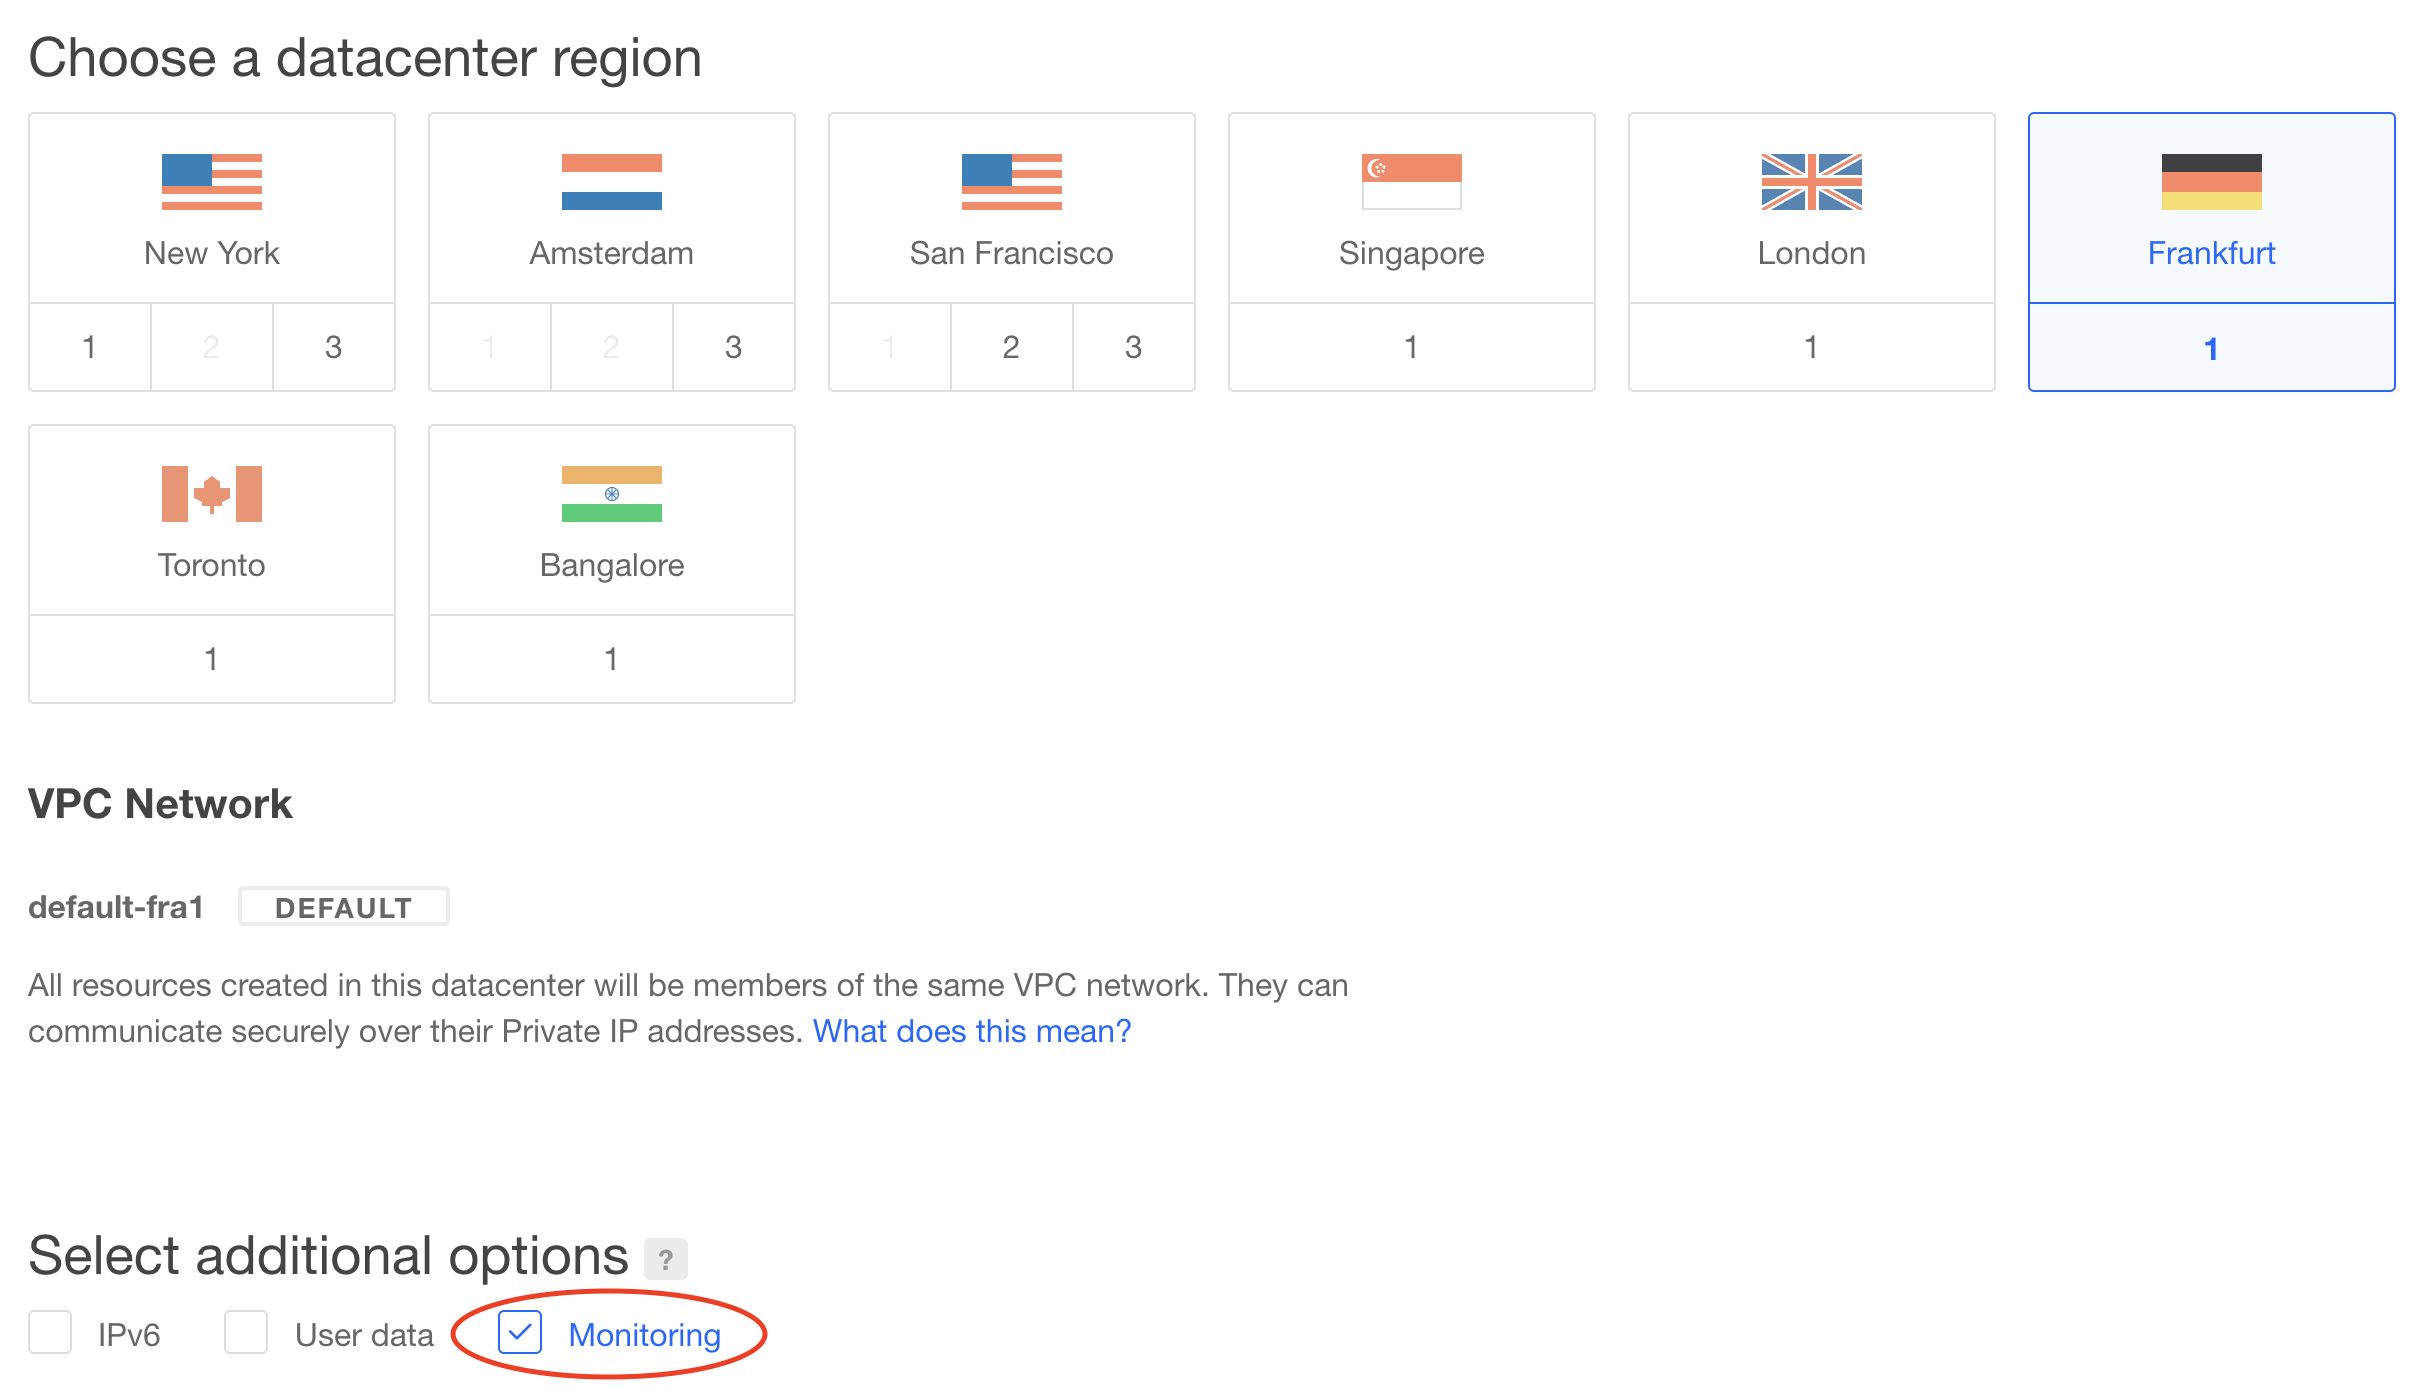
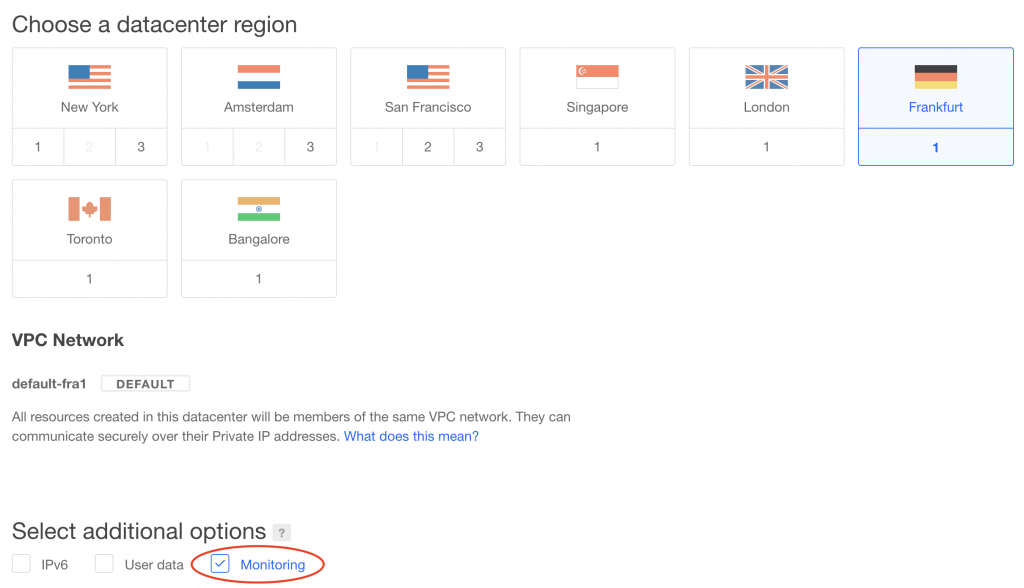
- Choose a datacenter region that is close to you, the Droplet (virtual server) will created there. Also remember to select the Monitoring option under Select additional options.
- Under Authentication you can either choose to use your public SSH key or just create a root password. Make sure it meets the password requirements. Remember to write the password down as it will not be sent to you via email.

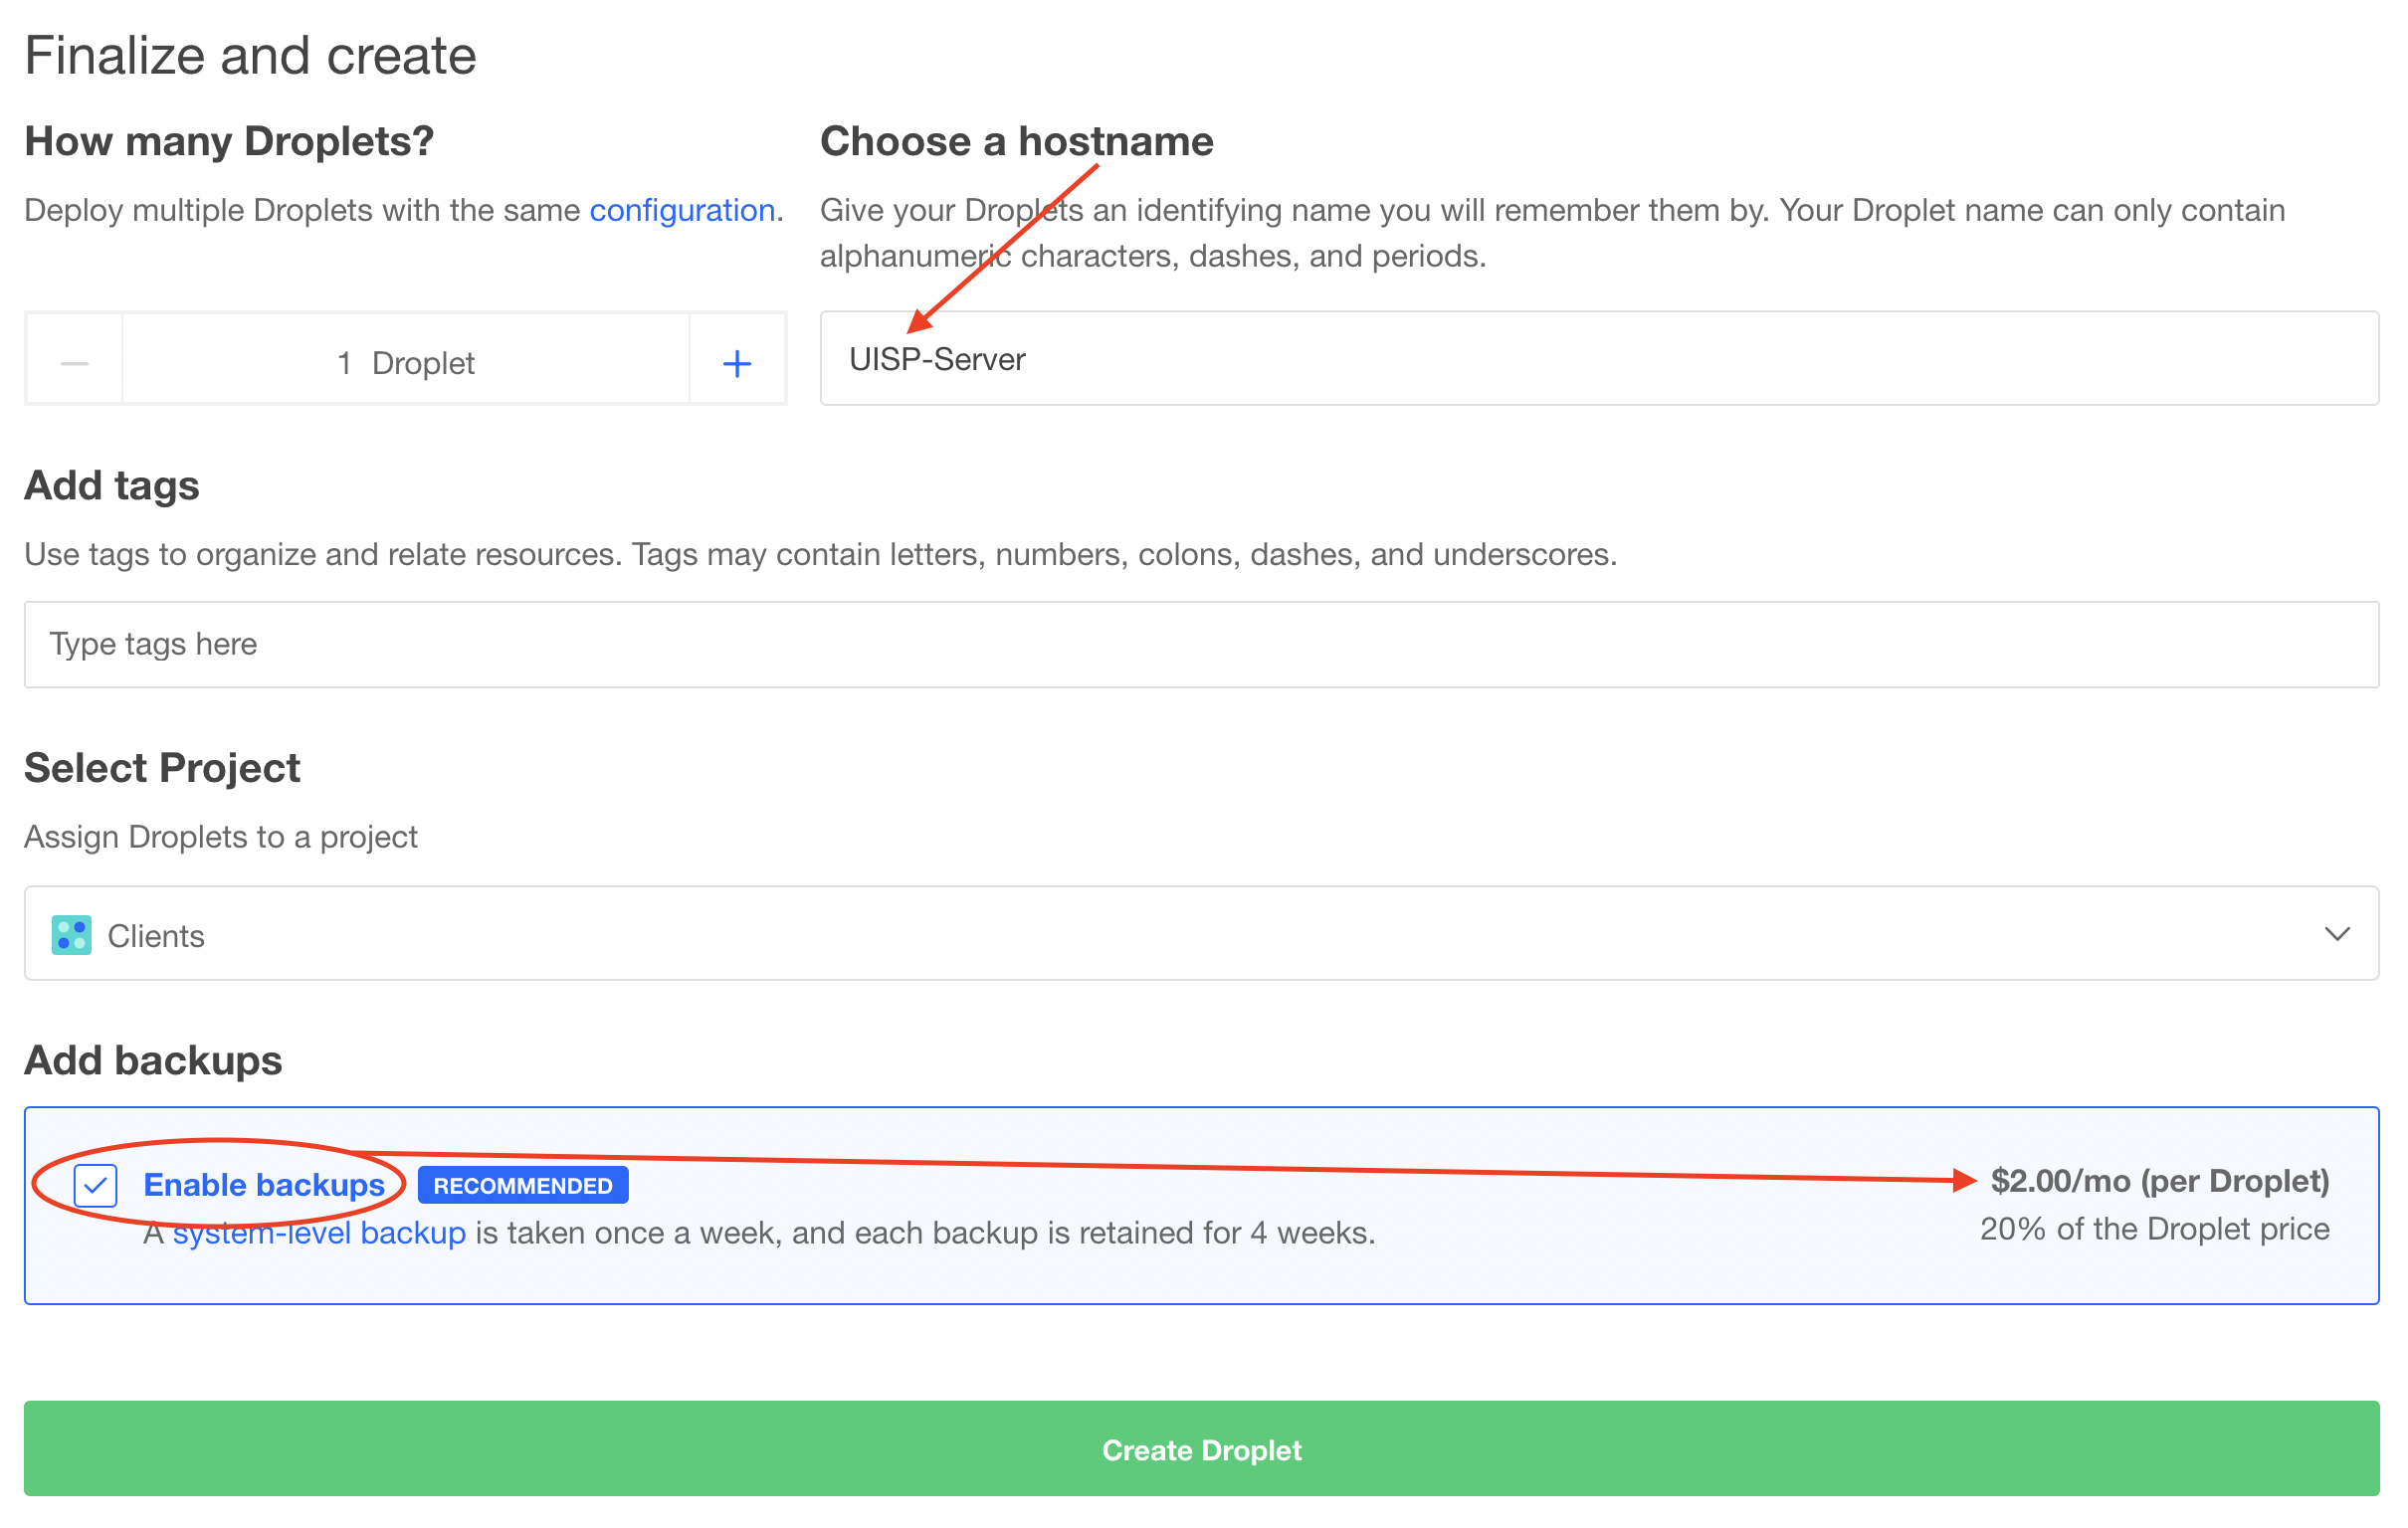
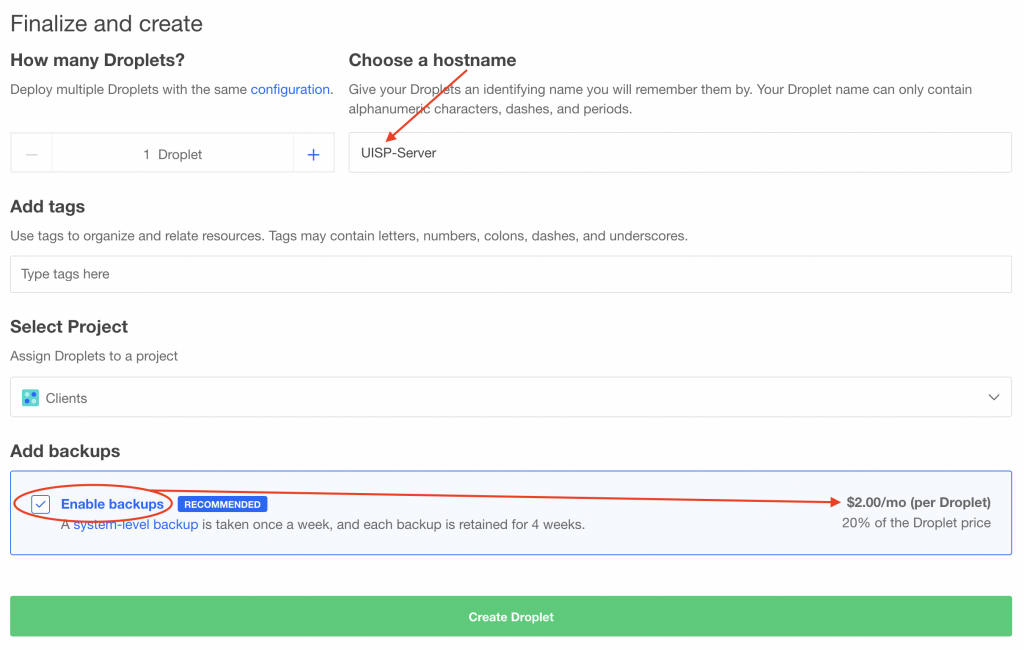
- The last remaining steps is to choose a hostname for your Droplet, add tags if you want and assign Droplet to a project if you have created this beforehand. I also recommend to Enable backups under Add backups, to make sure you are protected in the event of an upgrade failure on the software down the line or something similar (purely optional). Hit the green Create Droplet button to start creating your server.Important! By enabling backup an additional cost is added and with the Basic $10/mo Droplet we chose earlier, this backup costs $2 extra per month. (Depending on which Droplet you chose, this may vary and always adds 20% of the initial Droplet price.)
- Creating the Droplet shouldn’t take more than a few seconds and you can see the bar move quite quickly.

- When the Droplet is created it will be highlighted with a green spot just before the Droplets name, indicating it’s ready and powered on.
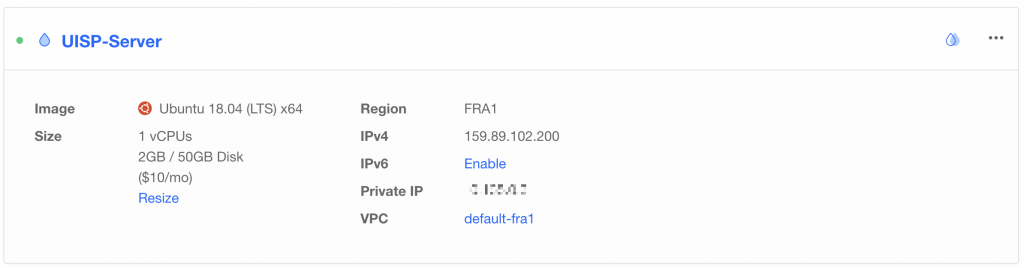
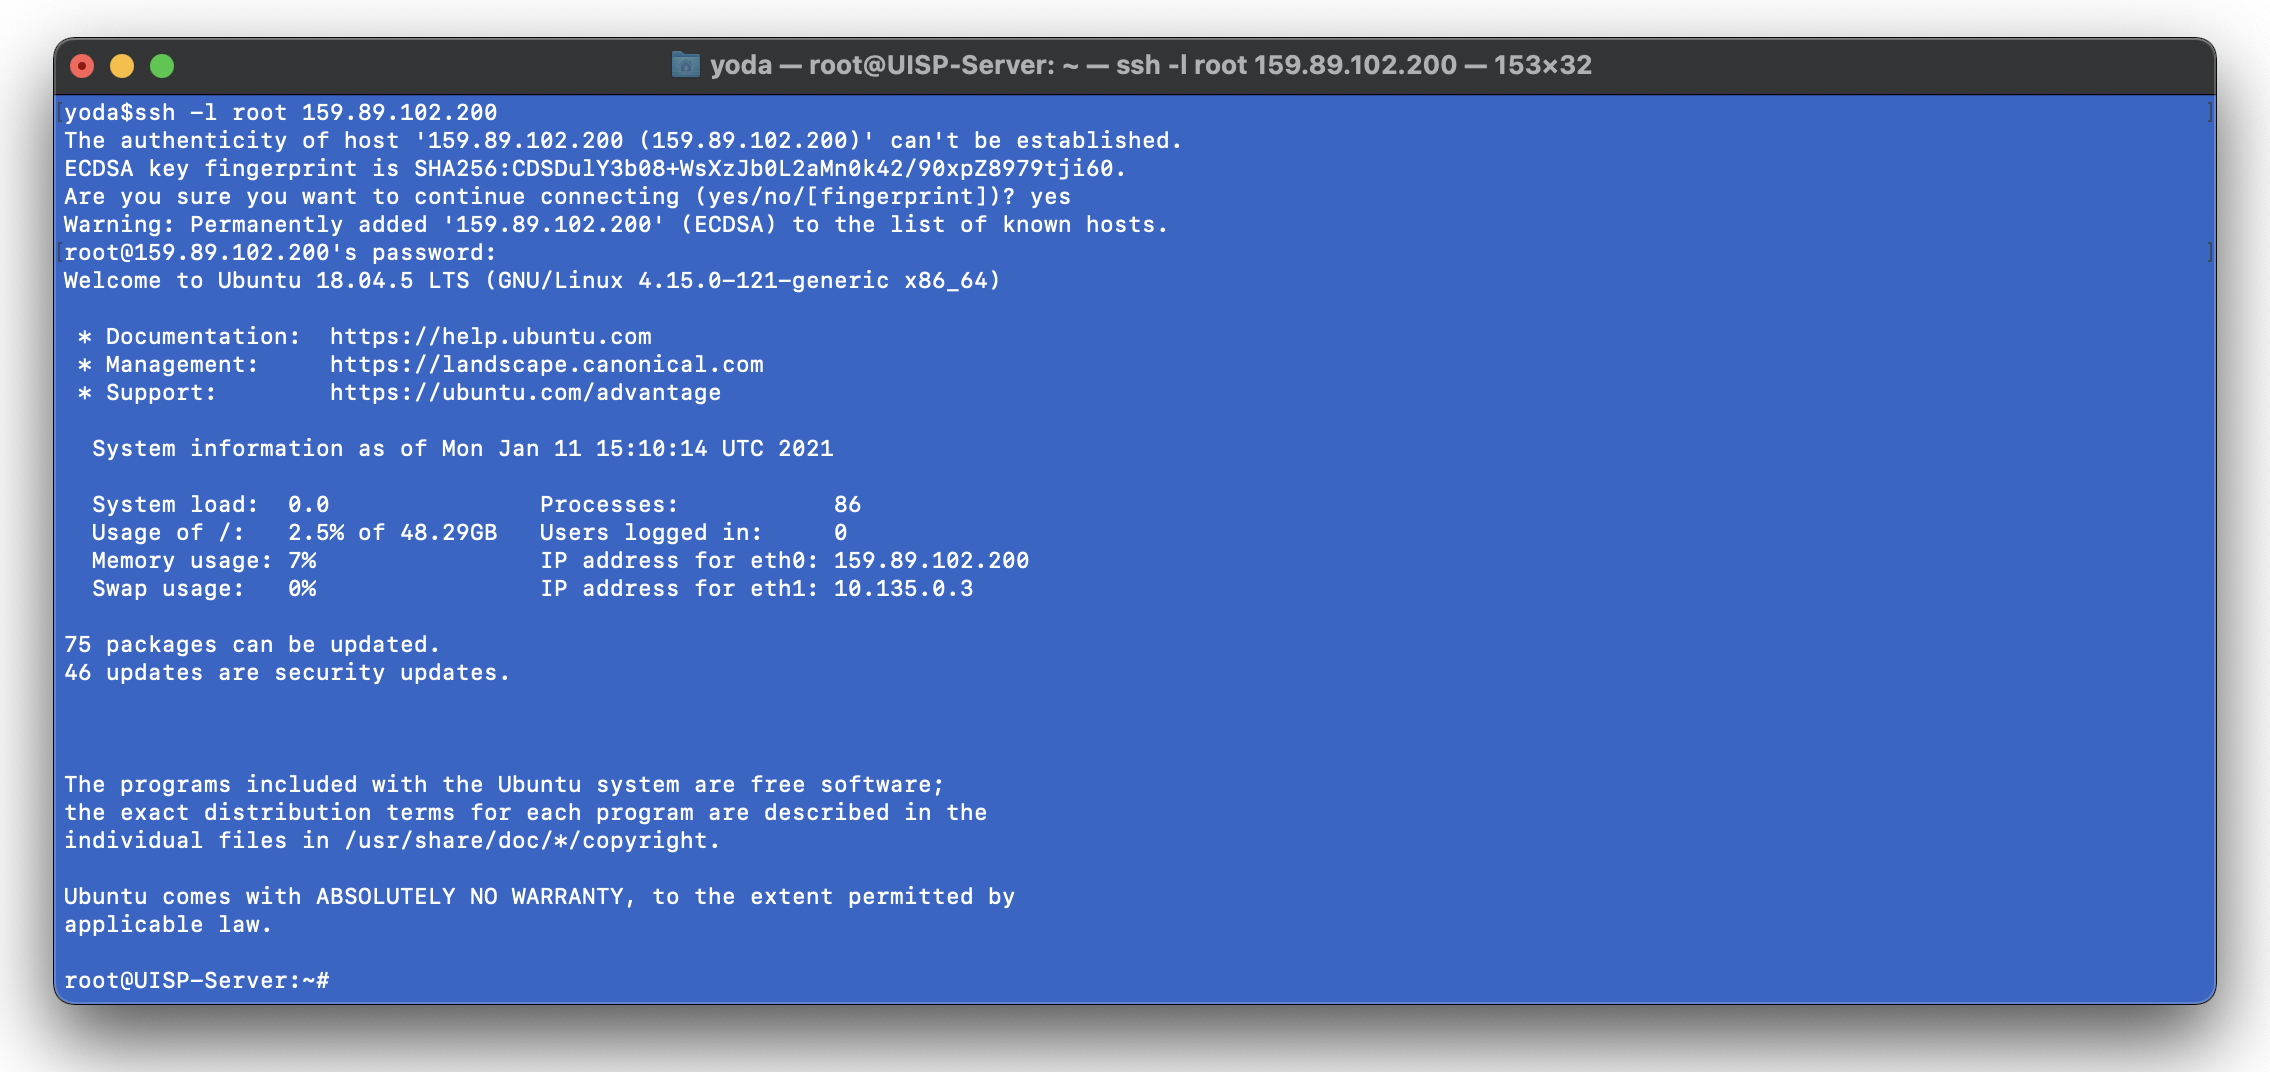
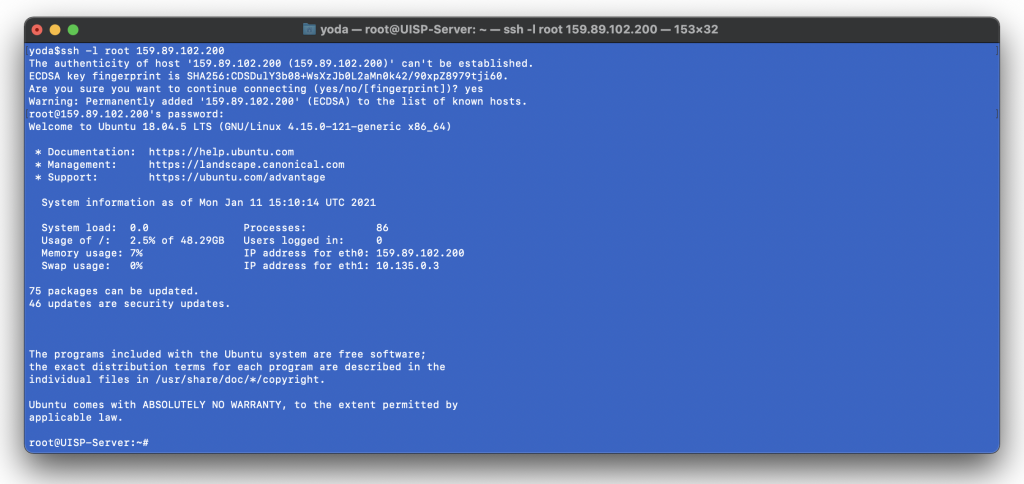
- Fire up your favourite terminal client (MacOS Terminal, PuTTY, etc) and log into your newly created server with the IPv4 address of the Droplet. Accept the fingerprint key by typing yes followed by the ENTER-key. Write in your chosen password from earlier and press ENTER-key:
ssh -l root 159.89.102.200
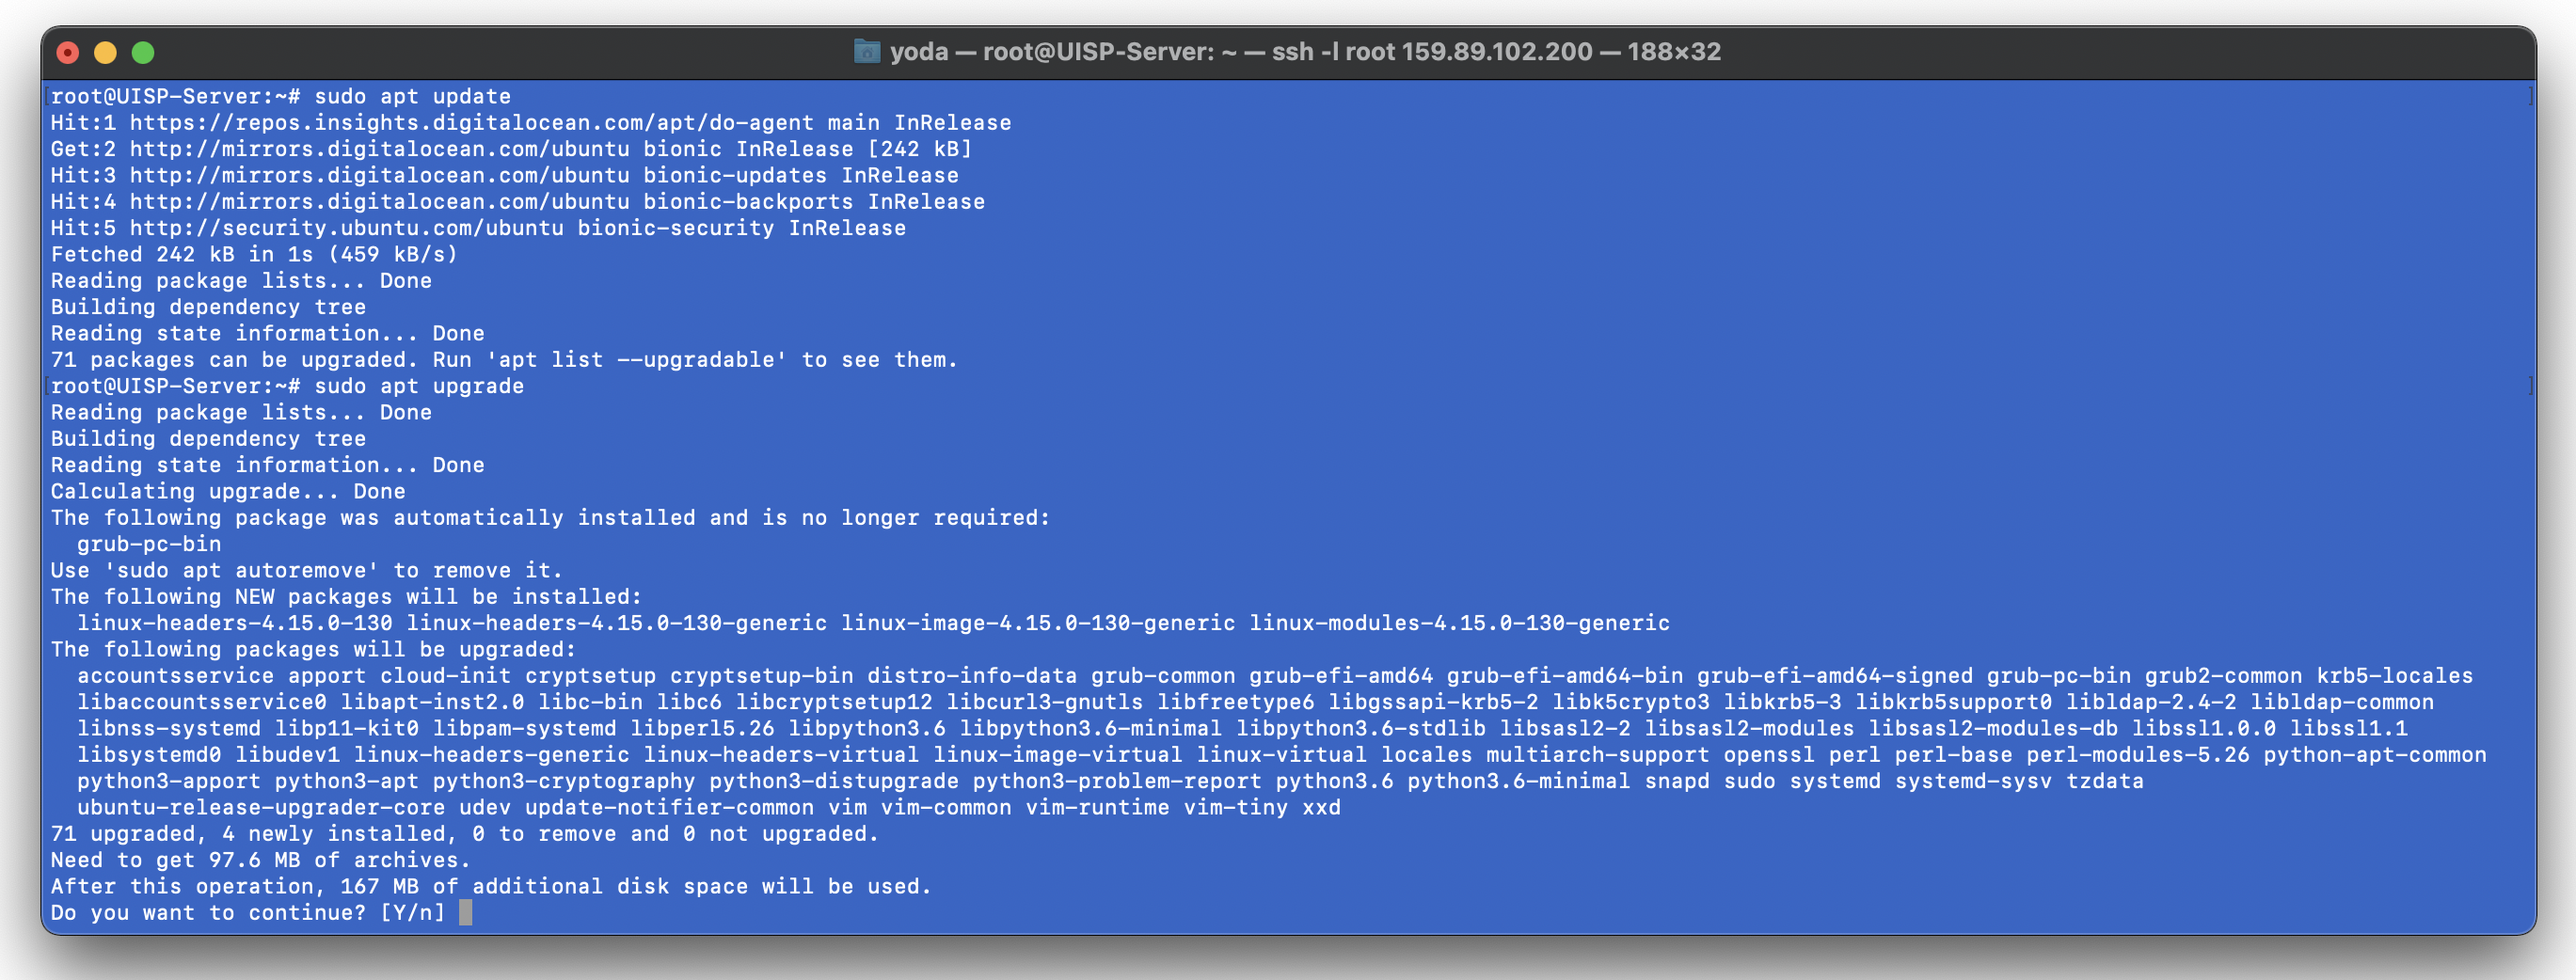
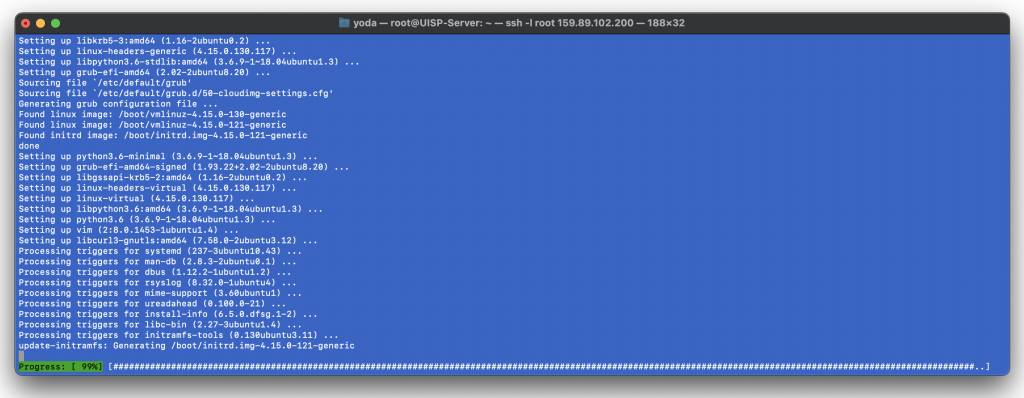
- There are usually a few updates to the Linux distro that can be updated. I recommend doing this before proceeding with the installation of UISP. To check for updates and then start the update process, write in the first command followed by the ENTER-key. And lastly the second command to start installing the updates followed by Y and the ENTER-key.
sudo apt update
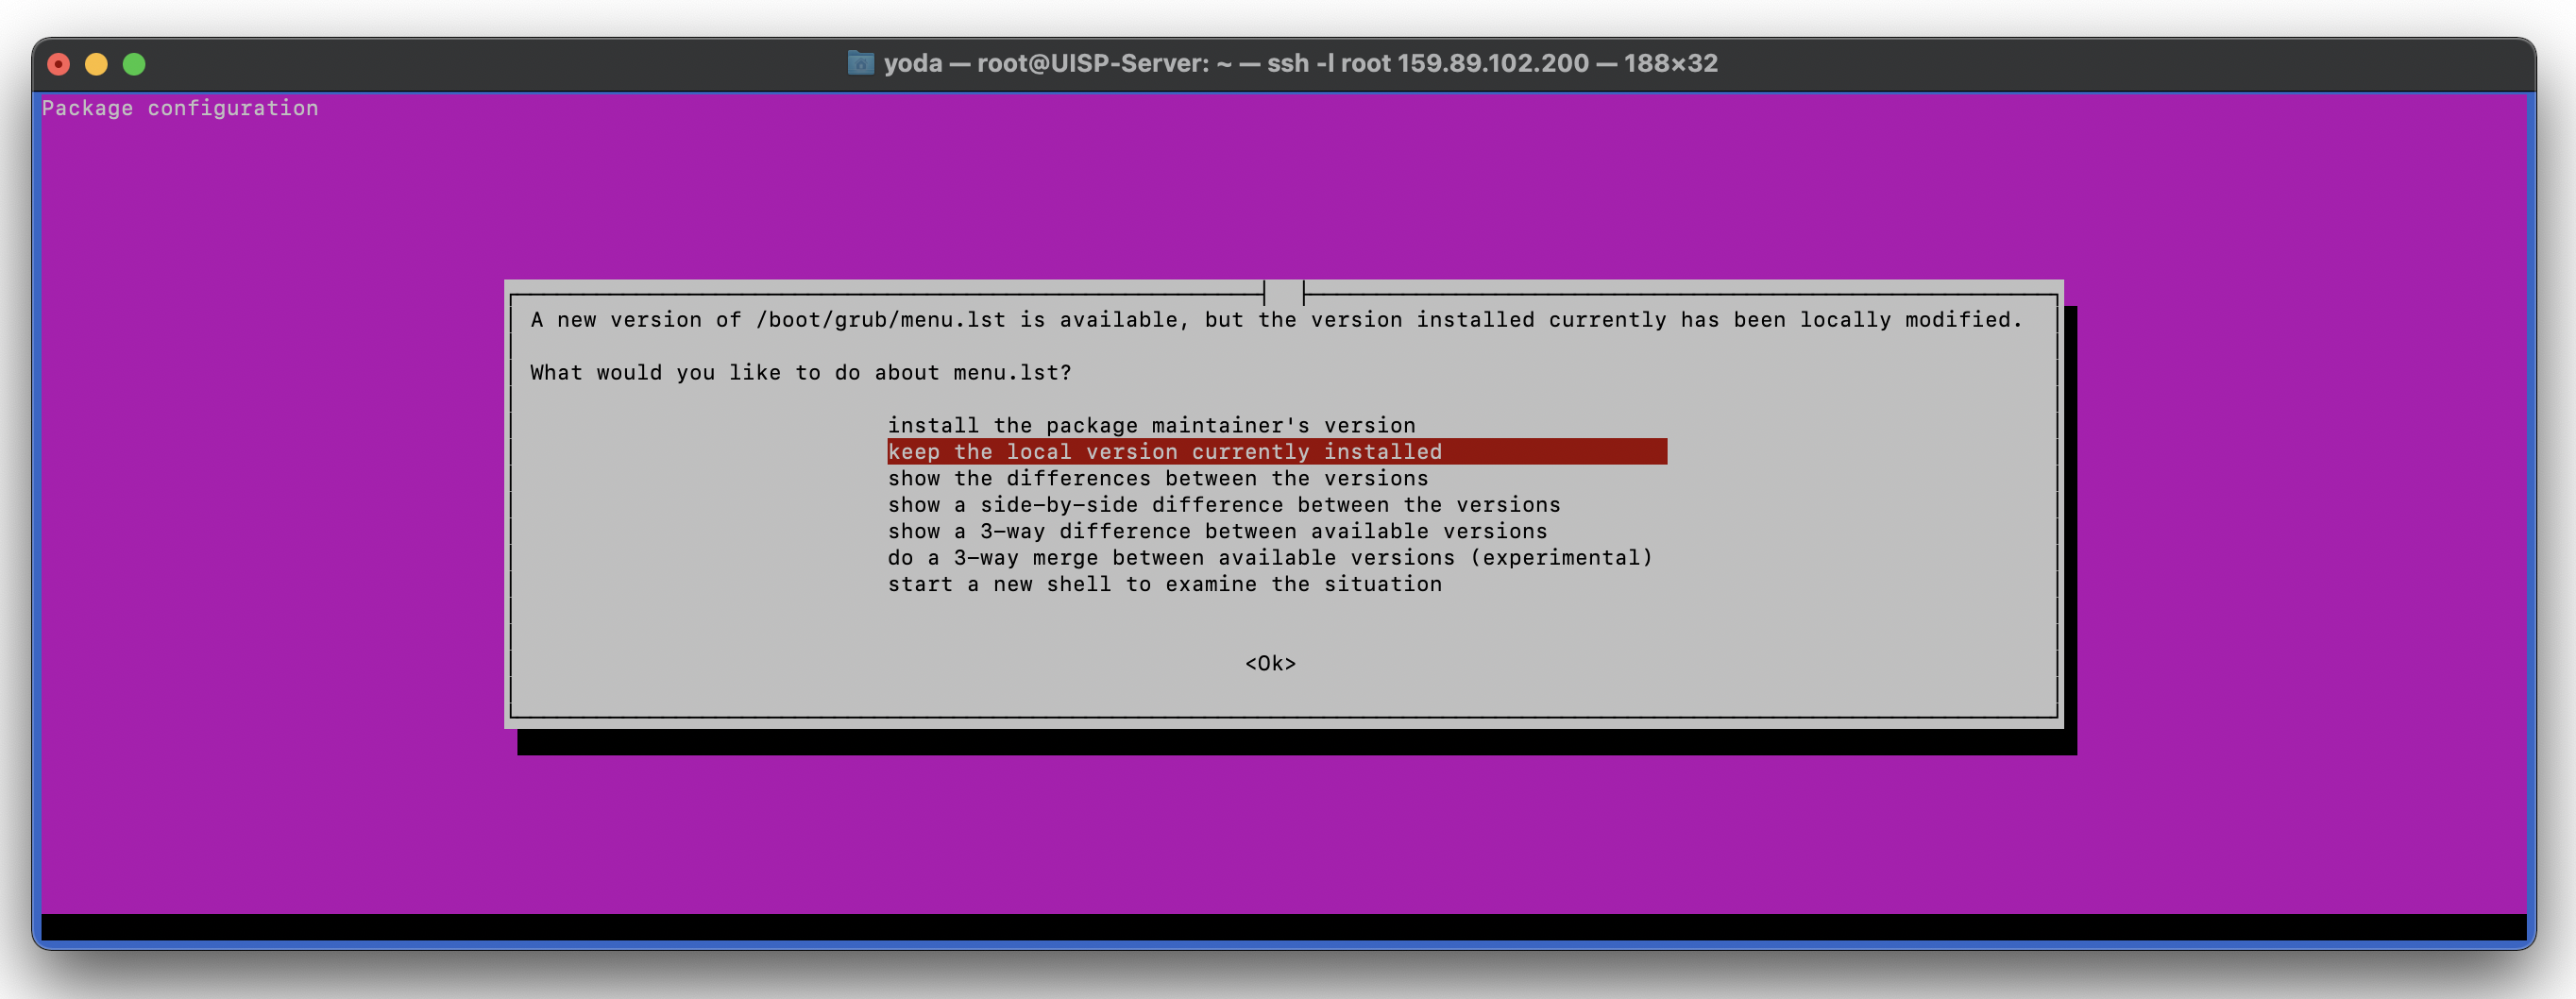
sudo apt upgrade - Let the update run for a while. When it’s close to the end, you will be prompted to choose an option for updating the menu.ls boot. Just chose Keep the local version currently installed and press the ENTER-key to continue.

- When it’s done and you are back at the terminal prompt, you can start installing the UISP followed by the ENTER-key. The command below will always install the newest, stable version that is listed in the Software Releases section on the Ubiquiti Community:
curl -fsSL https://unms.com/v1/install > /tmp/unms_inst.sh && sudo bash /tmp/unms_inst.sh - Answer Yes when asked if you would you like to set the overcommit memory setting to 1 and let it finish installing.

- Congratulations! When you are back at the terminal prompt, you are finished with installing UISP on Linux.

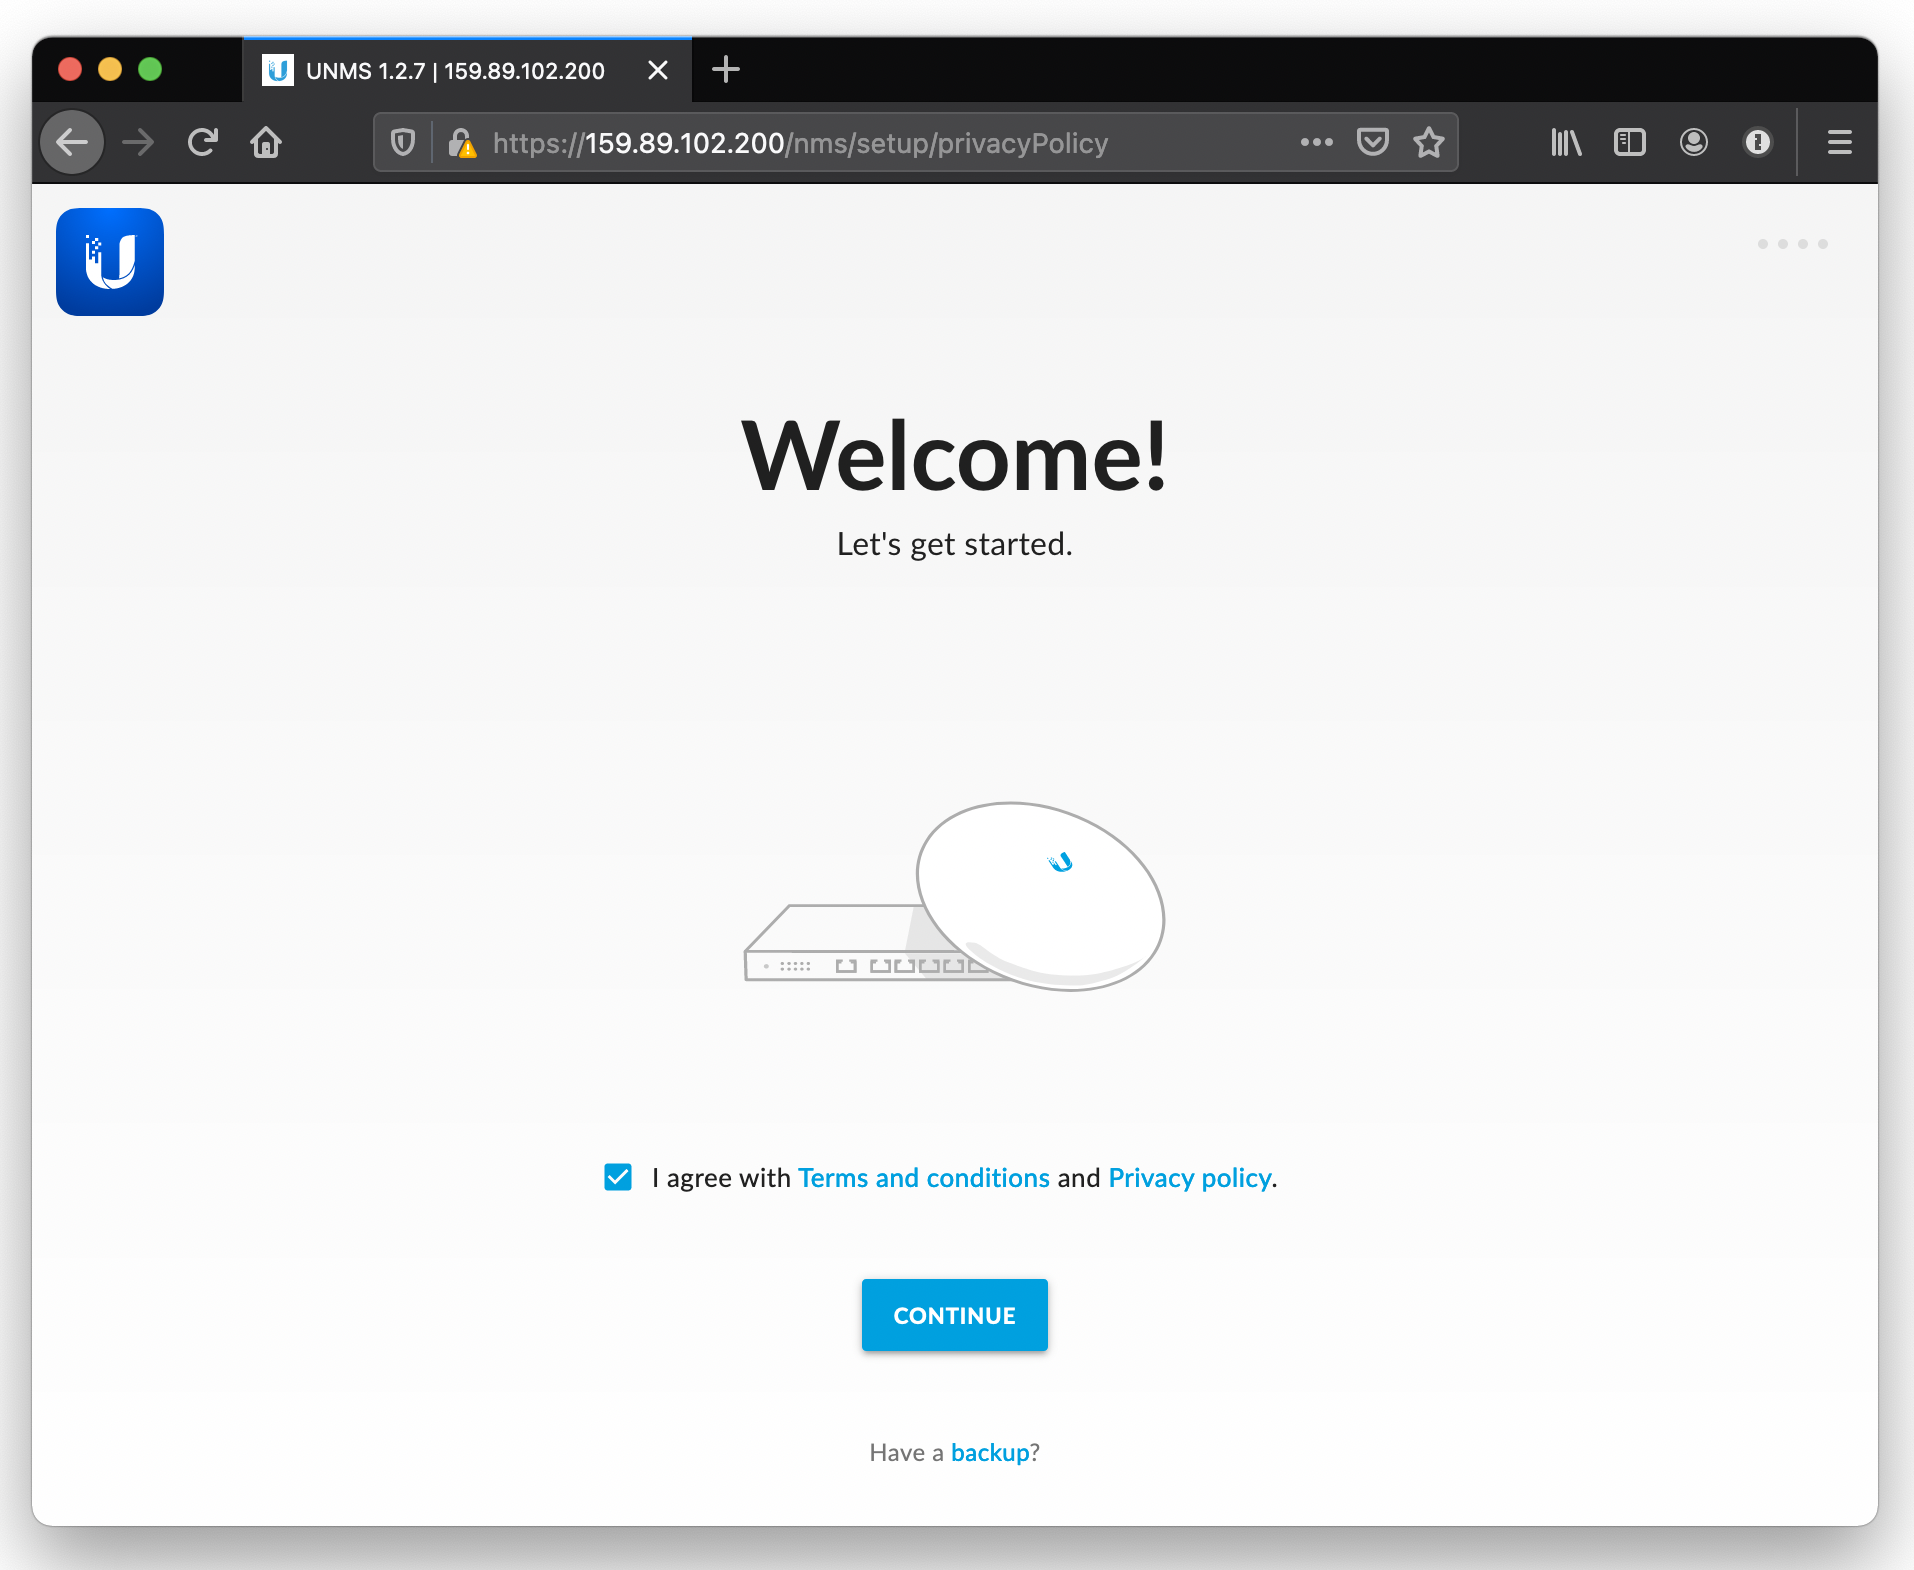
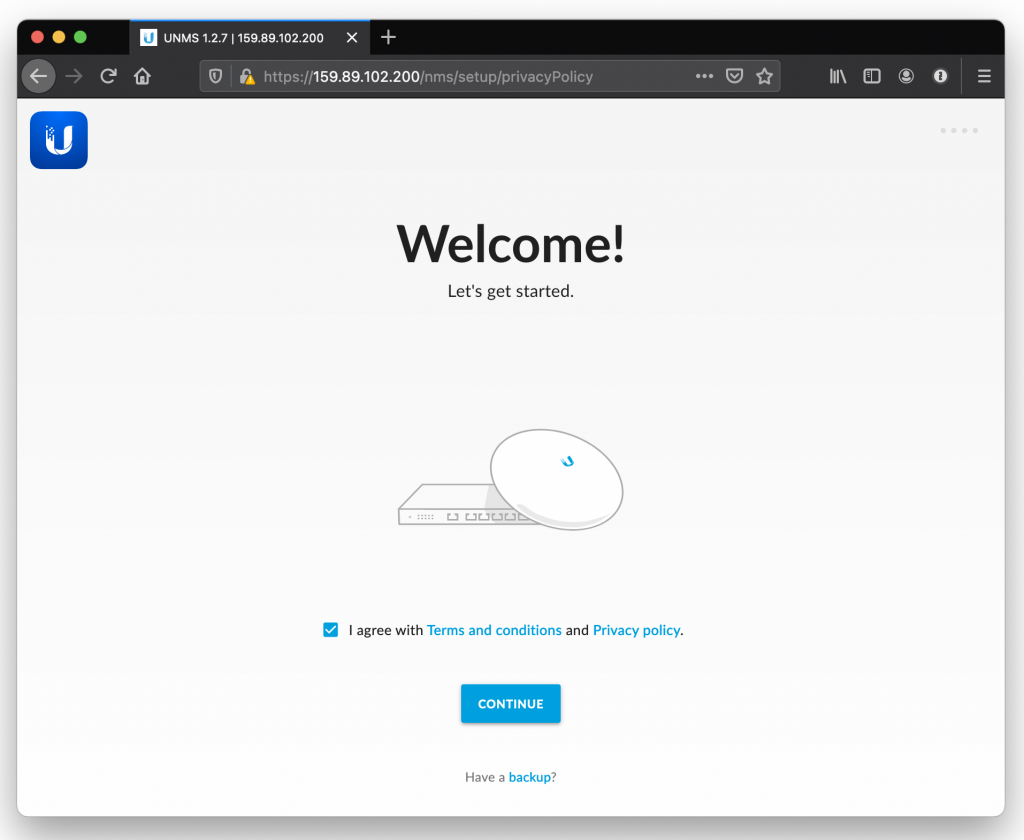
- You can now start your favourite internet browser and type inn the IP address of the droplet in the address bar. If you have your own domain name, it is recommended to use a FQDN for your Droplet. Add your IP address in the DNS settings for your domain name at your registrar and use the domain name in your internet browser to access the newly created Droplet (UISP cloud server). For example: uisp.mydomain.com
- Agree to the Terms and conditions and Privacy policy and click Continue.
- From here you should be able to finish setting up the rest of the UISP server. It’s just a matter of creating an account and start adding devices. There are numerous articles, videos and help on this topic. You can ask questions in the comments if something is unclear or you need help. And I’ll try to answer them as best I can. Good luck!