Heater - PTC (Dual Motor) (Remove and Replace)

FRT No: 18106302

Warning: Only technicians who have been trained in High Voltage Awareness are permitted to perform this procedure. Proper personal protective equipment (PPE) and insulating HV gloves with a minimum rating of class 00 (500V) must be worn any time a high voltage cable is handled. Refer to Tech Note TN-15-92-003, "High Voltage Awareness Care Points" for additional safety information.
Warning: If the 12V power supply is disconnected, do not attempt to open any doors with door glass in closed position. Failure to follow this instruction could result in door glass shatter.
Note: Before disconnecting the 12V power supply, ensure that the driver’s door window is fully open. Failure to follow this instruction could result in vehicle lockout.

Removal

  1. Open the glove box.
  2. Perform the vehicle electrical isolation procedure (refer to procedure).
  3. Remove the wiper motor (refer to procedure).
  4. Remove the LH and RH shock tower to bulkhead struts (refer to procedure).
  5. Release the bolts (x2) that secure each fuse box to the front crossmember (torque 5 Nm).
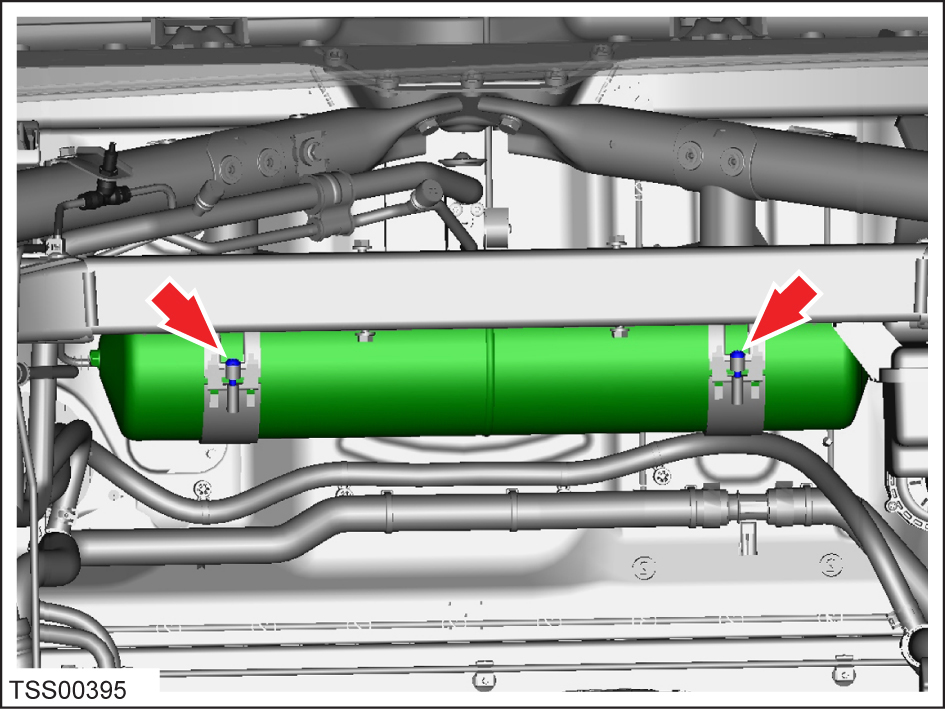
  6. If the vehicle is equipped with air suspension, release the screws (x2) that secure the air reservoir (torque 2.5 Nm). Carefully set the reservoir in the RH side of the underhood area.
    Note: It is not necessary to disconnect the air lines.
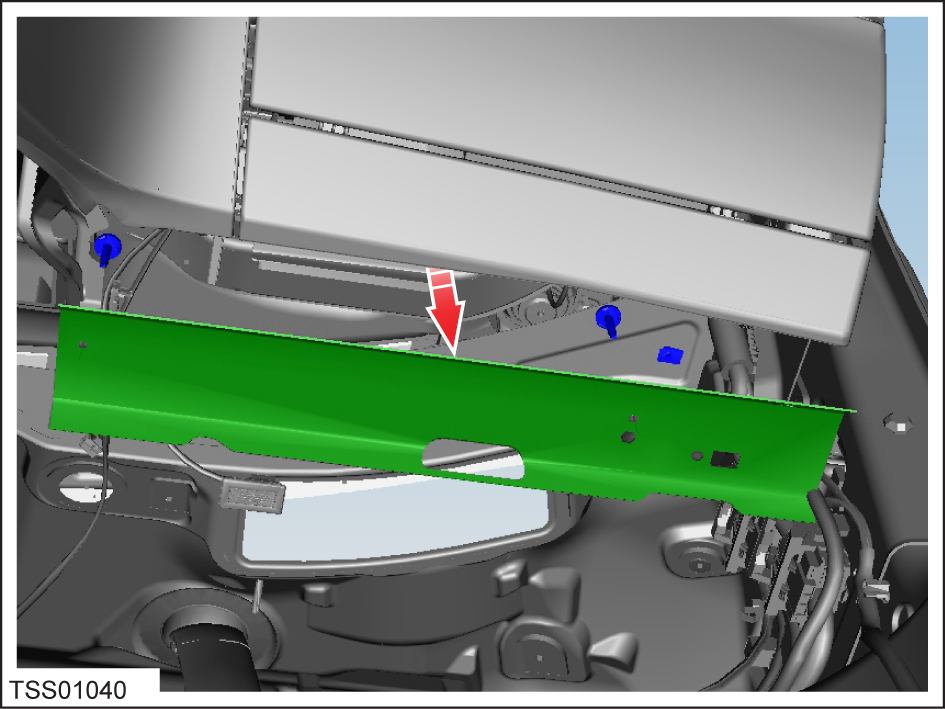
  7. Release the PTC heater harness (#4 in the below image) from the top of the forward junction box (FJB).
    1 HV Battery heater harness
    2 DC-DC converter harness
    3 Compressor harness
    4 PTC heater harness
  8. Attach string or wire to the PTC heater harness connector.
    Note: The string/wire will make it easier to re-install the PTC heater later.
  9. Inspect the center console:
    • If the center console part number is revision A, remove the center console (refer to procedure).
    • If the center console part number is revision B or newer, continue to the next step of this procedure.
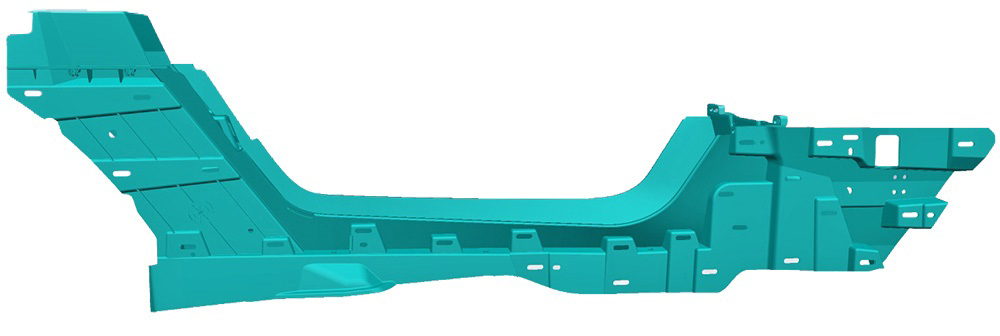
    Revision A part Revision B part
  10. Remove the glove box (refer to procedure).
  11. If equipped, remove the passenger knee airbag (refer to procedure).
  12. If equipped, remove the bolt that secures the passenger knee airbag bracket (torque 7 Nm). Remove the airbag mounting bracket.
  13. Remove the screws (x2) that secure the RH HVAC duct.
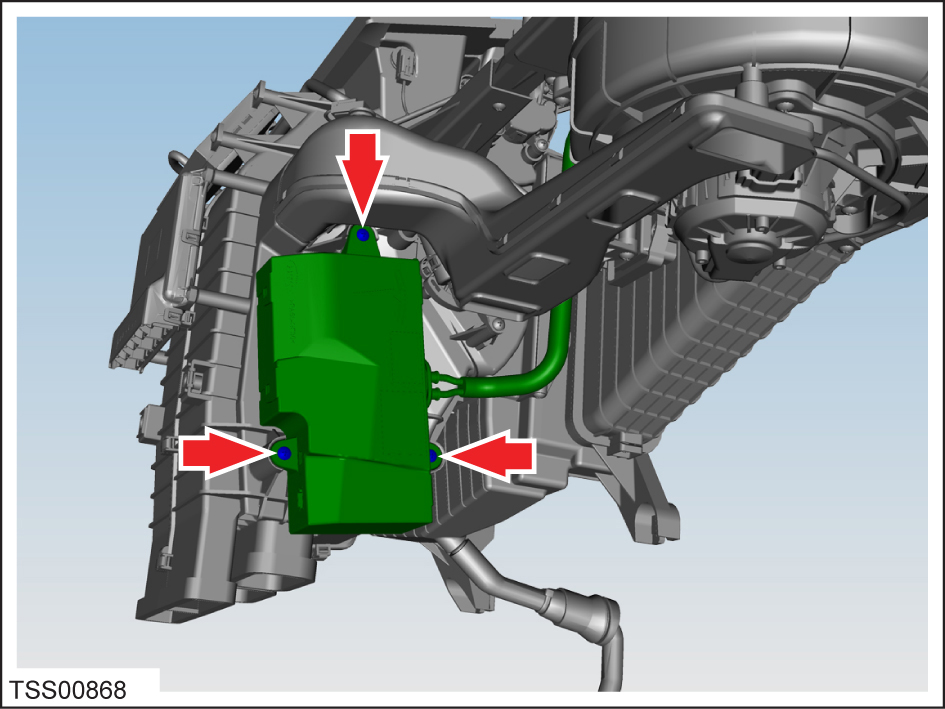
  14. Remove the screws (x3) that secure the PTC heater to the HVAC casing (torque 1 Nm).
  15. Release the PTC heater harness from the HVAC retaining clip.
  16. With assistance, carefully release the PTC heater harness from the bulkhead and carefully pull it into the vehicle through the footwell.
  17. Remove the string/wire from the PTC heater harness.
    Note: Do not withdraw the string/wire from bulkhead.
  18. Carefully remove the PTC heater module from the HVAC casing.
    Caution: Take care not to damage component(s).

Installation

Installation procedure is the reverse of removal, except for the following:
  • Clean the interior of HVAC casing prior to assembly.
  • Secure the string/wire to the PTC heater harness. With assistance, carefully pull the harness through the bulkhead. Ensure that the surrounding components are not compromised. Use a cable tie and a clip harness to avoid rubbing.
  • Use Toolbox to update or redeploy the firmware:
    • If the vehicle is not running the latest firmware, run the "Vehicle Firmware Update" procedure.
    • If the vehicle is running the latest firmware, run the "Firmware Redeploy" procedure.