IP Carrier (Remove and Replace)

FRT No: 14052102

Warning: If the 12V power supply is disconnected, do not attempt to open any doors with door glass in closed position. Failure to follow this instruction could result in door glass shatter.
Note: Before disconnecting the 12V power supply, ensure that the driver’s door window is fully open. Failure to follow this instruction could result in vehicle lockout.

Removal

  1. Position the vehicle so that both front doors can be fully opened.
  2. Move the driver's seat fully rearwards.
  3. Move the passenger's seat fully rearwards.
  4. Move the steering column to the lowest position, and fully extended.
  5. Open the glove box.
  6. Disconnect 12V power.
  7. Remove the defrost mesh grille assembly (refer to procedure).
  8. Remove the MCU/touch screen (refer to procedure).
  9. Remove the glove box assembly (refer to procedure).
  10. Ensure that the front wheels are in the straight ahead position.
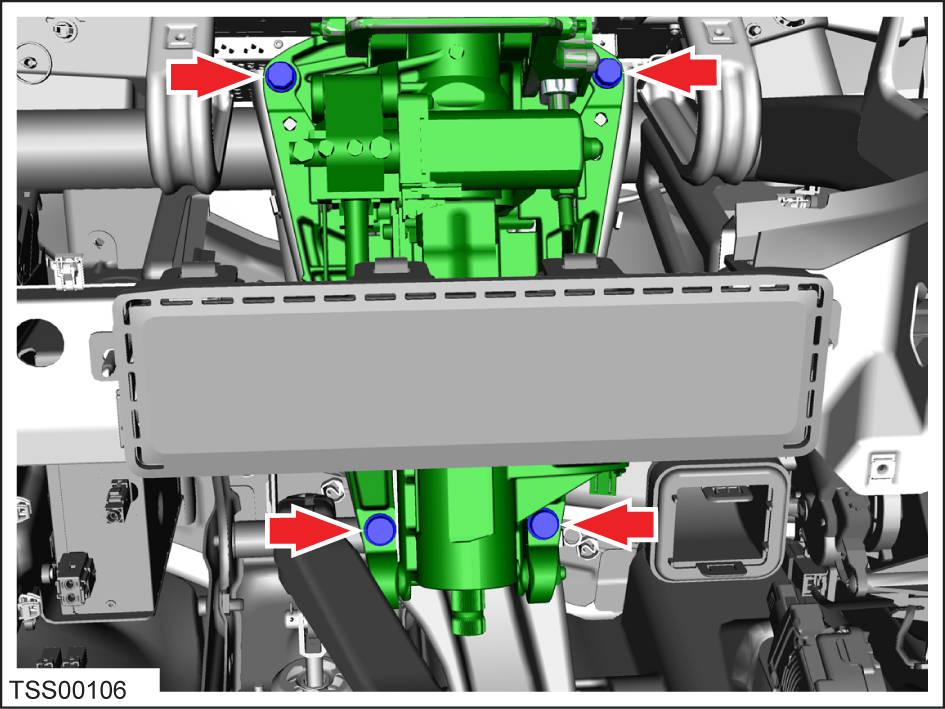
  11. Working from the driver's footwell, remove the bolts (x4) that secure the steering column to the IP carrier bracket (torque 30 Nm).
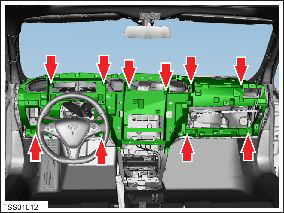
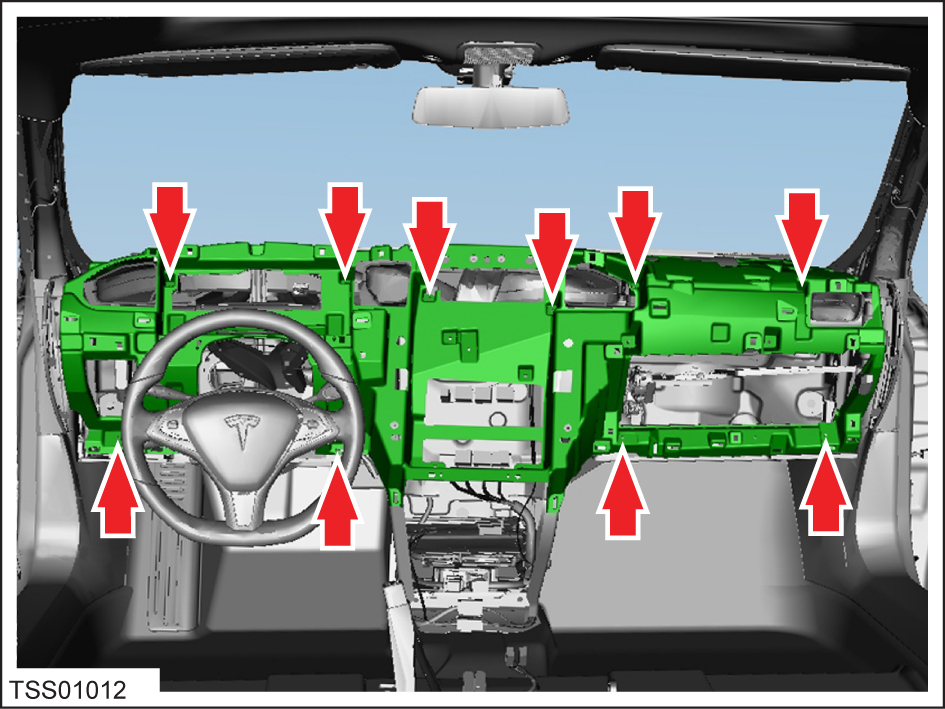
  12. Remove the screws (x18) that secure the IP carrier to the dash frame (torque 2 Nm).
  13. Remove the IP carrier from the dash frame.

Installation

Installation procedure is the reverse of removal, except for the following:

Transfer the speakers to the new IP carrier.