Getting a Shared Mailbox from Office 365 in the desktop Outlook App is quite easy. As long as the user has the right permissions to the mailbox, it will automatically appear to the left in their Outlook sidebar. Getting the Shared Mailbox to work on a mobile device on the other hand, is a whole other story. Especially if you do not want to use the more widely known method of using IMAP. Which makes you lose support for the Calendar and Contacts for instance. Also, it’s way more typing involved with technical server addresses and other non-user friendly settings.
The method explained here is very easy and gives the Shared Mailbox the exact same functionality as any normal licensed mailbox account, except from actually having to use or have a separate license. (Since Shared Mailboxes are license-free in Office 365.)
Guide:
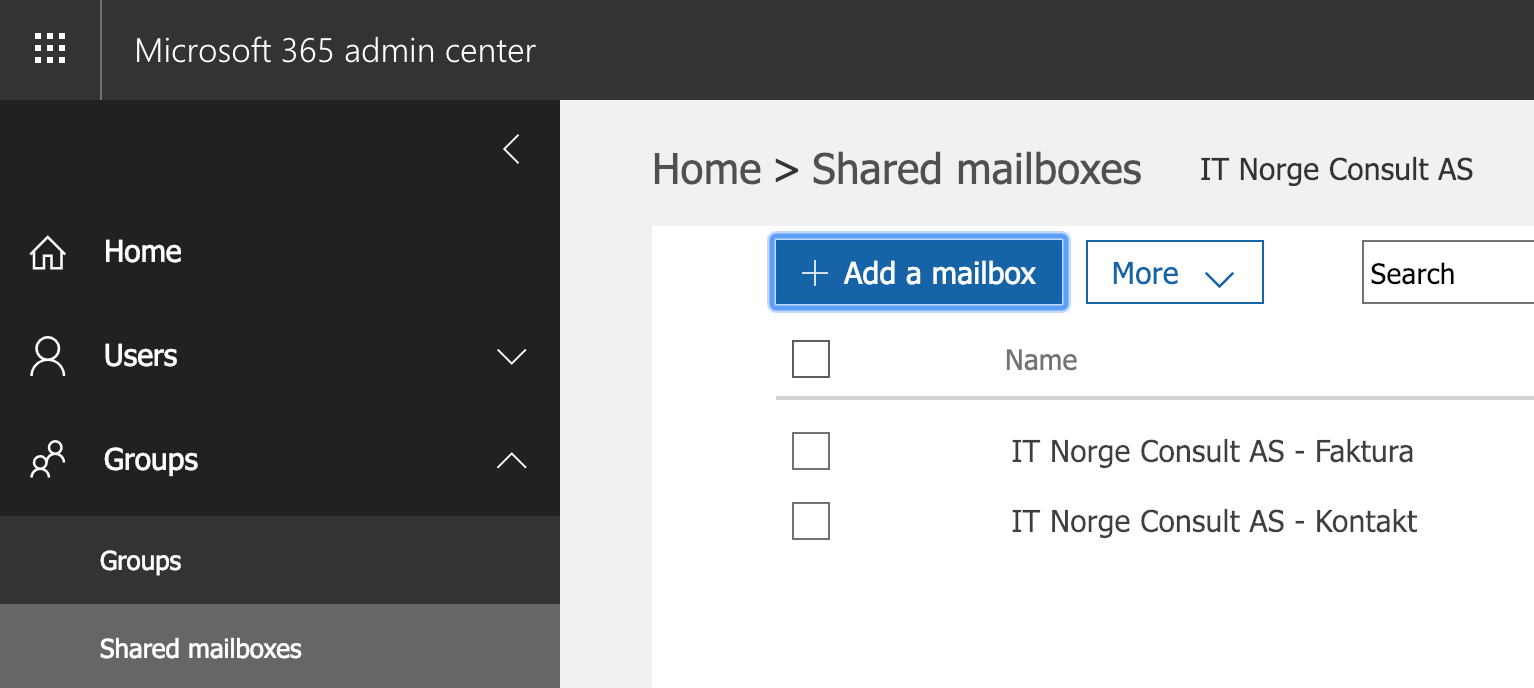
- Make sure you have created a Shared Mailbox and given the right permissions from the Office 365 Admin Center
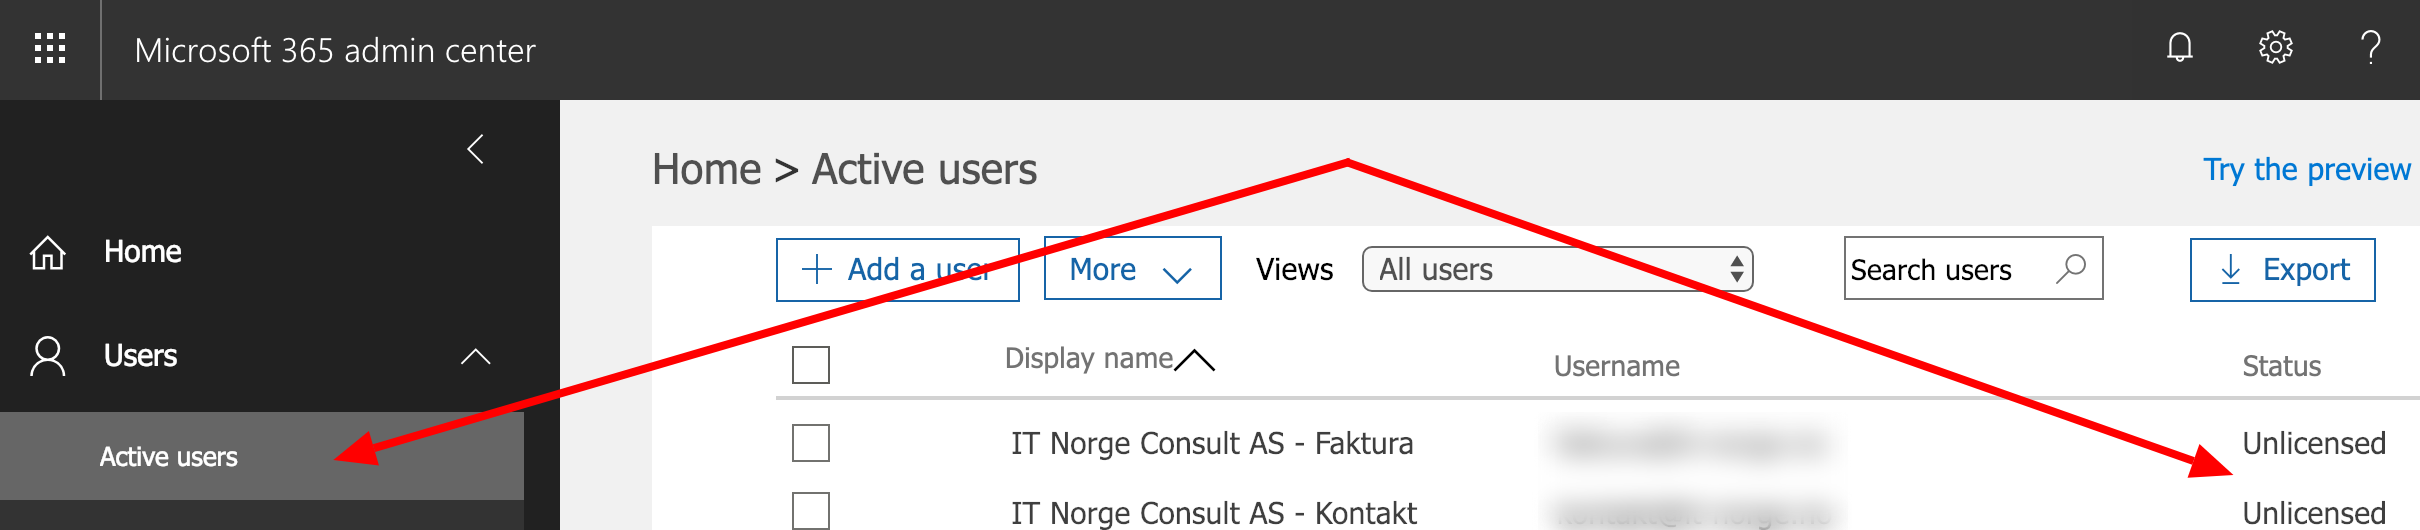
- From the Home dashboard, go to Users -> Active Users
- Press and highlight the Shared Mailbox (unlicensed dummy account) to open the account page
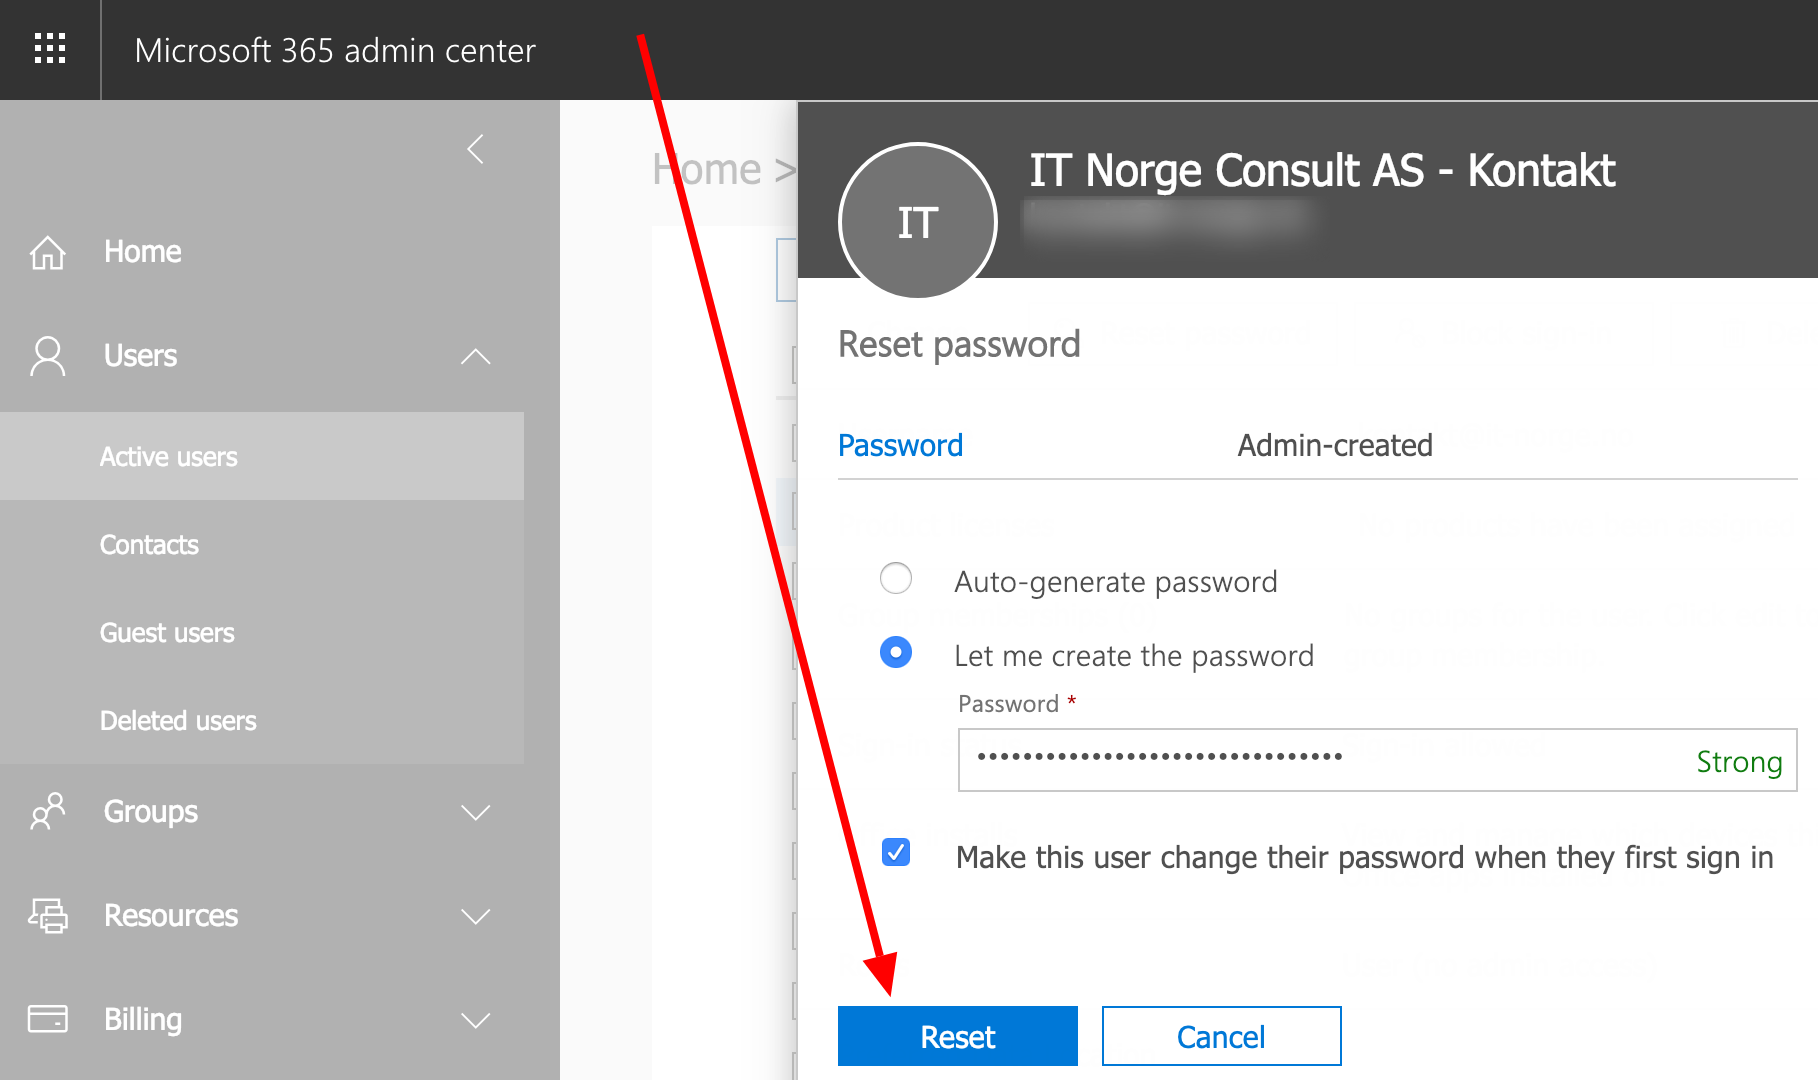
- Press the Reset password on the account page
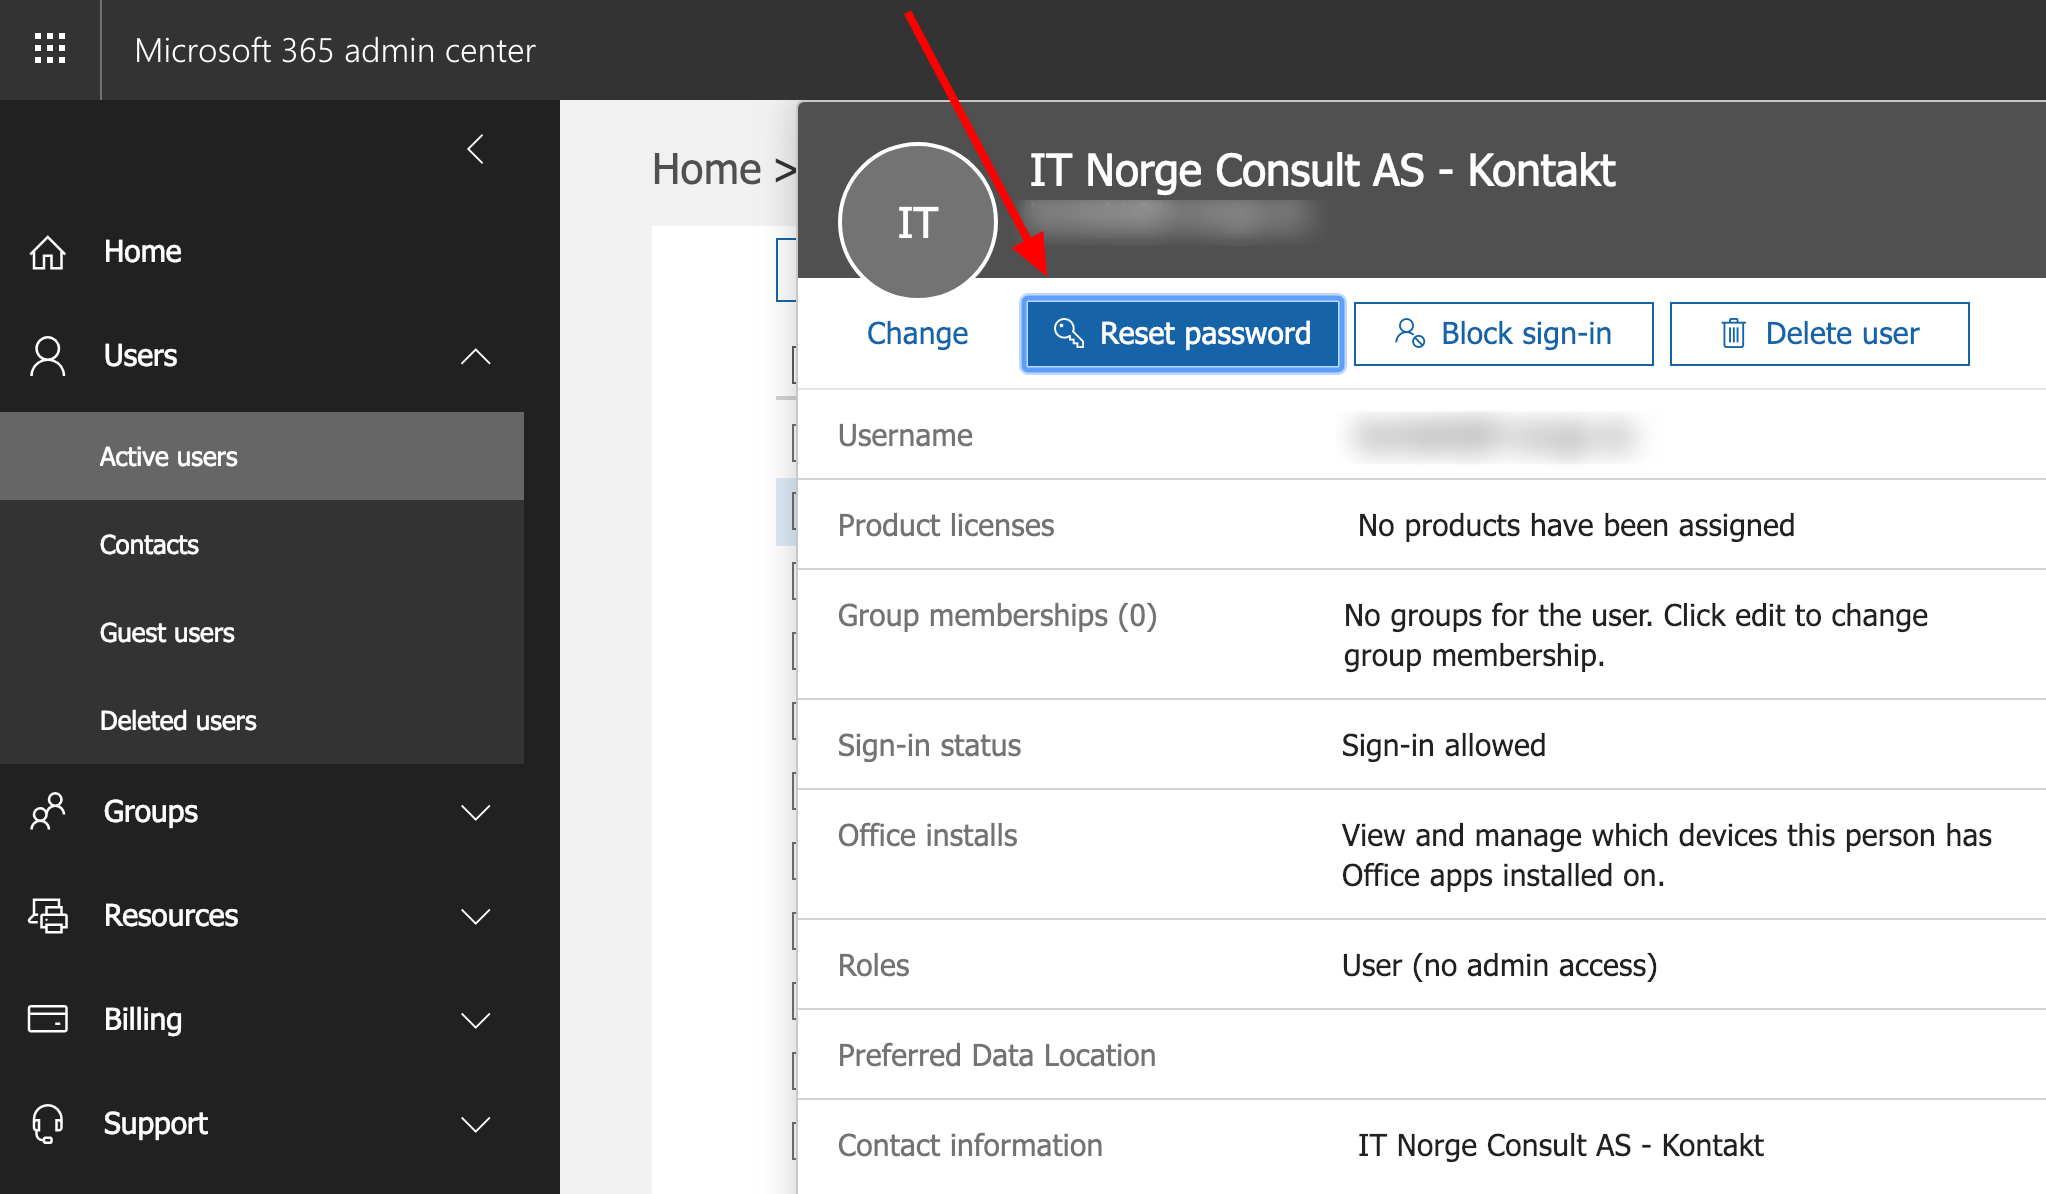
- Let the service auto-generate or type in a password (a strong password is always recommended) and press Reset
- After pressing Reset the password is now set for the first time
- You may now try to add the Shared Mailbox to your mobile device (any mail client or Mail App should work)
- Use the e-mail address associated with the Shared Mailbox and the password from earlier
- That’s it, you should be good to go
- Please share this guide if you find it helpful