Cooling System - Drain and Refill

FRT No: 18300100

Note: Make sure at least 14 L of the specified coolant is available before beginning this procedure.
Caution: Use the specified coolant only. In this manual, refer to General Information > Capacities, Fluids, and Lubricants > Fluids.

Special tools required for this procedure:

Supplier Part Number Description
Tesla 1008787-00-A Battery Cooling System Pressure Tester
Bosch 697-0700-4 Coolant System Tester (Pump and One Adapter)
Note: Only the coolant reservoir adapter is used for this procedure.

Drain

Warning: If the 12V power supply is disconnected, do not attempt to open any doors with door glass in closed position. Failure to follow this instruction could result in door glass shatter.
Note: Before disconnecting the 12V power supply, ensure that the driver’s door window is fully open. Failure to follow this instruction could result in vehicle lockout.
  1. In the Toolbox "Fluid Drain and Fill" panel, select "Coolant Fill", then select "Start Fluid Drain/Fill" from the dropdown menu. Press the Start/Play button.
  2. Use the Thermal System Signals panel to verify that the system is in "Series Mode" and that the coolant valves are set to 50%.
  3. Disconnect 12V power.
  4. Remove the front aero shield (refer to procedure).

Note: This procedure describes access of the coolant hoses from below the vehicle. Alternatively, the underhood storage unit can be removed to access the coolant hoses.

  1. Lower the vehicle to a height that allows access to the chiller and the coolant reservoir.
  2. Position a suitable container to collect the drained coolant. The container should be able to hold at least 14 L.

Note: To reduce splashing, do not remove the cap from the coolant reservoir yet.

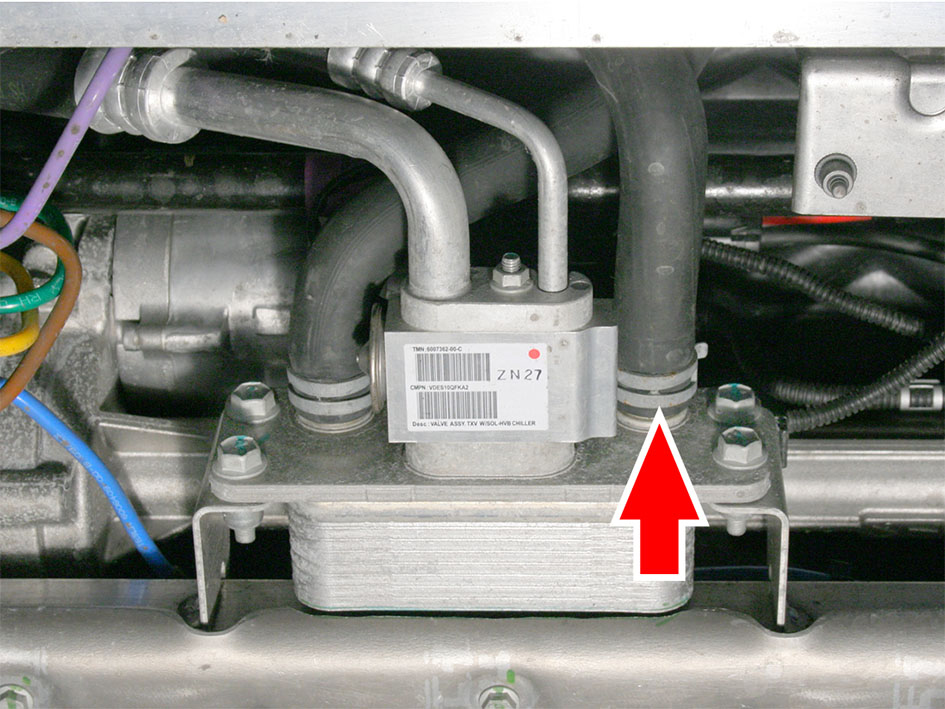
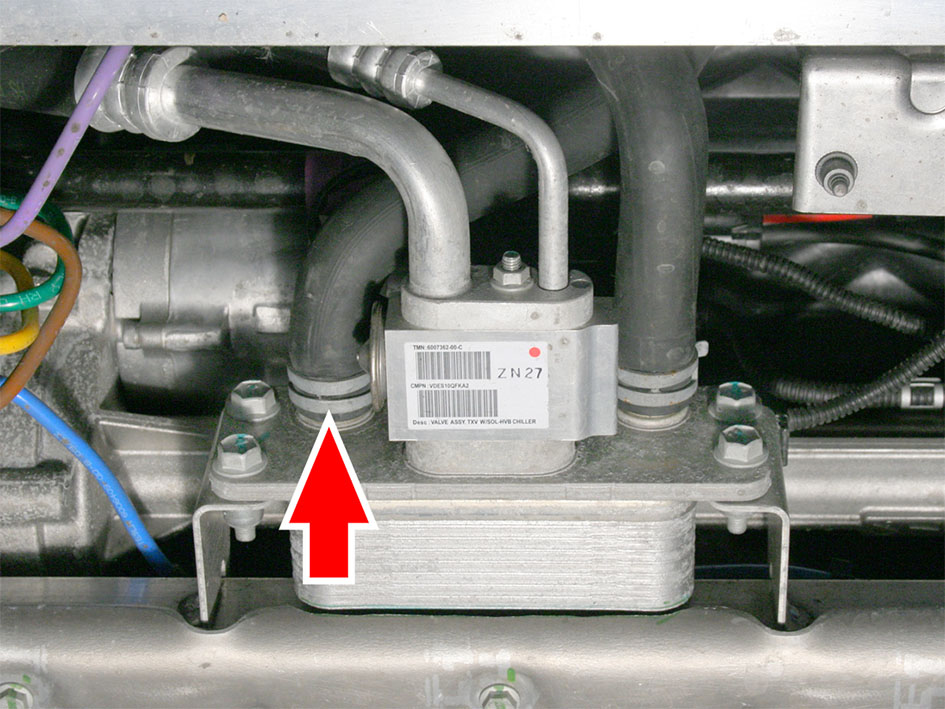
  1. Disconnect the LH coolant hose from the chiller.
  2. Remove the cap from the coolant reservoir.
  3. Allow the coolant to drain.
  4. Clamp the disconnected LH chiller coolant hose.
  5. Connect the Battery Cooling System Pressure Tester to a compressed air line.
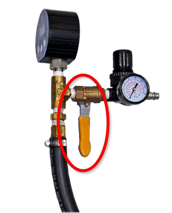
  6. Make sure the valve on the Battery Cooling System Pressure Tester is closed (the handle is perpendicular to the valve).
  7. Insert the rubber hose on the pressure tester into the rubber grommet in the coolant reservoir adapter. Push the hose into the grommet until it is secure.
    1 Pressure tester
    2 Coolant reservoir adapter
  8. Set the pressure regulator on the Battery Cooling System Pressure Tester to 5 psi (0.34 Bar).
    Caution: Do not exceed 5 psi (0.34 Bar) or damage to the battery might result.
  9. Slowly open the valve on the pressure tester.
  10. Allow the coolant to drain.
  11. Remove the clamp from the LH chiller coolant hose.
  12. Clamp the RH chiller coolant hose. Do not disconnect the RH chiller coolant hose from the chiller.
  13. Allow the coolant to drain.
  14. Remove the clamp from the RH chiller coolant hose. Reconnect the LH chiller coolant hose.
  15. Install the front aero shield.

Refill

Note: Make sure at least 14 L of the specified coolant is available before continuing this procedure.
Caution: Use the specified coolant only. In this manual, refer to General Information > Capacities, Fluids, and Lubricants > Fluids.

  1. Reconnect 12V power.
  2. Refill and bleed the cooling system (refer to procedure).
    Tip: It might be faster to refill the cooling system with the vacuum refill tool (refer to procedure).
    Note: Check for coolant leaks while performing the refill and bleed procedure.