HV Battery Assembly (Remove and Replace)

FRT No: 16010102

Warning: Only technicians who have been trained in High Voltage Awareness are permitted to perform this procedure. Proper personal protective equipment (PPE) and insulating HV gloves with a minimum rating of class 00 (500V) must be worn any time a high voltage cable is handled. Refer to Tech Note TN-15-92-003, "High Voltage Awareness Care Points" for additional safety information.
Warning: If the vehicle has air suspension, activate "Jack" mode on the touchscreen before raising and supporting the vehicle.
Note: Use a cordless electric drill with a 3/8 in drive adapter and an 3/8 in drive air rachet wrench to perform this procedure. Do not use an impact wrench to remove battery fasteners.
Note: This procedure is intended to be performed by 2 technicians.
Tip: Tesla recommends pre-filling new batteries with coolant before they are installed (refer to procedure).

Special tools required for this procedure:

Supplier Part Number Description
Tesla 1020566-00-E BATT MAN LIFT TABLE - MDLS
Tesla 1028149-00-A TOOL, HV RAPIDMATE INSTALL
Tesla 1026526-00-C HV Battery Alignment Rods

Removal

  1. Place the vehicle in "Jack" mode (refer to procedure).
  2. Disconnect 12V power.
  3. Raise and support the vehicle (refer to procedure).
  4. Remove the mid aero shield (refer to procedure).
  5. Remove the nut that secures the LH shear plate to the subframe (torque 35 Nm).
  6. Remove and discard the screws (x3) that secure the HV battery to the LH shear plate (torque 6 Nm).
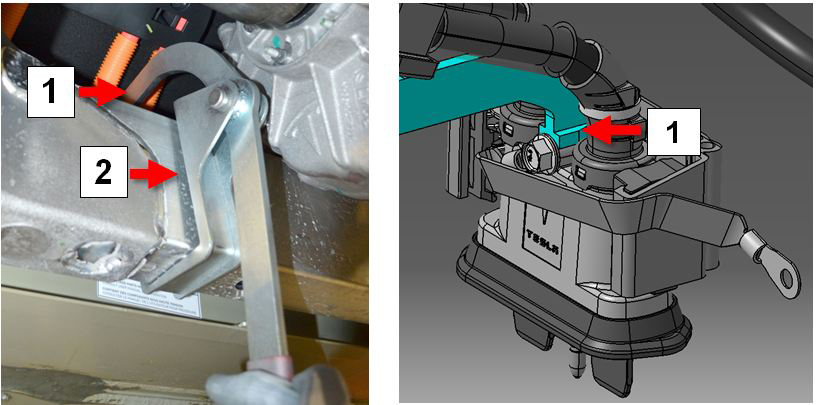
  7. Remove the plastic rivets (x2) that secure the LH shear plate to the wheel arch fairing bracket. Remove the shear plate.
  8. Repeat the 3 previous steps on the RH shear plate.
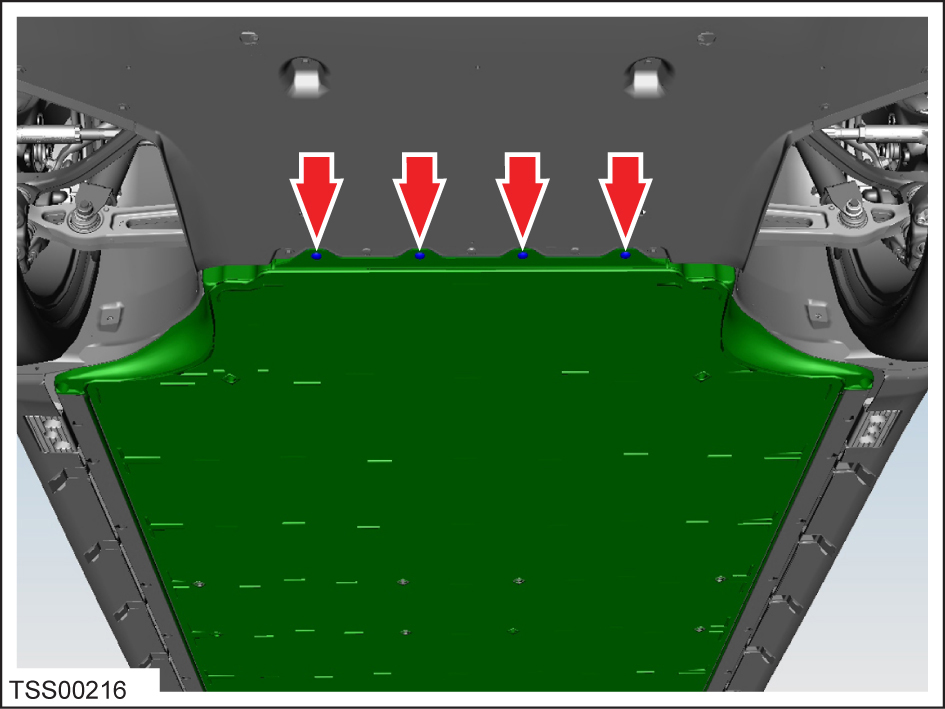
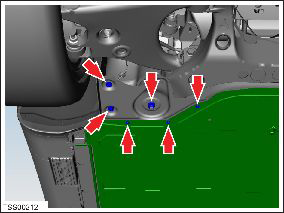
  9. Remove and discard the central bolts (x12) that secure the battery to the body (torque 38 Nm).
    Caution: Do not use an impact wrench to remove battery fasteners.
  10. If equipped, remove the bash plate extrusion (refer to procedure).
  11. Remove and discard the bolts (x4) that secure the HV battery to the front subframe (torque 30 Nm).
    Caution: Do not use an impact wrench to remove battery fasteners.
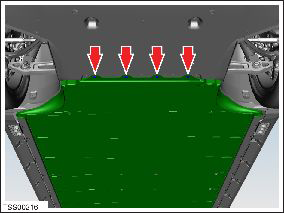
  12. Remove and discard the bolts (x2) that secure the HV battery to the front subframe and body (torque 115 Nm).
    Caution: Do not use an impact wrench to remove battery fasteners.
  13. Position the battery table underneath the battery. Ensure that the table is level and can support the full weight of the battery.
  14. Carefully lower the vehicle slowly onto the battery table until the weight of the HV battery is fully supported by the battery table.
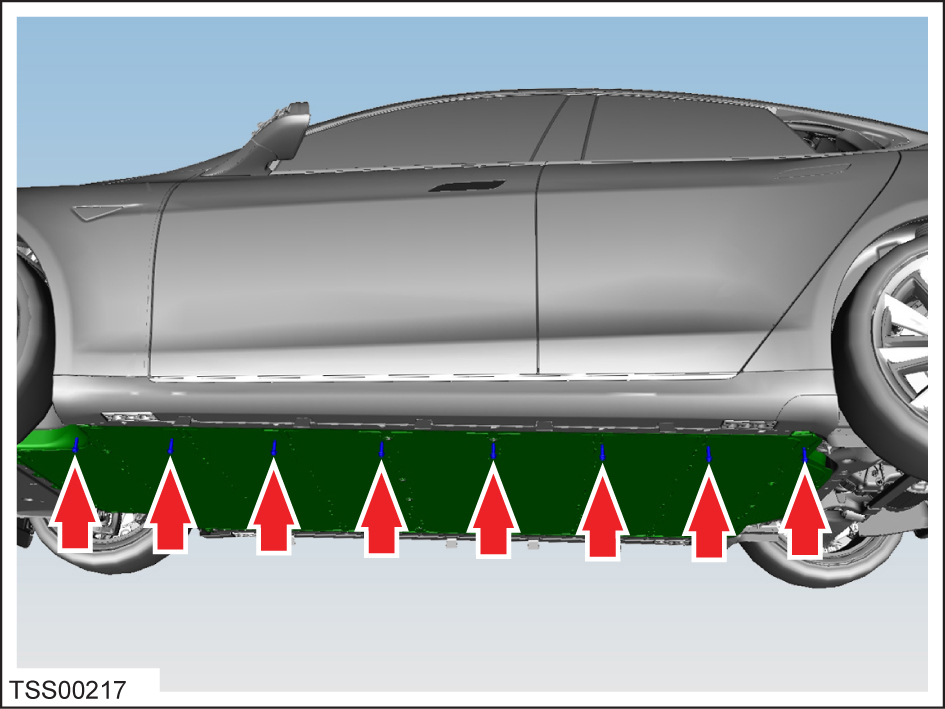
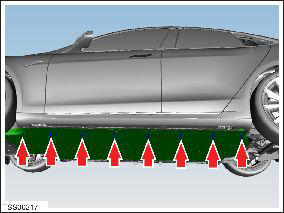
  15. Remove and discard the bolts (x8) that secure the HV battery to the LH rocker panel (torque 55 Nm).
    Caution: Do not use an impact wrench to remove battery fasteners.
    Note: Components have been removed in this graphic to aid clarity.
  16. Repeat the previous step on the RH side of the vehicle.
  17. Slowly lift the vehicle until the HV battery is clear of the underbody.
  18. Move the battery table away from the vehicle lift.
  19. Use a multimeter to check the voltage at the HV battery:
    • B+ to ground
    • B- to ground
    • B+ to B-
    Warning: If any voltage reading is more than 10V, the contactors are not fully opened. Discontinue this procedure immediately. Contact a Field Service Engineer before performing any further work.
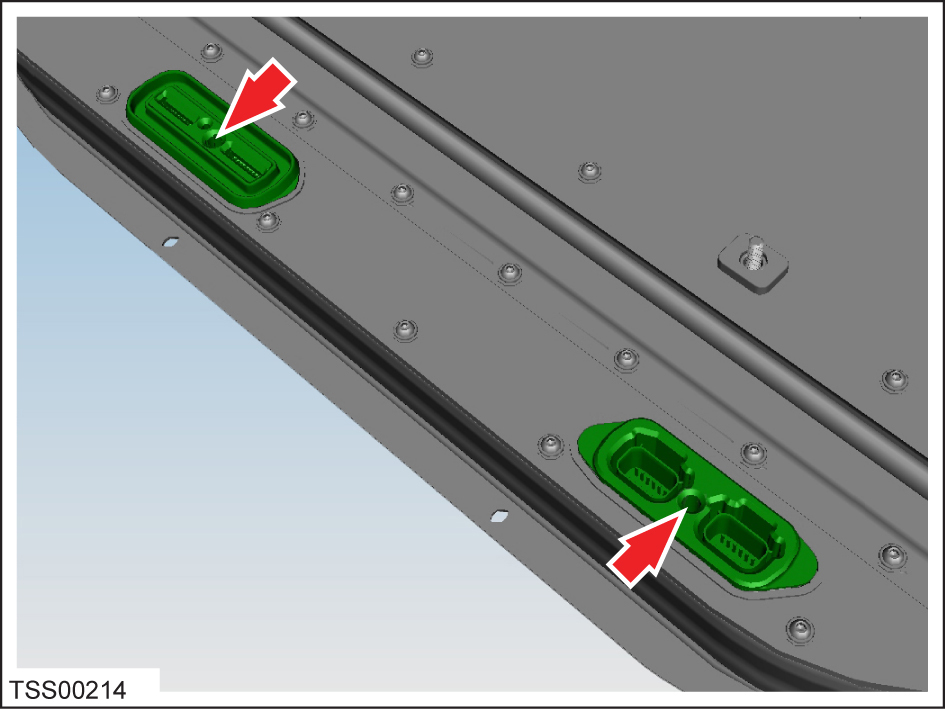
  20. Insert a high voltage cover (1038478-00-A) and a low voltage cover (1028325-00-A) into the high and low battery ports. If the covers are not available, use 3M 2480S Masking Tape (2" wide) or 3M 471 Red Vinyl Tape (2” wide) to seal the ports.
    Caution: Verify the seals on the covers are undamaged before use.
    1 High voltage
    2 Low voltage

Installation

Installation procedure is the reverse of removal, except for the following:
Caution: Replace all nylon-insert locknuts.
Caution: All fasteners that secure the HV Battery (whether patched or not) are one-time use only. Replace all fasteners.
Caution: Do not use an impact wrench to install battery fasteners.
  1. Slowly lower the vehicle onto the battery and ensure that the battery harness connectors and alignment pins (x2) connect to the battery.
    Note: Use the HV battery alignment rods to assist in alignment. Refer to Special Tools > Hardware > HV Battery Alignment Rods for additional information.
  2. Evenly and progressively tighten all battery bolts (x30).
  3. Use the HV Rapid Mate install tool to ensure that the HV Rapid Mate is properly seated:
    1. Reach above the rear subframe and pull down firmly on the HV Rapid Mate.
    2. Position the Rapid Mate seating tool so that the lower arm is braced against the bottom of the rear subframe and the upper arm is centered between the vehicle-side Rapid Mate HV cables.
      1 Upper arm between Rapid Mate HV cables
      2 Lower arm braced against bottom of rear subframe
    3. Pull the handle towards the rear of the vehicle to ensure that the Rapid Mate is properly seated.
  4. Check and top off the cooling system (refer to procedure).
    Note: If the battery was not pre-filled with coolant, the vacuum refill tool must be used to refill the cooling system (refer to procedure).
  5. Use Toolbox to update or redeploy the firmware:
    Note:
    • If the vehicle is not running the latest firmware, run the "Vehicle Firmware Update" procedure.
    • If the vehicle is running the latest firmware, run the "Firmware Redeploy" procedure.